I’ve set up a lot of top-rope anchors outdoors on bolts, and once you learn how to build safe climbing anchors from bolts it stops feeling like a mystery. A while back a friend told me she’d never rigged an anchor herself and always leaned on someone else to do it. That got me thinking about how much it’s worth knowing this yourself, even if it’s only so you can double-check the anchor a trusted partner just built before you weight it.
The anchor is the point at the top of the cliff that holds the rope in place. It’s the main safety point for everyone climbing that day. Most of the time you’ll use it to lower off a route or to set up a top-rope so the rest of your group can climb.
Usually the leader climbs the route first and builds the anchor at the top, so everyone else can top-rope after getting lowered off. Some crags are set up the other way around, where you walk to the top of the cliff, build the anchor there, and then rappel down to the base.
This is a step by step guide (with pictures) to help you do that. One thing to say up front: this article is not a replacement for hands-on, professional instruction. Anchors are life-safety gear, and a small mistake can have serious consequences. Get qualified instruction from a certified climbing guide or a qualified instructor, practice under their eye, and always consult a pro before you rig anchors for real, especially if you’ve never done it before.
The basic idea
Building an anchor from bolts is a fairly simple process, but a few details have to be right to keep everyone using it safe. The core idea is redundancy. You’ve got two points of contact on the wall through two separate bolts, and you build off both. If one carabiner or one bolt fails, the second set catches you and prevents a ground fall.
Gear you’ll need
This is the gear you want already on your harness before you reach the anchor. If you’re still building out your rack, here’s what to bring on a climbing day-trip.
- Basic Anchor:
- 2 Quickdraws (locking carabiners are optional)
- Extending the Anchor
- 1 Sling
- 1 Locking Carabiner

Anchor set-up: how to build safe climbing anchors from bolts
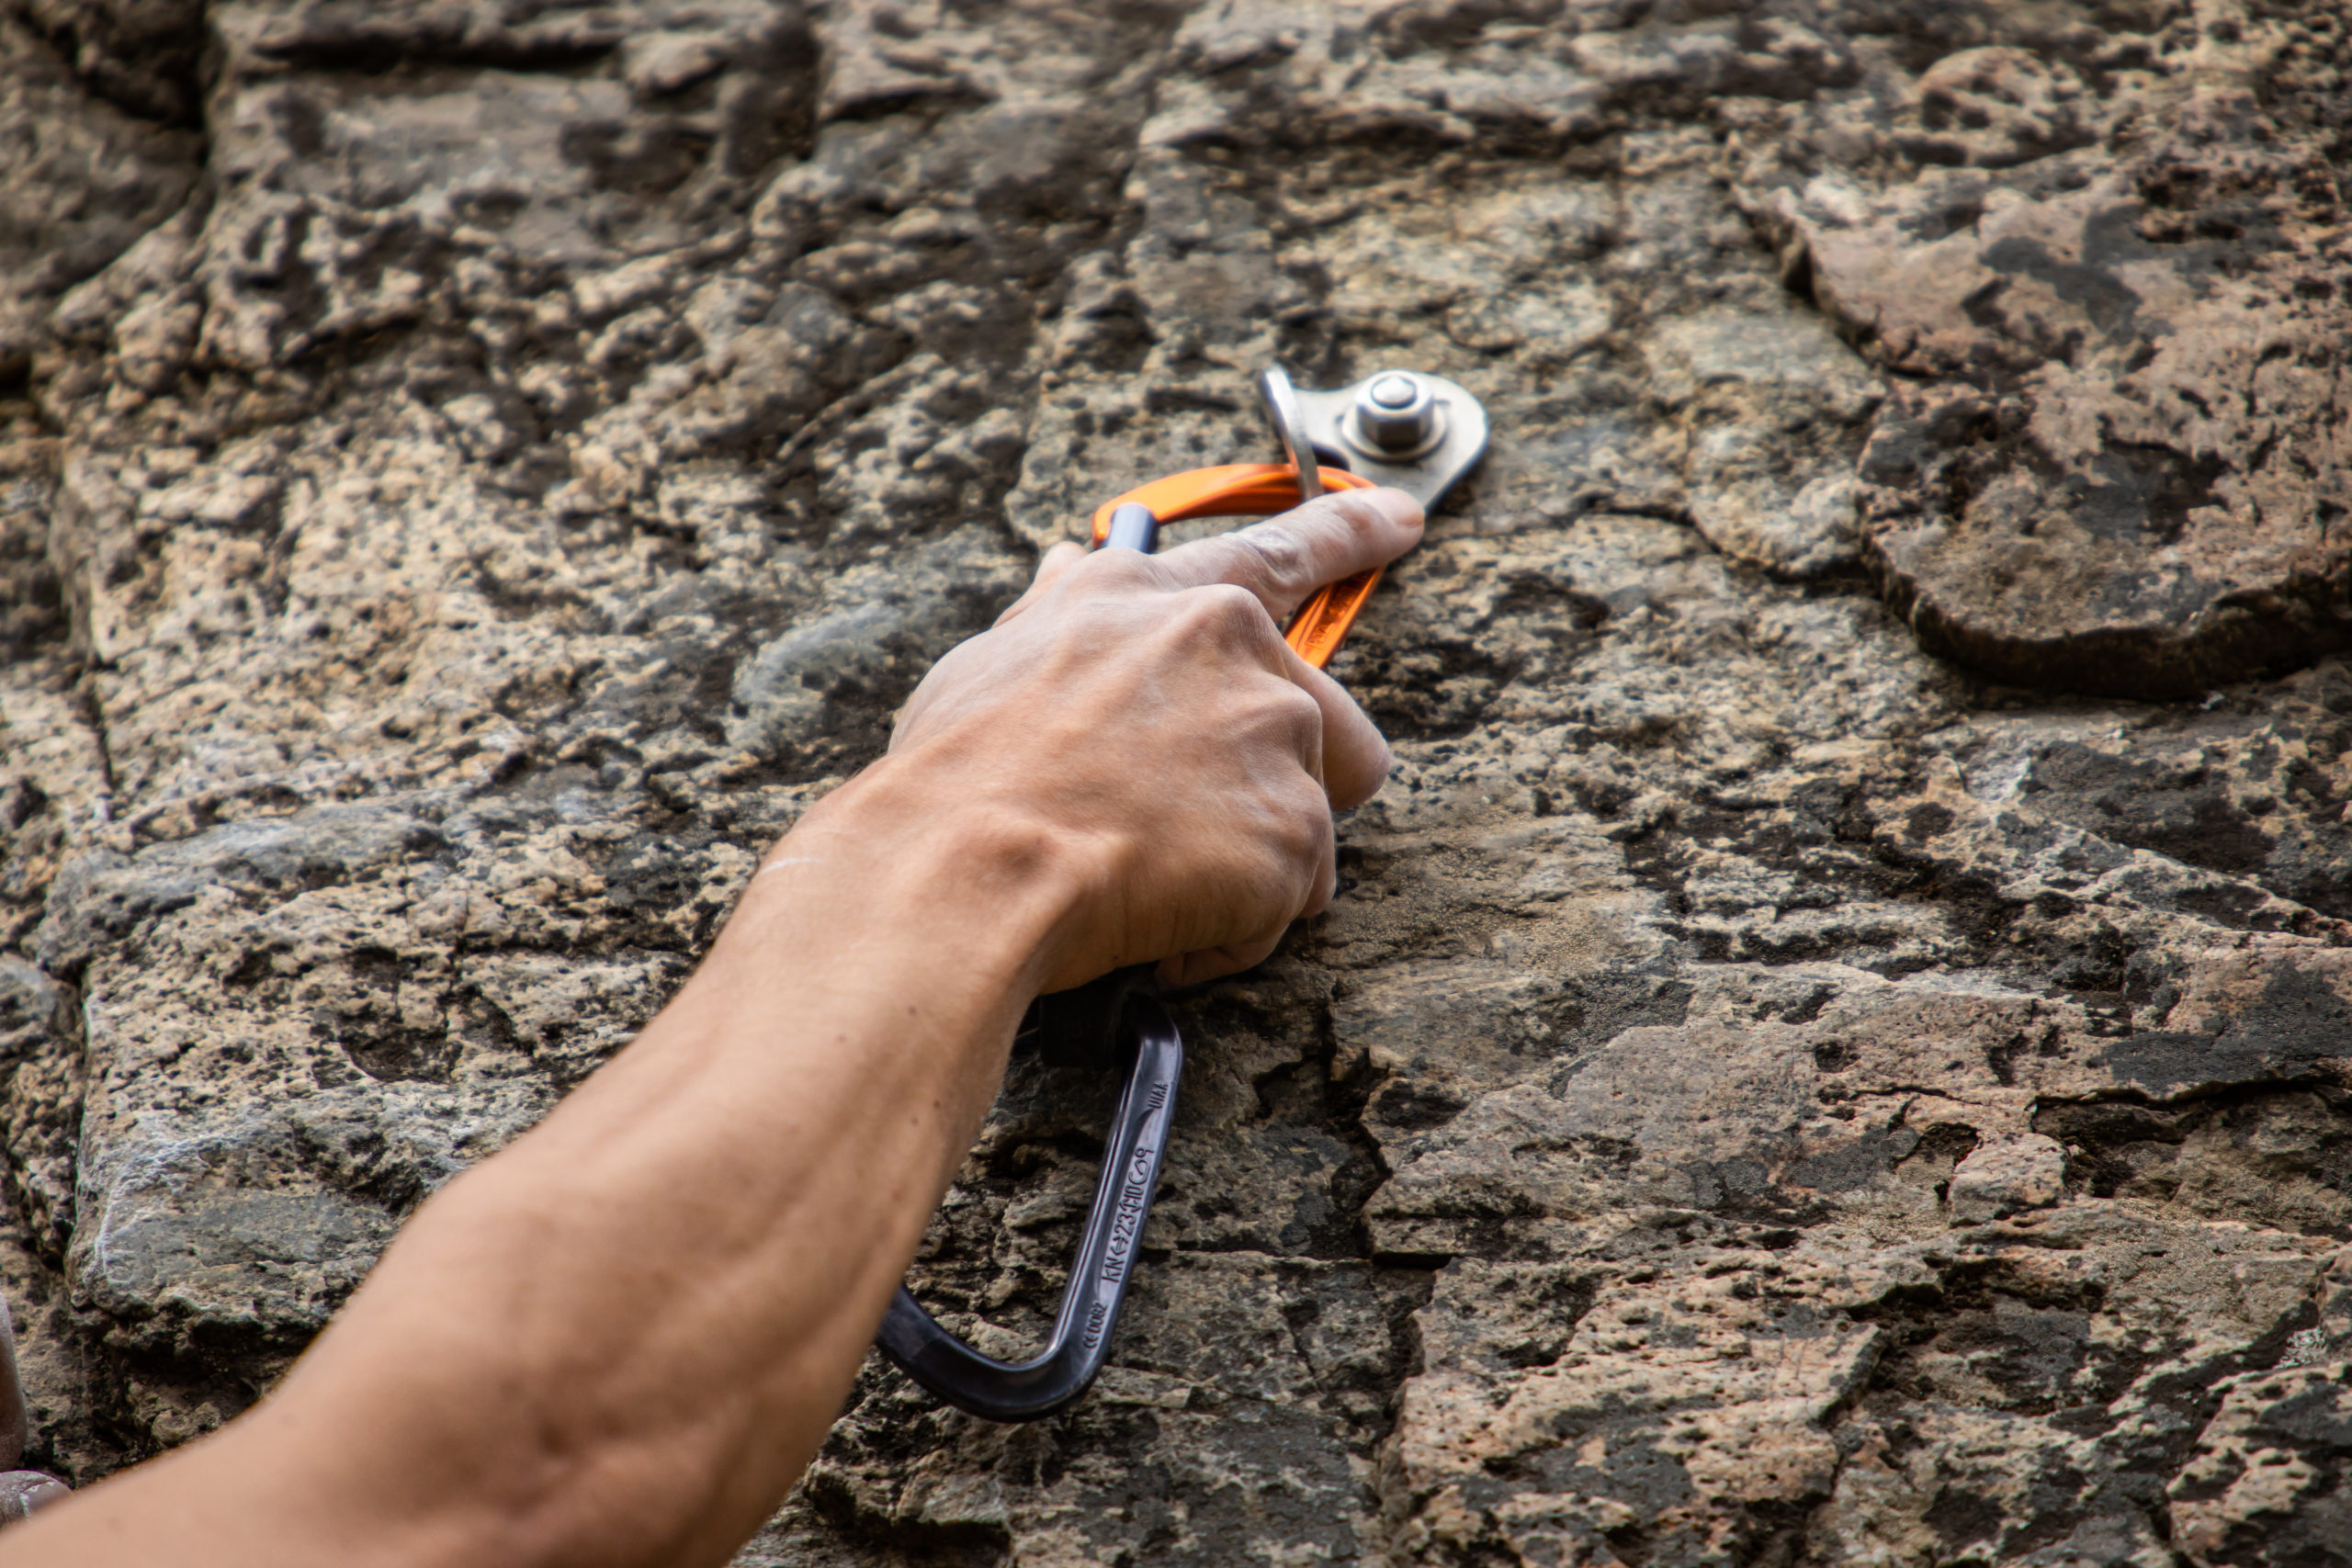
Once you’ve reached the top of the route, you should already have your first quickdraw clipped to the first bolt with your rope running through it, just like you would while lead climbing. Now you’re going to clip a quickdraw to the second bolt with the gate facing the opposite direction.
Run your rope through both quickdraws and your anchor is complete. If you’re worried about the carabiners rubbing on the edge of the rock, or the rope dragging across the edge, then see below for extending the anchor.
Key checks before you trust it
Which carabiners touch the bolts, and which touch the rope?
Most quickdraws have one end where the carabiner can swing freely and another end where a rubber keeper or a tight fit holds the carabiner in place. Make sure the carabiners clipped to the bolts are on the loose, free-moving end of the quickdraw.
The bolts rub against those carabiners over time and slowly wear a groove into them. By always keeping the bolt-side carabiner on the bolts, you keep that worn, sharp metal away from your rope.
Which way are the gates facing?
Since the rope can slide side to side, it matters that the two gates face opposite directions. That way, if the rope ever moves in a way that pops it out of a gate, it can only come out of one carabiner, and the other one stays clipped and intact. That’s your redundancy.
Which side of the carabiner is loaded, the narrow side or the fat side?
Carabiners are built with a fatter side (the spine side) and a narrower side. Ideally the main load runs through the fat, strong side of the carabiner rather than close to the gate.
So for the carabiners clipped to the bolts, make sure the bolt sits on the fat side. For the carabiners the rope runs through, make sure the rope rides on the fat side too.
Do this and even if the anchor flips itself upside down, the gates still end up facing opposite directions.
When to extend the anchor
If the carabiners are rubbing against the edge of the rock, or the rope drags across the rock before it reaches the lip of the cliff, then you need to extend the anchor. Extending it moves the gear out past the edge so it isn’t grinding on the rock. That keeps your gear from picking up abrasions and wearing down, and it keeps the rope running clean.
How to extend the anchor
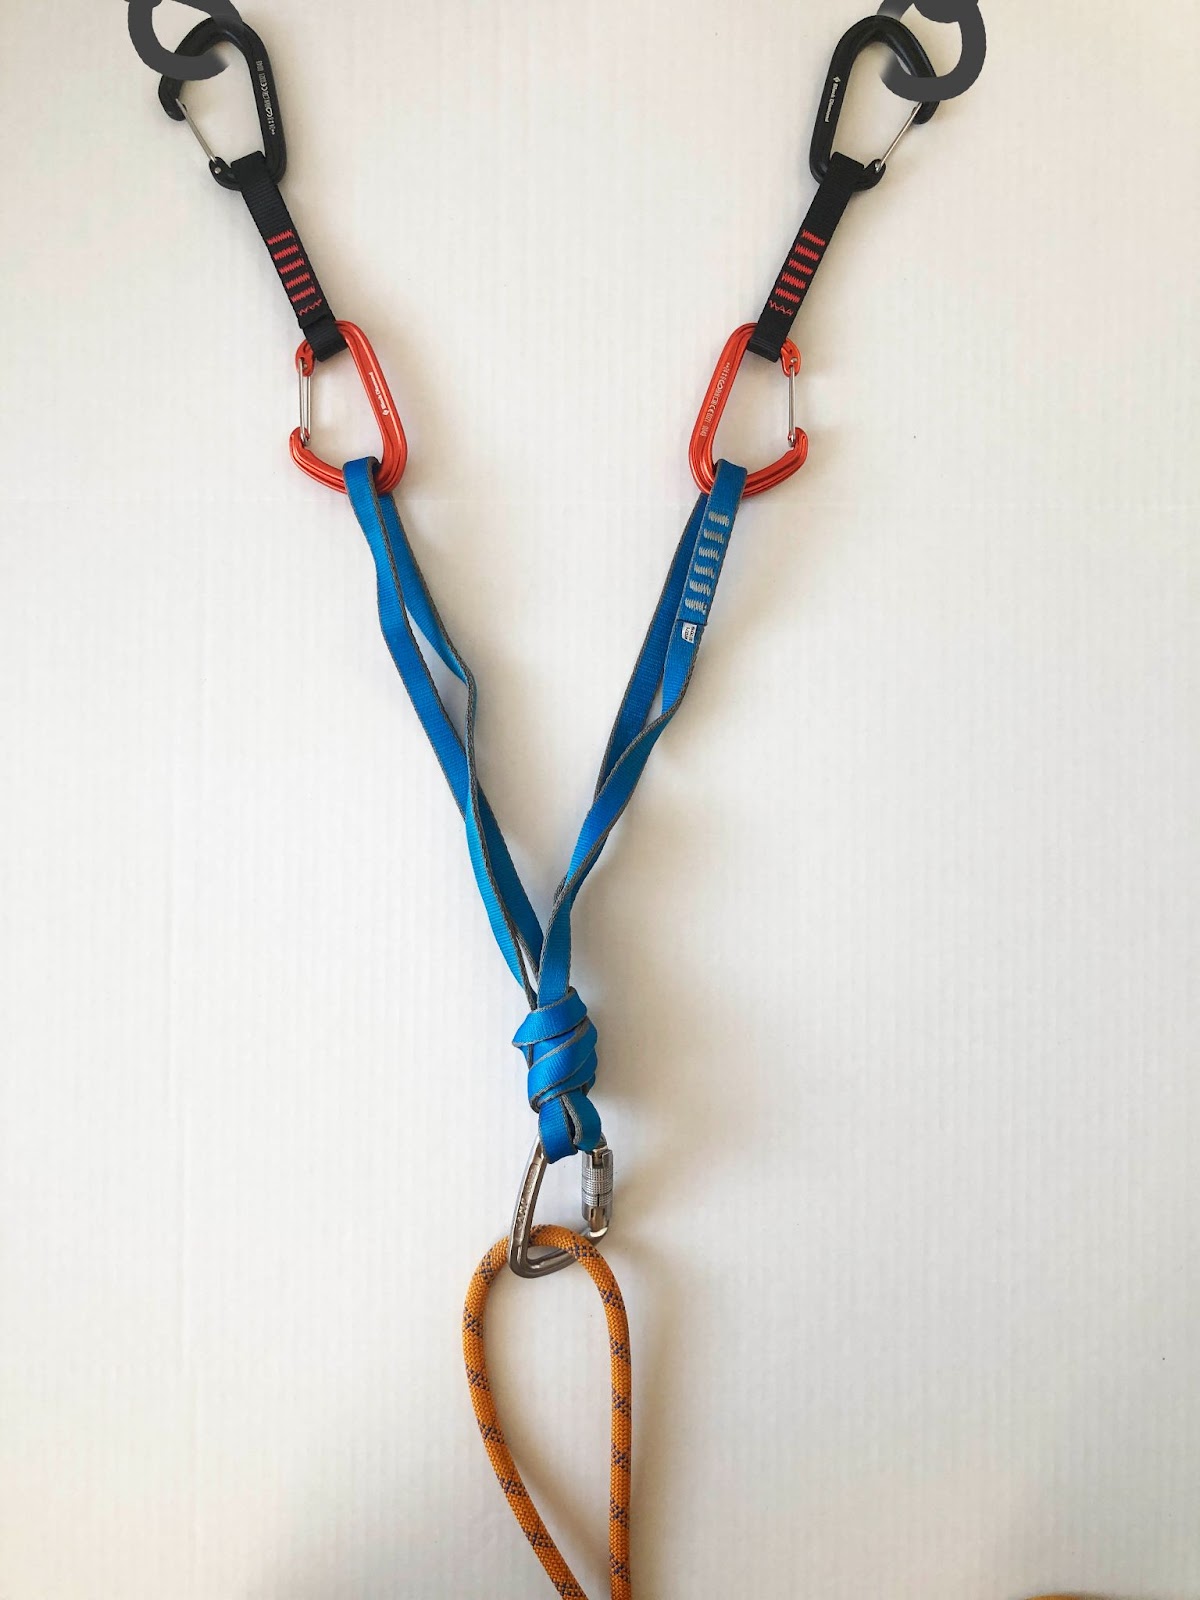
The most common way to extend an anchor is by adding slings to the system. Ideally you’ll use two separate slings, so that if one sling gives out, the second sling is still there as your redundancy.
With two separate slings, you treat each sling like the webbing in a quickdraw. You clip a sling to each bolt, then clip a carabiner on the free end of each sling, and run the rope through those, so the whole thing extends past the edge while it keeps two fully independent legs.
If you only have one sling, you can still build redundancy by tying a knot above a clip-in point (see the image above) so the single sling forms two separate loops. That setup uses both quickdraws together with the tied sling.
How to “clean” the anchor
Cleaning the anchor means safely stripping your gear off the bolts and getting lowered on the chains at the end of the climbing day. To clean an anchor you need extra gear to attach yourself directly to the anchor and keep yourself safe while your rope is off the system.
Please note: practice this on the ground before you ever do it at the top of a wall, so the sequence is second nature. This is one of the easiest places to make a fatal mistake, so professional instruction is strongly recommended.
What you need:
- Personal anchor (a PAS or equivalent, girth-hitched to your harness belay loop, see choosing a climbing harness)
- Locking Carabiner
Steps for cleaning the anchor:
- Clip your personal anchor to a bolt with your locking carabiner and weight it, so the belayer can give you slack. At this point you should be fully hanging on your personal anchor and not on the rope.
- Tie the rope back to your harness (a clove hitch to a locking carabiner on your belay loop, or a bight of rope through your tie-in points) so that if you drop the rope, it’s still attached to you. Once the rope is backed up to your harness, untie your figure eight.
- Thread the rope through the lower chain link or ring, then re-tie your figure eight and tie back into your harness the normal way. Now remove the backup knot and any remaining gear that’s no longer holding you.
- Call to your belayer so they can take the extra slack back in and hold you on the rope. Give the rope a firm test weight to confirm they’ve got you before you commit.
- Only once you’re weighting the rope and the belayer has you, disconnect your personal anchor from the bolt, then tell your belayer to lower you.
Anchors are one of those skills that click once you drill them a piece at a time and keep practicing under someone who knows their stuff. If you like getting one sharp, doable climbing skill each week, I run a free newsletter with about 15 minutes of training in each issue. You can grab the free newsletter here.
Frequently asked questions
Do I need locking carabiners to build a bolt anchor?
For the basic setup, two quickdraws will build the anchor and locking carabiners are optional. That said, plenty of climbers and instructors prefer lockers on a top-rope anchor for the extra security, since it removes any chance of the rope unclipping a gate. If you’ve got lockers, using them is never a bad call.
What makes a bolt anchor “safe” if one piece fails?
Redundancy. You build off two separate bolts with two separate quickdraws, so no single point holds your whole weight. If one carabiner or one bolt fails, the second set catches you and stops a ground fall.
Why should the carabiner gates face opposite directions?
Because the rope can slide side to side and, in the wrong spot, pop out of a gate. If both gates face the same way the rope could theoretically come out of both. Facing them opposite means the rope can only ever leave one carabiner, and the other stays clipped.
When do I need to extend the anchor?
Extend the anchor any time the carabiners or the rope are rubbing on the edge of the rock before they reach the lip of the cliff. Adding slings pushes the gear out past the edge, which keeps your rope running clean and saves your gear from abrasion.
What does it mean to “clean” an anchor?
Cleaning is the process of safely removing your gear from the bolts and getting lowered on the chains at the end of the day. You clip in with a personal anchor and a locking carabiner, back up the rope to your harness, re-thread it through the chains, then get your belayer to lower you. Practice it on the ground first, and get qualified instruction before doing it for real.