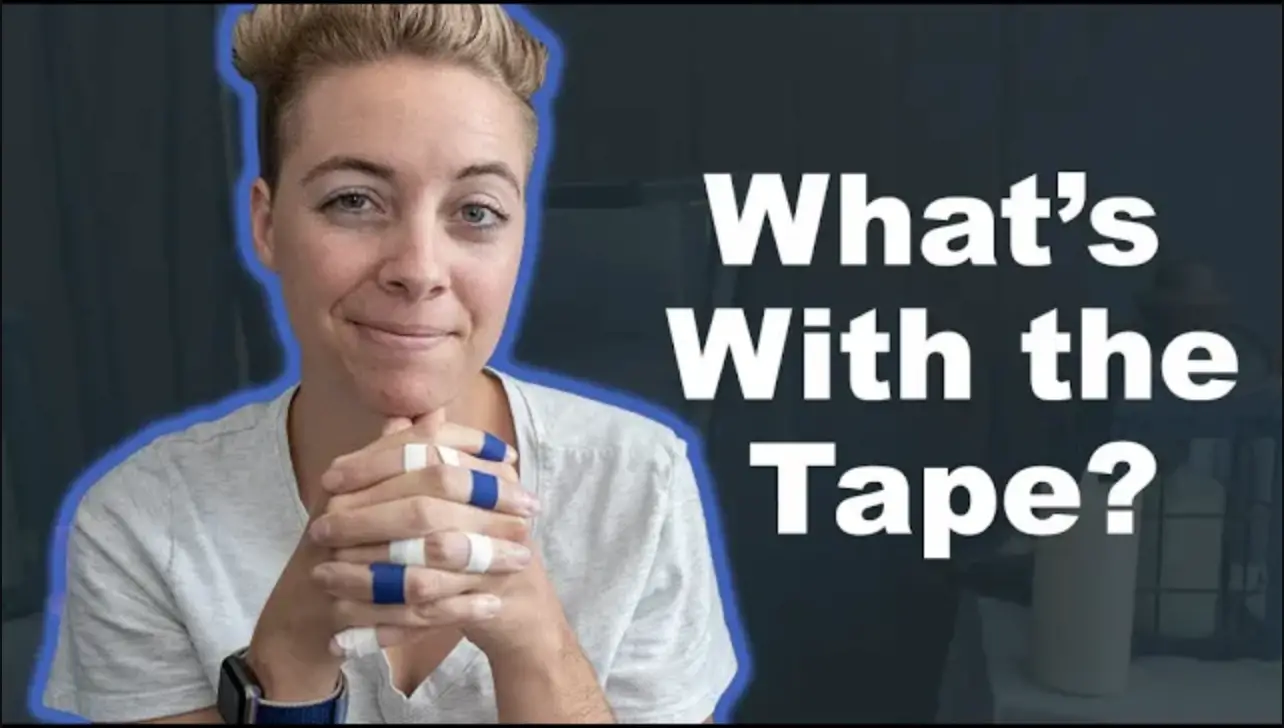
If you’ve been to a climbing gym or watched a rock climber working a cliffside, you’ve probably noticed them taping their fingers. When it comes to taping fingers for climbing, there are really only two reasons a climber reaches for the roll: their skin is torn or about to tear, or they’re trying to give a finger tendon some support. The reason matters, because the way you tape for skin is not the way you tape for a tendon.
Plenty of doctors and physical therapists have looked at using tape to support tendons, both before and after an injury. The short version is that tape won’t hold you through the risky movement that hurt you in the first place. Worse, tape tends to have a psychological effect: it makes you feel stronger than you really are. That false confidence pushes you into risky moves and more damage. So if you tape, stay mindful of what your fingers are actually doing and go easy on your tendons.
With that said, if you’re a beginner, skip to the end of this article where I talk about using tape for skin protection instead of structural support. That’s the part that’ll actually help you right now.
How Pulley Injuries Happen
Pulley injuries are one of the most common problems climbers report. Your fingers don’t have muscles in them. They flex through a system of pulleys and tendons, and that’s the system that takes the load when you crimp. When you’re on a route and your feet fly off, leaving your fingers to catch your full body weight, it’s easy to get an uncontrolled contraction, and that sudden load can create a tear or a blowout. Overuse is the other big one. A healthy finger needs real rest and recovery, which is tough to give it on a climbing trip when you’re out every day. The middle and ring fingers tend to be the usual culprits, and an A2 pulley injury is among the worst you can get. The hand position most often tied to it is the crimp grip. If you want the fuller picture, we get into it in our guide to climbers’ tendon injuries and what causes them.
You usually know you’ve done something when you hear a pop or an audible crack in your finger, feel pain when you pinch it, or see swelling. Everyday stuff starts to hurt too. Gripping the steering wheel gets uncomfortable and holding a cup of tea becomes almost unbearable.
Unfortunately, this very common climbing injury takes a long time to heal. Even if it isn’t bad enough for surgery, you’re likely looking at months before you feel fully recovered.
Prevent Injury
Being careful with how much load you put on your fingers helps, but you can’t completely stop your feet from cutting and flying off the wall. What you can do is stack the odds in your favor so a foot cut doesn’t automatically mean an injury.
For example, when you’re on a small hold, try to use an open-handed grip instead of a full closed crimp. That way there’s less strain on your tendons if your feet cut and you have to hang on. The more crimp strength you’ve built, the easier it is to hold that open-hand position, so strength itself is a form of injury prevention. Building that strength and tendon resilience is training, not taping, and it’s the kind of structured finger work an app like Grip & Grind is built for. A few exercises to prevent tendon injuries go a long way here too.
Go easy on mono holds and two-finger pockets so you’re not isolating specific tendons. You won’t get quite as much out of a session if you avoid those grips entirely, but being aware of the risk lets you pick your moments instead of getting surprised by a tweak.
Taping injured tendons
There are ways to tape a finger when the tendon is already hurt. But multiple studies suggest the force your tendons take while climbing is far higher than any support tape can add. So the honest answer is this: avoid taping an injured tendon so you can keep climbing. Take a break instead and let it fully recover.
Hooper’s Beta did a great video digging into whether tape actually prevents tendon injuries, and it pointed to research showing only about an 11% decrease in the stress on your tendons. That’s a small mechanical advantage for something people lean on so heavily.
Providing Structural Support
One of the main reasons climbers tape their fingers is to try to head off tendon injuries like a ruptured pulley. But tape has turned out to be more of a psychological tool than a real barrier against a pulley injury. So treat the taping methods below as a slight crutch, not an ideal fix.
If you’re feeling pain in your tendons, stop climbing and start rehabbing your fingers. An injured finger isn’t worth a single send.
Why and how climbers tape fingers for support
If you’re going to tape for tendon support anyway, it’s worth knowing the common methods and what each one actually does. There are a couple of go-to techniques for flexor tendons or an injured pulley. The most common in recent years is the H method, though older climbers will often be found using the crisscross method, also called the X method.
Crisscross Method
Clean the finger you want to tape, wiping off any chalk or dirt with water, and get it as dry as you can so the tape sticks.
Tear the tape into 3mm wide strips.
Start by making a ring near the top of where your finger needs support, then crisscross over the area you want to protect and cover the joint. Finish by making another ring at the bottom of the support area.
Your finger will feel secure, but keep in mind an injured tendon still won’t hold your body weight, even with the tape.
The Ring Method
This is the simplest way to tape a finger, but I’m hesitant to include it because it does little to prevent an injury and little to support one you already have. You take a 10mm (1cm) wide piece of tape and wrap it around the area that needs support. Make sure it isn’t so tight it cuts off circulation, but tight enough to make a border around the affected area.
The idea is to keep everything in place and prevent blowouts. Plenty of physical therapists point out that it doesn’t really provide the support you’d need for the load your tendons see while climbing. That said, one study on circumferential taping of flexor tendons found it can increase the A2 pulley’s load to failure.
The X Method
The X method gets recommended a lot because it doesn’t restrict your finger’s ability to bend but still gives some support. You take a medium to wide strip of tape, make a ring above the affected area, then cross to the other side of it. Make another ring and cross back over to the first ring, so the strands form an “X.”
The H Method
The H method is probably the most recommended for just about any finger tendon issue. It keeps movability in the finger, so it doesn’t lock the positions you can put your fingers in, while giving more support than the X method. In a study by Schweizer on the H-Tape method, the tape increased the load to failure, which could help prevent a pulley injury.
You’ll need wider tape for this one. Instead of taping separate pieces together, you cut or tear the tape as if you were splitting it down the middle, but stop short of the center. Then repeat on the other side of the tape. Keep the center intact so it stays one piece.
Place the center of the tape on the injured area, then make a ring around the top and bottom of it using the torn ends.
It’s a pretty easy process once you get it down, and some studies suggest it’s the most effective taping method.
That said, some people find it doesn’t stay as tight on the finger as the other methods, so you may need to test it a few times to dial in the right length of tape. If you need to, add a couple of extra layers around the ring area.
Here’s the honest takeaway on all of this: tape is a small aid at best, and none of it replaces rest or the strength work that keeps tendons healthy. If you want that kind of thing to land in your inbox, I put out a free Send Edition newsletter with one short climbing drill a week that takes about 15 minutes. You can level up your climbing with 15 minutes of training and grab it here.
Using Tape For Skin Injuries
There are two main skin injuries in climbing. The flapper, where a layer of skin tears off and hangs on by a small edge, and the split, where the skin splits open and looks like a nasty papercut. An experienced climber will often tape the affected area so the texture of the holds doesn’t chew that skin up more. Taping also dials down the sensitivity of that skin, which helps keep pain manageable so you can keep climbing.
Taping for skin injuries protects the raw area, and it also keeps loose skin from peeling off so your body can heal that spot more easily.
There are two downsides to taping for skin. First, the sensitivity you’re dulling can help you keep climbing, but it also means you lose the biofeedback that tells you how a hold feels and whether you’re slipping.
Second, the more you tape, the less your skin adapts to the texture of climbing indoors or out. If your skin doesn’t build endurance, long sessions get rough and you’ll often leave the gym with sore fingertips.
So it’s best to keep tape to a minimum, especially when you’re first getting into climbing.
For me, if I take a break and then jump back into the same rigorous schedule I trained at before, I always notice my skin peeling like a snake shedding.
If I get tears or splits, I do tape the finger. But if I get a flapper, I tend to cut the session there and give my skin the three or so days it takes to recover. Sometimes, if the skin is still fresh and healing from a flap, I’ll tape the new skin to keep it from re-injury. If flappers are your usual problem, we go deeper in how do you deal with climbing flappers.
Tips for taping splits and tears
If you’re taping the tip of your finger, put a vertical piece over the fingertip and then use an X formation so the tape doesn’t peel off. If you only run horizontal tape across the end of your finger, it’ll likely come off as you climb.
For direction, start at the outer end of your finger and work toward the knuckle and palm so you don’t interrupt blood flow.
To check you’re still getting blood flow to the tip, pinch the end of your finger. If it stays white for a few seconds, you may not be getting enough blood to the tip and you should re-tape.
To make sure you can still bend your fingers and keep full motion while climbing, bend the finger slightly while you tape it.
If you can, avoid putting tape right where your finger bends.
Make sure your skin is clean before you start, or the tape won’t stick. The best move is to wash your hands with soap and water, but if you don’t have soap, spray them down with water from your bottle.
If the split runs vertically, tape horizontally across it. If the split runs horizontally, lay a vertical piece down first, then wrap around it horizontally.
Tips for taping flappers
If you have a flapper and you tape right on top of it, the tape tends to stick to the flapper, and when you pull the tape off it can tear the flapper off with it.
Your own skin is the best protection for the raw layer underneath while it heals, so it’s worth keeping the flapper in place for a better recovery.
You can lay a little piece of tape upside down against the skin as a barrier between the sticky side and the flapper. If you do, tape around the area really well so it doesn’t shift and rub against the flapper. Friction there can make the flapper worse.
What tape should you use for climbing?
For skin, I used to use medical cloth tape from Black Diamond, which tears off easily at a set thickness. The trouble was I always needed the same thickness and always had to tear it, so I switched to Matilious tape, which comes in fun colors and the exact thickness I want for a finger tape job.
For tendon support, Black Diamond athletic tape, also known as medical tape, tends to be the best option. It’s softer and more flexible so you can still move your fingers, and it’s made to sit against your skin, so the glue works a little better for that too.
Can You Use Electrical Tape or Duct Tape For Rock Climbing?
For patching a hole in your rope bag, duct tape is great. But for taping fingers, whether it’s for skin or tendon support, athletic tape is the better call. Electrical tape flexes too much and is too slippery to be useful on skin or tendons. Duct tape is too rough on your skin and too slick on the holds.
Do climbers use tape for crack climbing?
If you take a trip to Indian Creek or watch some of the best climbing documentaries, you’ll see tape all over the backs of climbers’ hands, or something called a crack glove. That crack glove, whether premade or built up from medical tape, is purely for skin protection. The wide strips of medical cloth tape become a barrier between skin and rough rock so a climber can jam a whole hand into a crack without shredding it.
Frequently asked questions
Does taping your fingers actually prevent climbing injuries?
Not really. Research points to roughly an 11% decrease in stress on the tendons, which is a small mechanical advantage, and tape won’t hold you through the risky move that hurt you in the first place. Some studies on circumferential and H-tape methods did show an increase in the pulley’s load to failure, so there may be a little benefit, but tape is best treated as a slight crutch rather than real protection. Strength and rest do far more.
Should I tape an already injured finger tendon and keep climbing?
No. The force your tendons take while climbing is much higher than the support tape can add, so taping over a real tendon injury and climbing on it risks making it worse. If you feel tendon pain, stop climbing, rest, and start rehabbing the finger.
What is the best finger taping method for climbing?
For tendon support, the H method is the most recommended because it keeps the finger mobile while giving more support than the X method, and one study on the H-tape method showed it increased the load to failure. For skin, a vertical piece plus an X formation over a fingertip tends to stay on best.
What kind of tape works best for climbing?
Athletic or medical tape is the right choice for both skin and tendon support. Black Diamond athletic tape is soft and flexible enough to keep moving your fingers, while Matilious tape comes pre-cut at handy thicknesses for skin jobs. Skip electrical tape (too slippery) and duct tape (too rough on skin, too slick on holds) for your fingers.
How do I tape a finger without cutting off circulation?
Tape from the outer end of the finger toward the knuckle, keep it snug but not tight, and avoid taping right over the joint where it bends. To check circulation, pinch the fingertip. If it stays white for a few seconds, re-tape a little looser.
More About Safety and First Aid:
- Taping Fingers For Climbing: Why And How
- Proper Nutrition For Tendons For Climbers
- Exercises To Prevent Tendon Injuries For Climbers
- Climbers’ Tendon Injuries And What Causes Them
- 5 Common Injuries In Climbing And How To Prevent Them
- Climbers Guide: First Aid Kit
- How Do You Deal With Climbing Flappers? Prevention And Care
- Should You Wear A Helmet For Bouldering?