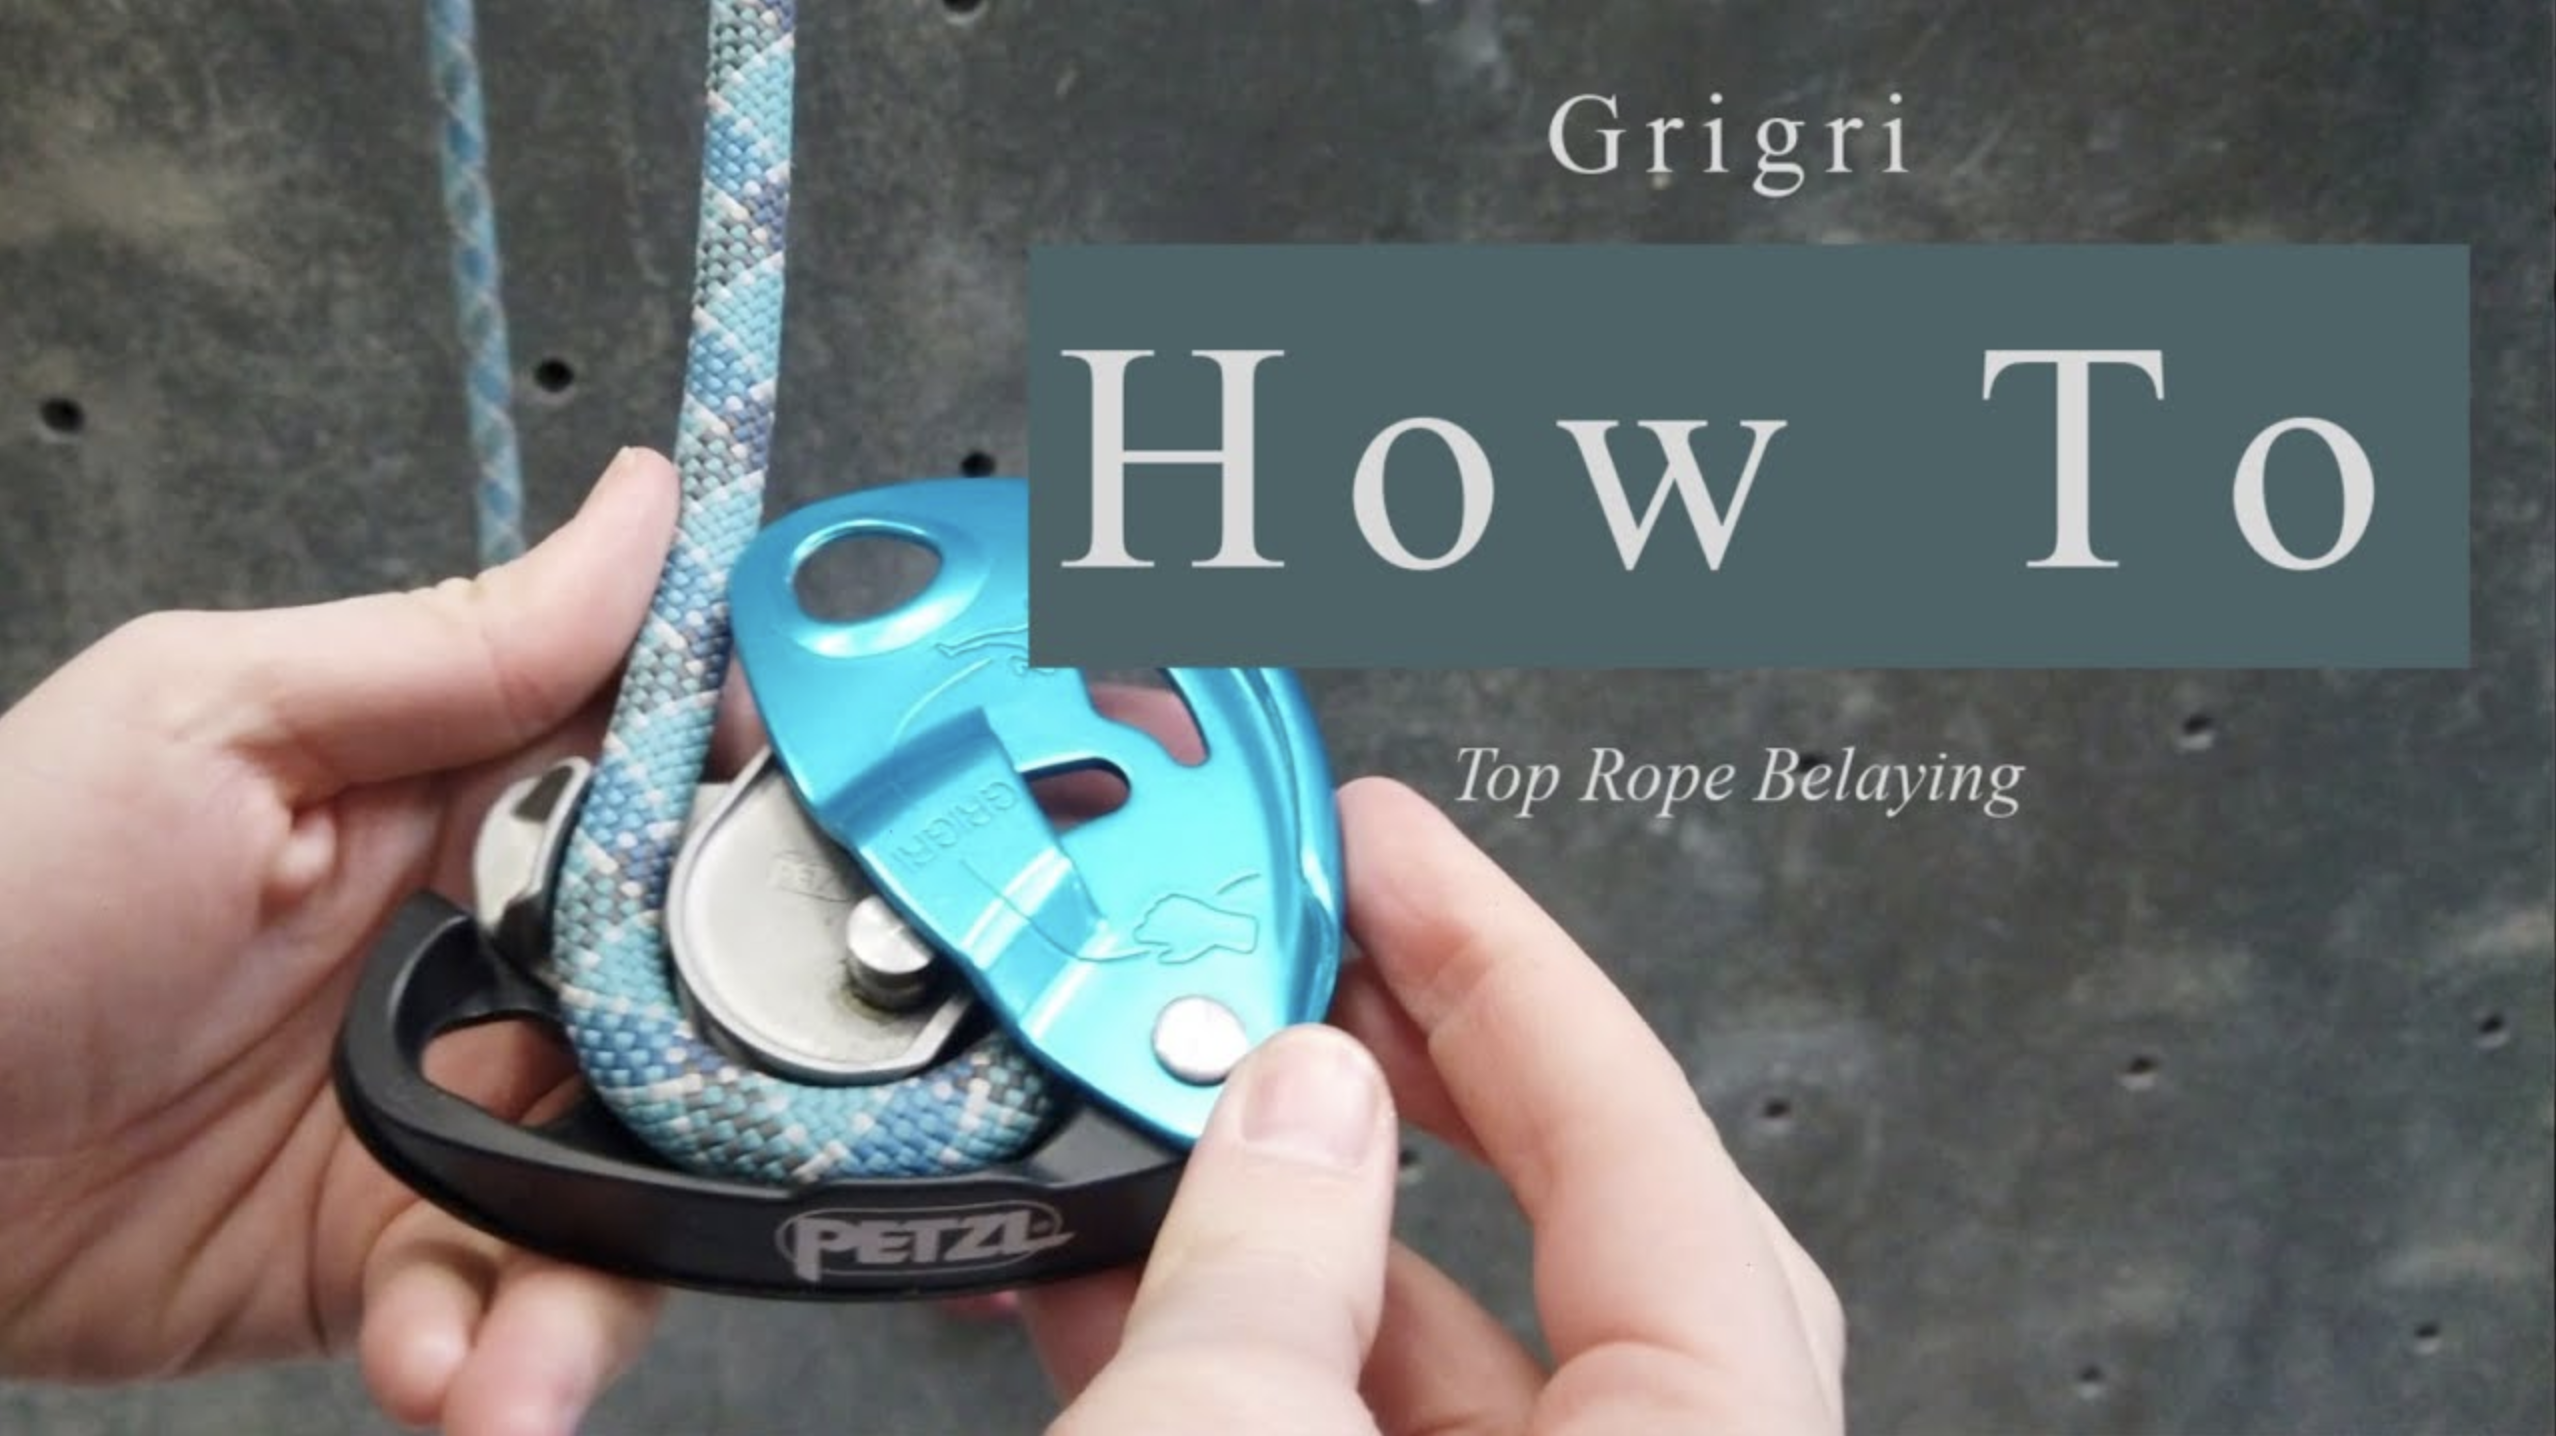
If you want to know how to belay with a Grigri for top rope climbing, you’re in the right place. The Grigri is an amazing belay device, and honestly, if you’re worried about falling or your belayer is still pretty new to belaying, it’s a great tool for that extra sense of safety. When you fall on top rope and the Grigri is being used correctly, the device is going to catch you, even if your belayer somehow becomes unconscious. So there are some real benefits to using it. Let’s go through how you actually use the device, step by step, without skipping any of the safety.
How to load rope into the Grigri belay device

The device is pretty easy to use. To load the rope, you’re going to follow the pictures printed right on the Grigri. It shows you a picture of a climber and a picture of a hand.
The picture of the climber is the side where you place the rope that leads up to the anchor.
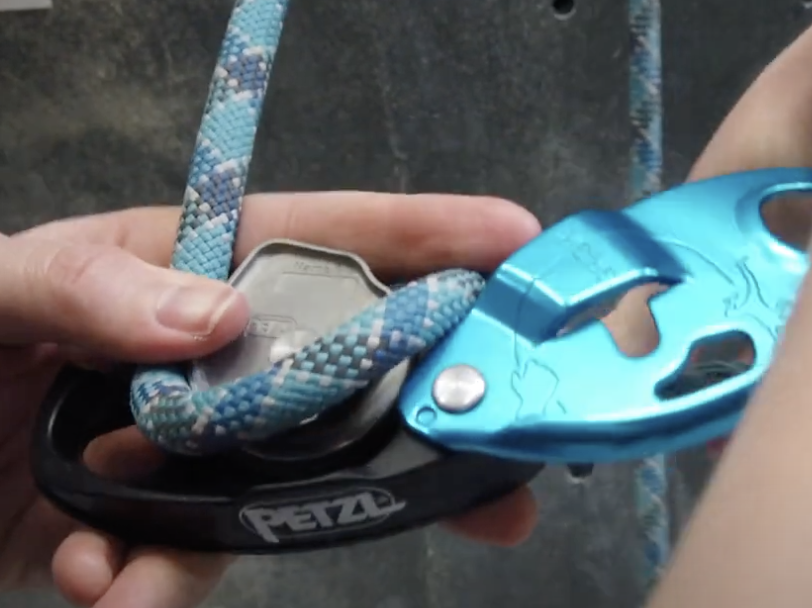
Then you’ll run the rope through to the other side, where the rope-in-hand icon is on the device.
The rope you’re going to hold with your brake hand comes out on the brake icon side of the belay device.
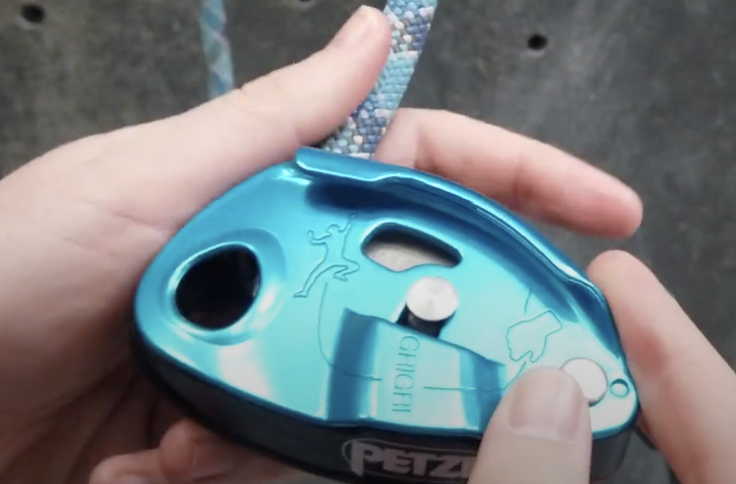
Once the rope is loaded, slide the device closed and lock it in place with a locking carabiner through the carabiner loop on the Grigri and the belay loop of your harness. Make sure that carabiner is actually locked before anyone leaves the ground.
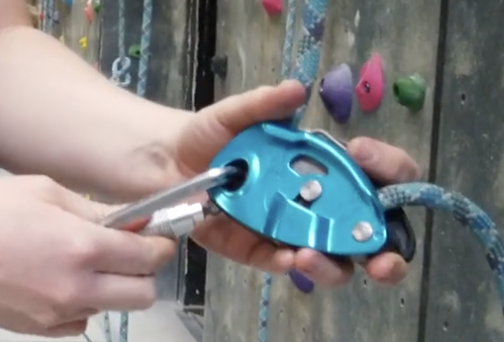
Now, once the climber is properly tied in (how to tie into the rope can be seen here), the belayer can place their hands on the rope and belaying can begin. If you’re still getting comfortable with the basics, our Belaying 101 guide is worth reading before you head to the wall.
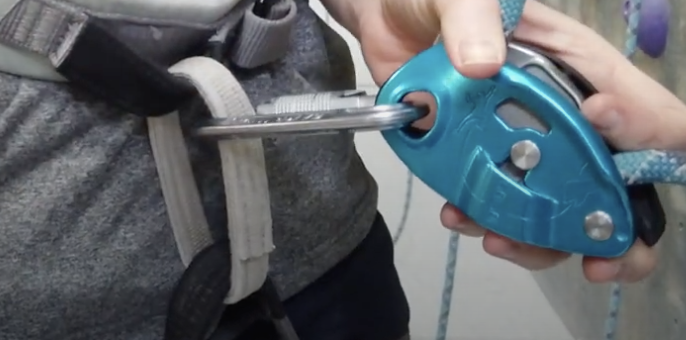
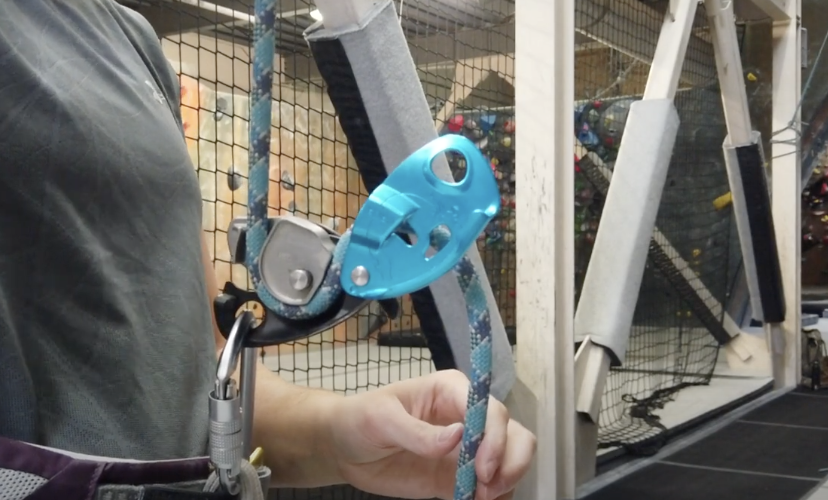
How to take in rope with the Grigri for top rope climbing
With top rope climbing, you’re going to be taking in rope as the climber goes up so the rope stays tight and catches them if they fall. Taking in rope is just like using a normal ATC. If you’ve never used an ATC before, that’s okay. It’s usually recommended to learn belaying with an ATC first, but the movement is the same, so learning on a Grigri is fine.
When the climber goes up, you take in the rope.

To take in the rope, pull the rope down and toward the belay device.

Then with your brake hand, pull the rope through the device. Repeat the motion as the climber goes up the route.
Safety Note: Don’t let your brake hand off the rope. Either slide your brake hand up while keeping a grip, or for extra security, place the hand you’ve been using to pull down underneath your brake hand to hold the rope in place while you slide the brake hand up. Your brake hand never leaves the rope.

I find that when I’m climbing with people who move slower, I’m perfectly fine when they use the sliding method. That said, don’t get lazy about it. Being lazy with your brake hand can be really dangerous.

Good footwork on your harness setup matters too. If yours isn’t sitting right, our guide on how to put on a harness walks through it.
How to lower a climber with the Grigri
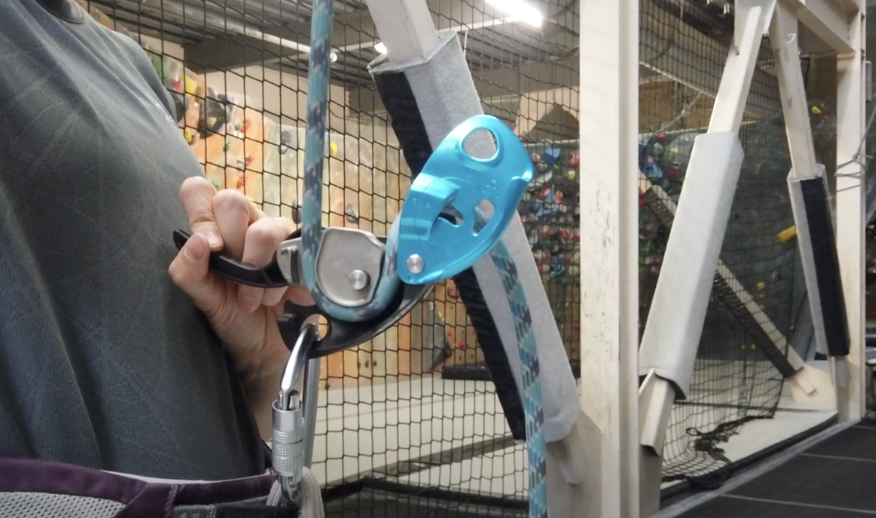
So the climber made it to the top and now it’s time to lower them. This is the best part about the Grigri, honestly. All you have to do is keep your brake hand on the brake side of the rope and pull the little lever with your other hand. The further you pull the lever back, the faster the rope runs through the device. Go smooth and stay in control, and keep that brake hand on the whole way down.
Test the Grigri out before using it on a full climb
I’d recommend actually testing the device out by having the climber go up about three feet, and then, once the rope is tightened, have them take a small fall. Then use the lever to let them down. This helps the belayer learn the device, and it also helps the climber feel more secure. Both of you get a better feel for how the Grigri works. Once you’ve tried it out and you know what you’re doing, go ahead and use it on the full climb.
How the Grigri works
The Grigri is built with what’s called a camming device that pinches the rope when it’s pushed at a certain angle, which is exactly what happens when a climber falls and the rope tightens. The lever lets you “un-cam” the device and release the rope in a controlled way. That’s why it can hold a fall on its own, but it’s still an assisted-braking device, not a hands-free one, so your brake hand stays on.
What I think about using the Grigri
The Grigri has changed my life. I feel so much safer climbing top rope, outdoors, and even indoors. It’s more comfortable, plus you don’t get as tired because you don’t have to put as much effort into holding the rope down with your brake hand. I’m able to belay longer and easier than with any of the other belay devices I’ve used. If you’re still picking gear, our take on the best harness for climbing pairs well with a setup like this.
Gym ropes are typically thicker, so if I was going to belay children or people significantly lighter than me at the gym, I’d probably consider using the Madrock Lifeguard instead. The Madrock Lifeguard is my backup device right now, but I always pull it out at the gym if I’m belaying kids so I don’t have to feed the rope through the device when it’s really thick.
Check out this article for how to belay with any type of belay device (how to belay with auto-locking, semi-auto-locking and basic ATCs)
Want a few solid climbing tips in your inbox every week? Join the free Send Edition newsletter and get a short, 15-minute climbing drill each week to level up your climbing.
If you have questions about the Grigri
If you ever have any questions about safety, talk to an expert. Talk to someone at the gym who is trained to teach other people how to belay.
Frequently asked questions
Will a Grigri catch a fall if the belayer lets go?
When the Grigri is loaded and used correctly, the camming device pinches the rope during a fall and catches the climber, even if the belayer becomes unconscious. That’s a big part of why it’s so trusted for top rope. It does not replace good habits, though. You should always keep your brake hand on the rope.
Do I still need to keep my brake hand on the rope with a Grigri?
Yes. The Grigri is an assisted-braking device, not a hands-free one. Your brake hand never leaves the rope. When you slide your hand up, keep a grip, or hold the rope in place with your other hand underneath while you reposition the brake hand.
Should I learn to belay on an ATC or a Grigri first?
It’s usually recommended to learn belaying with an ATC first, but the taking-in motion is the same, so learning on a Grigri is okay. Whichever you start on, get hands-on instruction from someone qualified at your gym.
How do you lower a climber with a Grigri?
Keep your brake hand on the brake side of the rope and pull the small lever with your other hand. The further you pull the lever back, the faster the rope runs through the device, so ease it out and stay in control the whole way down.
Is a Grigri good for belaying kids or lighter climbers?
It can be, but gym ropes are often thicker and harder to feed. For belaying children or people significantly lighter than you at the gym, a device like the Madrock Lifeguard can be easier to feed. When in doubt, ask a qualified belay instructor at your gym.
New to climbing?
Learning the device is one step into roped climbing. The Climbing for Beginners guide answers the rest of the first month questions in one place, from what to wear to what the grades mean.