Grip training is one of the biggest levers you’ve got as a climber, and it’s the thing most of us always want more of. Whether you’re just starting to build hand strength or you’re hunting for fresh grip training exercises to add to your routine, these workouts are a solid way to get your fingers and forearms stronger.
This is a list of 12 grip training exercises pulled from training books, interviews with pro climbers, social media, Reddit and a few of my climbing friends. Some need rock climbing grip equipment or other tools, but most of them you can find at your local gym or pick up cheap online.
Why Grip Training Exercises Build Hand Strength For Climbers
Grip strength matters so much that climbers everywhere keep chasing new exercises and gear to build hand strength and climb harder. But is all of it actually necessary?
If half of your climbing came down to one strength, wouldn’t you want to train it? Research shows grip strength lines up directly with climbing performance. This study on hand-arm strength and endurance as predictors of climbing performance found that relative grip strength accounted for more than 50% of performance in women climbers and less than 30% for men. Your hands do the work on nearly every hold you grab, from big jugs to tiny edges, so it pays to train grip across the different climbing holds you’ll actually see on the wall.
Hangboard Training
The hangboard is one of the best pieces of finger strength gear, and just about every climbing gym has one, so it’s pretty accessible. There are plenty of apps, articles and videos with hangboard workouts, but I really liked Metolius’s training recommendations for beginner, intermediate and advanced climbers. I included their entry-level 10 minute workout below.
Warning: Hangboarding isn’t for brand-new climbers. Misuse and overtraining can cause long-term injuries to your tendons.
What You Need:
- Access to a hangboard for 10 minutes
What You Do:
- 1st minute: 15-second hang on the jug
- 2nd minute: 1 pull-up on the round sloper
- 3rd minute: 10-second hang on the medium edge
- 4th minute: 15-second hang with 3 shrugs on the pocket
- 5th minute: 20-second hang with 2 pull-ups on the large edge
- 6th minute: 10-second hang on the round sloper
- 5 knee raises while hanging from the pocket
- 7th minute: 4 pull-ups on the large edge
- 8th minute: 10-second hang on the medium edge
- 9th minute: 3 pull-ups on the jug
- 10th minute: hang as long as you can on the round sloper
Wrist Curls
This one’s common among my climbing friends, and apparently gymnasts and lifters too. On top of building endurance in your hand tendons, it works your forearms, which are a big part of your grip. Wrist curls use a small movement, so you can do them just about anywhere, anytime (while watching TV is my favorite) without breaking focus.
What You Need:
- A low-weight dumbbell
What You Do:
- Sitting or standing, hold a dumbbell with your elbows supported on something like a table or your knees, bent at a 45 to 90 degree angle, palms facing down
- With a slow, controlled movement, curl your forearm so your palms rotate from facing down to facing out and parallel to your body
- Repeat until you max out, then switch arms
- Now hold the dumbbell with your palms facing up
- With a slow, controlled movement, curl the inside of your forearm so your palms rotate from facing up to facing inward and parallel to your body
- Repeat until you max out on each arm
If you like Pinches, you’d probably also like this product: Pinch Hold Espresso Cup (affiliate link). I feel like my grip is getting stronger just by drinking Espresso from this cup 😉
Plate Pinch Hold
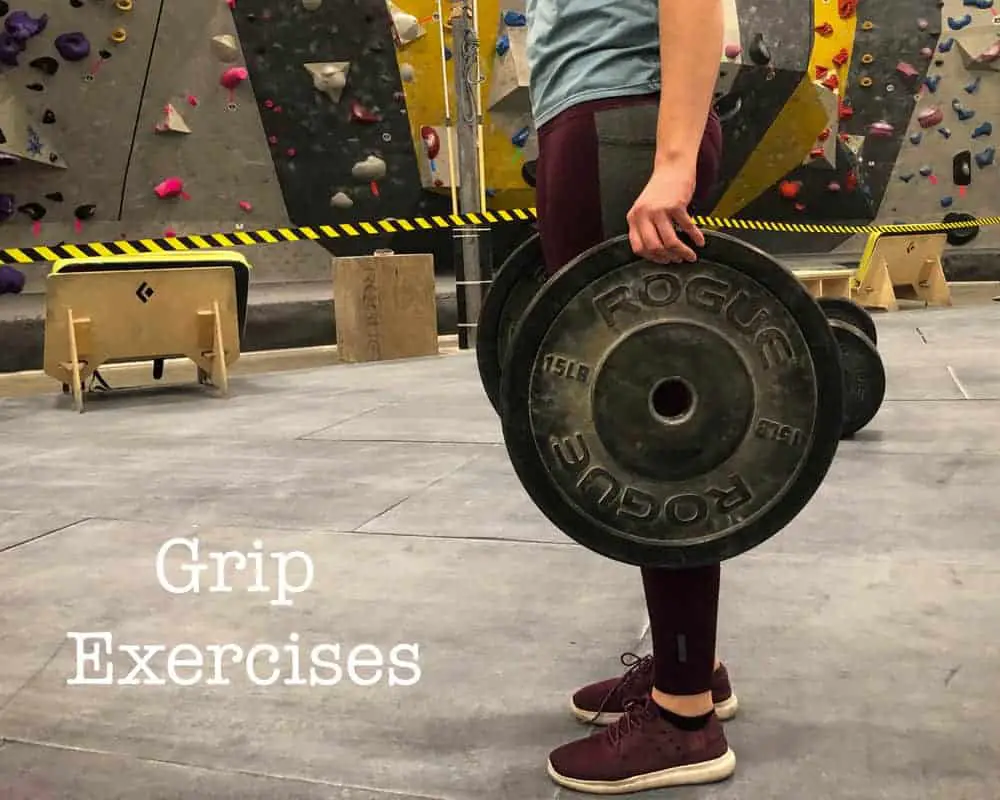
This is a dead-simple exercise a lot of climbing coaches recommend for pinch strength. Pinches are one of the most common hold types, so pinch strength really matters for your climbing. Most gyms have weight plates lying around, which makes this an easy one to get to. Different plate sizes and weights also let you change the grip width, how much your fingers curl, and the intensity.
What You Need:
- Weight plates (15 to 45 pounds depending on your strength)
What You Do:
- Standing tall with your arms straight and shoulders back, hold a weight plate at your side with your thumb on one face and your fingers on the other (you can also pinch two plates together in each hand to make it harder)
- Hold until your grip fails, then set the plates down gently so you don’t hurt yourself
- Repeat twice, trying to hold a little longer each round
Campus Board Training
There’s a lot going on in your grip, and campus training builds the dynamic grip and shock loading that every climber needs. Eric Horst, a well-known climber, trainer and author of a stack of training books, put out a campus board exercise video with EpicTV that I highly recommend. I included his beginner exercise below as a good entry point.
Warning: If you’re newer to climbing, only campus under the supervision of a pro, and stop the second you feel any pain or strain.
What You Need:
- A campus board
What You Do:
- With both hands, grab the third rung from the bottom with your fingers on top and your thumb underneath
- Put both feet on the ground close to the board and lean back so your arms are straight
- When you’re ready, take one hand off and drop it to your side
- Pull with the working hand, drawing your shoulder back and bending your elbow to move between the third and second rung from the bottom
- Repeat that movement for 6 to 12 reps in 10 seconds or less
- After a short rest, repeat twice with each hand
Dead Hang
Hanging, like hangboarding, fires up every muscle your grip needs, including your hands, arms and core, so it trains your whole body to engage instead of just your fingers. And since you can hang from almost anything (a door frame, a tree branch, a pull-up bar), anyone can do it with zero gear.
What You Need:
- Something to hang from that’s high enough to keep your arms and core straight while holding your full weight (bending your knees is fine)
What You Do:
- Grip whatever you’re hanging from and lift your weight so nothing touches the ground
- Pull your shoulders back and your chest up to engage your shoulders and core
- Hold for 1 minute
- Take a short break
- Repeat 3 times
Offset Hang
This is like the dead hang, but it loads one hand more than the other, so it’s a step up. It’s popular with climbers and lifters and easy to set up, since all you need is a pull-up bar and a towel to “offset” your hang.
What You Need:
- A pull-up bar
- A small hand towel
What You Do:
- Wrap the towel over the pull-up bar and grip both ends of the towel with one hand
- With your other hand, grip the bar with an overhand grip slightly wider than shoulder-width
- Lift your legs so you’re holding your weight with both hands, one on the bar and one on the towel
- Pull your shoulders back and your chest up to engage your shoulders and core
- Hold for 1 minute (if you can’t last that long, build up in increments of 5 to 10 seconds)
- Take a short break
- Repeat twice on each hand
Three Limb Climbing
This is one of the more fun ones, and it builds coordination and dynamic movement at the same time. Most climbers start by taking one foot off so both hands stay on, but as you get stronger, taking a hand off is the real challenge and forces your grip to work overtime.
What You Need:
- A climbing wall
What You Do:
- Pick a climb a couple grades below your current level
- Choose one limb (an arm or a leg) you won’t use on the climb
- Send the climb without letting that limb touch the wall
- If you dropped your left limb the first time, run it again dropping your right
- Repeat 1 to 4 times on 3 different climbs
Love These Drills?
Imagine how much easier your climbing journey would be if you had an entire book of drills (77 Drills, to be exact).
77 Drills To Help You Climb Better is NOW AVAILABLE
Fingertip Pushups
Like a few of the others, this one lights up every muscle in your grip, not just your hands. If you can’t do full pushups yet, drop to your knees and you’re still good to go.
What You Need:
- Nothing, just the ground, which you can find just about anywhere
What You Do:
- Get into a high plank position
- Push your fingers down and pull your palms up so only your fingertips touch the ground
- Do 10 pushups on your fingertips
- Take a 30 to 60 second break and repeat 5 times
Fingertip Plank
Same idea as the fingertip pushups, working every muscle in your grip instead of just your hands. It uses your body weight and gravity, which are honestly the best training tools around, though some people add a weight vest to make it harder.
What You Need:
- Access to the ground. You could probably do this on your bed, on a plane, even up a tree if you really wanted…
What You Do:
- Get into a high plank position
- Push your fingers down and pull your palms up so only your fingertips touch the ground
- Drop your palms back down to the floor
- Repeat 10 times
- After a short break, repeat 10 more times
Seated Row
This one’s best with a resistance band, but a row machine works too. Most people think of rows for back and core, but they also hit your shoulders, arms and hands, so they’re great for training everything a strong climbing grip needs.
What You Need:
- A resistance band
- A place to sit (the floor works)
What You Do:
- Wrap a resistance band around your feet and hold the ends at your sides
- Straighten your back
- Hold the band at shoulder width with your palms facing each other
- Pull the band into the sides of your waist
- Repeat 15 times
- Take a 30 to 60 second break and repeat 3 times
Boa Constrictor Ring Grip
Grip trainers are some of the most popular grip gear because they’re cheap, portable and you can use them anywhere. Like a boa constrictor squeezing its prey, this exercise is all slow, controlled movement. Compared to the usual fast, high-rep grip work, going slow lets you focus on each muscle in your grip. Ring grip trainers are one of the best hand strengtheners for climbing, and I really like them. You can use a spring-based trainer, but the ring version is silent, comfortable to hold and clean enough to use at the gym, a friend’s house, or even at work.
What You Need:
- A ring grip trainer. These come in different resistances, and I usually use a stiffer one for the full-hand part and an easier one for the individual-finger part
What You Do:
- Put your thumb on one side of the ring and your fingers on the other, then squeeze
- Hold a closed-hand position for 10 seconds
- Slowly release the tension in your grip (take 10 or more seconds)
- Repeat 5 times on each hand
More advanced:
- Repeat steps 2 to 4 using only your thumb and one finger
- Cycle through each finger, doing steps 2 to 4 for each
Power Fingers
Power fingers train the opposite muscles of grip trainers, and they’re really important for keeping your fingers and hands injury-free. You can buy the actual product, which is cheap, compact and portable, but I recently learned some climbers just use rubber bands instead. I like the real ones because the packaging lists the resistance ratings, so it’s easy to track your progress as you move up. If staying healthy is the goal, pair this with smart recovery so you can climb more often without getting injured.
What You Need:
- Power fingers
What You Do:
- Slip your fingers and thumb into each ring
- Hold an open-hand position for 10 seconds
- Slowly release the tension in your fingers
- Repeat 5 times
- Repeat steps 2 to 4 using only your thumb and one finger
- Cycle through each finger, doing steps 2 to 4 for each
- Run the whole thing again with your other hand
Bonus Exercise: 5-Second Rule
Your grip matters on every hold type, but crimps especially. If you want a grip exercise built for crimps, check out the 5-Second Rule exercise in this article on crimp holds and how to train for them (scroll to the bottom of the page).
Want climbing drills you can actually fit into a session? Send Edition sends one simple drill to your inbox every week, around 15 minutes each, and it’s free. Grab the free weekly drills here. And if you’d rather have your finger and grip work programmed and tracked for you instead of piecing it together yourself, that’s exactly what the Grip & Grind app is built for.
Conclusion
There’s no arguing with how much grip strength shapes your climbing, so if you want to build it, these are 12 solid grip training exercises that plenty of pro climbers and trainers say will get you results.
Just remember your grip is a lot more than hand strength, so whatever routine you build, include exercises that work your hands, arms, shoulders and core. The goal is a grip that’s strong all over, not just in one spot. A good way to get there is to isolate each muscle so you give every part the same attention and spot your weak links. Pair these with your regular sessions and some bouldering drills, and give your hands real rest days so the strength actually sticks.
Forearms pumping out early?
Grip training is one part of the picture. The Grip Efficiency guide covers how to hold things well, why forearms pump early, and when training your grip is actually the answer.
Frequently asked questions
Do grip training exercises actually improve climbing performance?
Yes. Grip strength lines up directly with how well you climb. One study on hand-arm strength and endurance found that relative grip strength accounted for more than 50% of performance in women climbers and less than 30% in men, so building it is one of the higher-leverage things you can train.
Is hangboarding safe for beginners?
Not really. Hangboarding isn’t recommended for brand-new climbers, and misuse or overtraining can cause long-term injuries to your tendons. If you’re newer, build a base with lower-risk exercises like dead hangs, fingertip pushups and planks first, and only campus board under a pro’s supervision.
What equipment do I need for grip training?
It depends on the exercise. Several need nothing at all, like dead hangs, fingertip pushups and fingertip planks. Others use gear you’ll find at most gyms or can buy cheaply, such as a hangboard, a dumbbell, weight plates, a campus board, a resistance band, or a ring grip trainer and power fingers.
Should I train the muscles that open my hand too?
Yes. Power fingers work the opposite muscles from most grip training and help prevent finger and hand injuries. A strong grip isn’t just your fingers either, so build in work for your hands, arms, shoulders and core for a grip that’s strong all over.