Climbing technique is the foundation of how climbers move efficiently, stay balanced, and solve problems on the wall. It’s not about strength, drills, or workouts it’s about recognizing movement options and executing them intentionally. This page is the central guide to climbing technique fundamentals, explaining what climbing techniques are, why they matter, and how they show up across different styles, grades, and terrain. Whether you’re new to climbing or refining advanced movement, this hub organizes the most important techniques into a clear, progressive framework so you can understand what you’re seeing on the wall and why certain movements work when others don’t.
What Are Climbing Techniques?
Climbing techniques are the ways climbers move their bodies on the wall. They describe how you use holds, place your feet, shift your weight, and stay balanced while climbing.
A technique is not a workout or a drill. It’s a common type of movement that shows up on many climbs. For example, moves like flagging, drop knees, or heel hooks are techniques because climbers use them over and over to solve similar problems.
Climbing techniques are not about being stronger. Using the right technique often makes a climb feel easier, more stable, and less tiring, even if your strength stays the same.
This page focuses on helping you recognize and understand these techniques, so when you’re on the wall, you know what kind of movement a climb is asking for.
Why Climbing Techniques Matter
Climbing techniques matter because they help you climb more efficiently, not just harder. When you use the right technique, you rely less on raw strength and more on balance, positioning, and smart movement.
For beginners, technique is often the difference between a climb feeling impossible and suddenly feeling manageable. Many climbs become easier-not because you got stronger, but because you learned how to move your body in a better way.
Good technique helps you:
- Use your legs more and your arms less
- Stay balanced instead of pulling yourself off the wall
- Get less tired on longer climbs
- Feel more in control as climbs get steeper or more complex
As you progress, technique continues to matter. Harder climbs don’t just require more strength, they require more precise movement and better decisions. Understanding technique gives you a foundation you’ll build on at every level.
How to Use This Page
This page is designed to help you understand climbing techniques and recognize them while you’re climbing. It’s a reference and learning guide, not a training plan.
You will not find drills, workouts, or strength exercises here. Instead, this page focuses on what each technique is, when it shows up, and how it’s typically used on the wall.
As you read through the techniques, think about whether you’ve seen or tried them before, and when a climb might call for that type of movement. The goal is to improve recognition and execution, so you can choose better movement options in real time while climbing.
If you know the techniques but struggle to apply them consistently, you’ll find links later on this page that show you how to train and practice these movements.
1. Use your toes
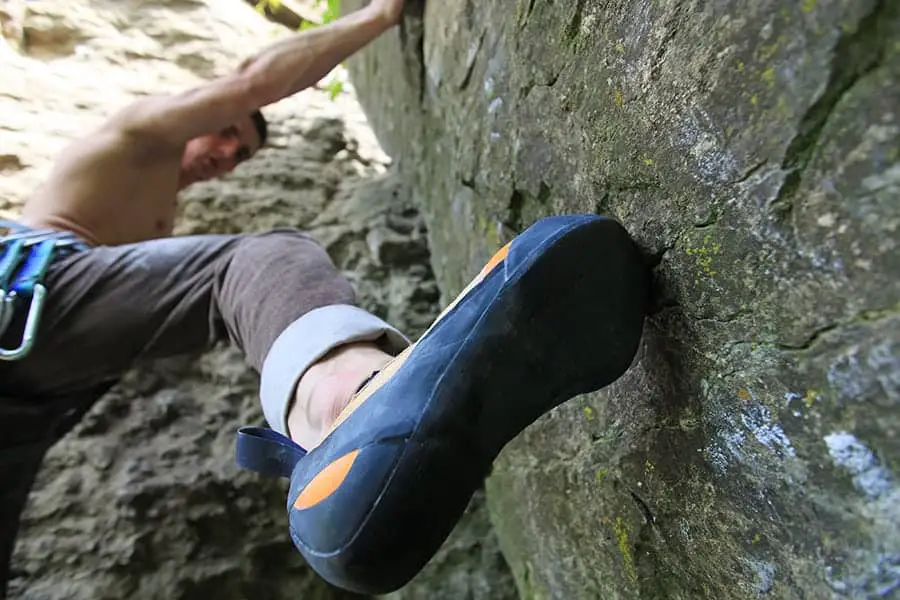
Using your toes is probably the most basic climbing technique and should be one of the first techniques that you master.
What it is:
Using your toes means that when you place your foot on a hold, the only part of the foot/shoe that you use is the toe part of your shoe. The most common part of your toe used will be the inside of your big toe, but there are situations where you will use the tip of your toes and the outside of your little toe.
What it does:
This movement helps with balance as well as gives you diversity of movements with your foot and leg so that it can pivot from one side to the other as needed or also give you the option to increase the distance you can reach by lifting your heel and getting on your toes.
How to do it:
To do this technique, all you have to do is watch your feet as you place them and ensure that you only place your toes on the hold. Many professional coaches and trainers will often mark a new climbers shoes with a line on the side of the climbers shoes to indicate the area of the shoe they should be using to climb. This often serves as a reminder for climbers and also helps them get in the habit of doing it.
2. Flagging
Flagging is the most common technique in climbing and is used for static climbing.
What it is:
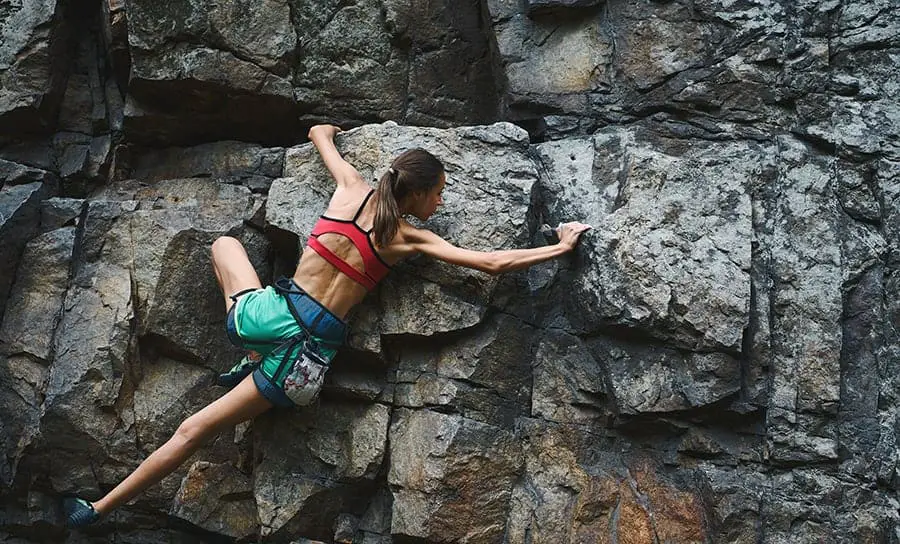
Flagging is when you use your leg as a counterbalance to the rest of your body. With flagging, the counterbalance leg/foot is extended straight and the toes touch the wall instead of using a foothold.
What it does:
Flagging helps climbers stay balanced so they can make movements sideways without falling off the wall
How to do it:
There are two main types of flagging, inside flagging and outside flagging. Basically, what you do is extend a leg in the opposite direction of where you are trying to reach.
If you are trying to reach a handhold to the right, then you will extend one of your legs to the left. Whether the flag is an inside flag or an outside flag is dependent on how high the foothold is.
If the foothold is high, you will move your leg on the outside of the other leg.
If the foothold is low, you will move your leg on the inside of the other leg.
With practice, you will be able to make these movements without putting much thought into it, but this is a technique that takes a lot of time to get to that point.
For more tips on how to flag, check out this article: When to Flag in Climbing and How-To Do It (With Videos)
3. Drop knee/Back Step
The drop knee is something you will often see in climbing, especially in climbing overhangs.
What it is:
The drop knee is a movement when the knee is pointing down.
When to do it:
The best situation to use a drop knee is when you need to reach a little bit further and/or need help getting your hips closer to the wall.
How to do it:
To do a drop knee, you will place your foot on a foothold and twist your toe and leg until your knee is facing down.
If you are doing a drop knee with your left foot, try to touch your left hip to the wall. If you are doing a drop knee with your right foot, try to touch your right hip to the wall.
Then reach for the next hold with the hand from the same side you are doing the drop knee.
4. Palming
Palming is a technique used in slab climbing to help create tension.
What it is:
Palming is when you point all of your fingers down and use your palm to press against the wall or an edge to push your up from.
When to do it:
The most common reason to do this move is if you are trying to move your opposite hand up higher but you don’t have a place for your hand. You can use palming to get additional height as well as add tension so you can move your feet up the wall without falling.
How to do it:
Palming is a very easy technique to leverage in the right conditions. All you have to do is point your fingers toward the ground and place pressure on your palm to push your body up.
If you are using an edge to press against, try using your thumb against the edge to add additional strength to your palm. Sometimes the thumb will create a sideways movement that can ruin your balance, but in many cases, the thumb can add additional balance.
5. Straight arms
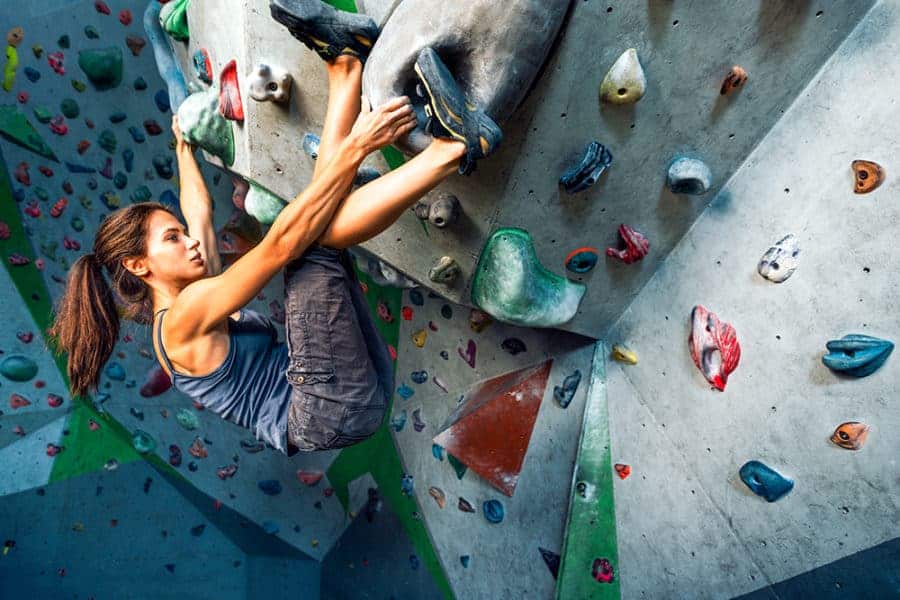
Straight arms is a great technique for any kind of climbing but especially overhang climbing.
What it is:
Straight arms is exactly what it sounds like. It is climbing with your arms straight so that you can minimize the energy and muscle expense of your arms while climbing.
When to do it:
This is a technique that you can do in almost every instance. If you are climbing an overhang, however, then this will be especially important to do throughout the climb.
How to do it:
The only way you will be able to do straight arms is if you use your feet and legs to get up the wall. Instead of using your biceps to pull yourself to the next hold, place your feet in a position that allows you to use your legs to push you to the next hold.
6. Hip turns
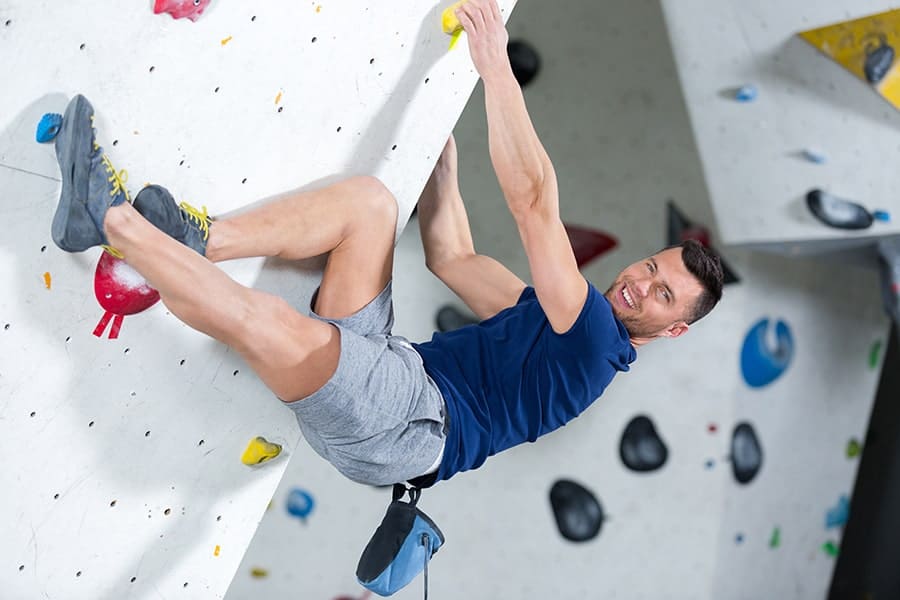
Hip turns can be used in any type of climbing, overhang or slabs.
What it is:
Hip turns is when you turn your hip to get closer to the wall and/or closer to the next handhold.
When to do it:
You can do hip turns pretty much any time that you have your weight properly distributed on your feet and you need a little extra reach to get to the next hold.
How to do it:
To turn your hips, pivot your toes so that your hips, knees and toes are all pointing in the same direction. Then grab the next hold you are trying to reach.
If you turn your hips without turning your knees and toes, you may injure your knees.
7. Beta reading
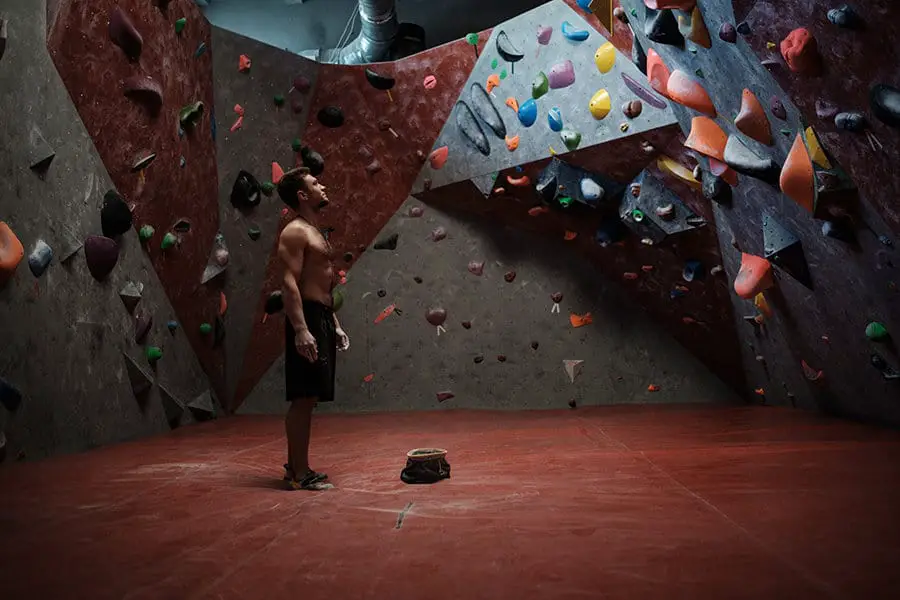
The most important technique to use for climbing happens before you get on the wall with beta.
What it is:
Beta reading is when you review the climb and identify what moves you need to make to get to the top.
The sequence you identify also takes into account the movement that your body needs to make to get through each move.
When to do it;
You should identify beta before any climb. Oftentimes when you are climbing outside, you aren’t able to figure out the right sequence on the first try, so if you fall, make sure that you take into account what you learned and include that when you are identifying beta for your next attempt.
How to do it:
To read beta, identify what handholds and footholds are available to you. Then play in your mind what you need to do and what of those handholds and footholds you have available to you that should be used.
Sometimes we aren’t right with the beta, but you can try different sequences and different means of getting through the climb until you get it right.
Getting good at reading beta is something that is learned over practice and not often easy for beginner climbers. However, the more you practice, the better you will get.
8. Heel Hooks
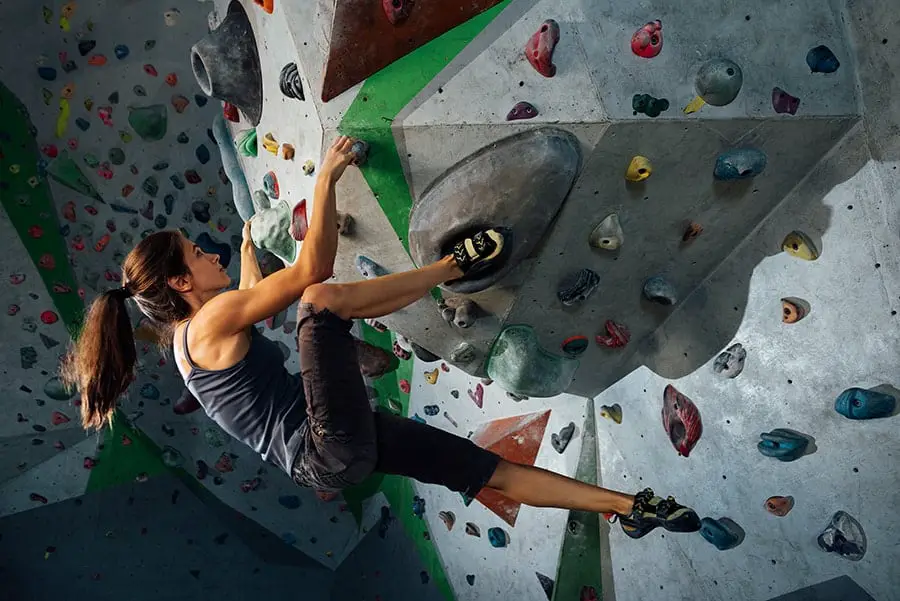
Heel hooks are to do but it takes a lot of practice for them to be really useful.
What is it:
Heel hooks is when the climber leverages their heel to hold a position or move their body up.
When to do it:
If a foothold is a little too high to leverage your toe or if you need extra balance, you can use a heel hook to either hold your body in one direction while you reach in the other direction, or you can use a heel hook to use your legs to help pull you in the same direction of the heel.
How to do it:
If you are using the heel hook to hold yourself in one direction while reaching in the other direction, all you have to do is place your heel on a corner or in a hole or on a hold to keep your feet in that position while you move in the opposite direction.
If you are using a heel hook to help pull yourself toward the same direction, place your heel on the edge or hold that you are leveraging and at the same time as pointing your toes to touch the side of that edge, also pull with your hamstrings of the same leg to pull your body toward that handhold.
9. Toe hooks
Toe hooks are great for all kinds of climbing, especially overhangs.
What is it:
Toe hooks are when you leverage your toe to hold your body in place while you reach in the opposite direction.
When to do it:
Toe hooks are usually used when you need to keep your body tight against the climbing wall while needing assistance of a foothold to pull in the opposite direction.
How to do it:
Identify where you want to go and identify the handhold that you want to leverage. Place your toe on the outside of the hold, then pull toward it with your foot at the same time as leaning your body in the opposite direction.
10. Smearing
Smearing is used in most types of climbs including slab and inverted climbing.
What is it:
Smearing is when you place your foot against the wall and leverage the friction like a foothold.
When to do it:
You can use smearing any time that you can get the angle to have friction with your foot against the wall. Smears are most often used when a climber needs a foothold in a specific location but one isn’t present.
How to do it:
Using the rubber on the bottom of your toe, press against the wall. If you need more friction, try to get your heel lower/closer to the wall to increase the amount of rubber that is on the wall.
11. Lay back
A lay back is a common feature that route setters often use on slab climbs.
What it is:
A lay back is when you have to push with your lower body in the opposite direction as your hands to create a pulling situation.
When to do it:
Lay backs are most common with sideways edges and side pulls. It is often a technique that allows you to match your hands while pulling to the side instead of pulling down.
How to do it:
Place your hands on the sideways hold that you wish to leverage. Then place your feet on footholds or on the wall and push against them at the same time as pulling on the handhold.
If you want to use the layback technique to get higher and reach the next hold, consider walking your feet up to a higher hold to bring your center of gravity up as well.
12. Stemming
Stemming is most common in outdoor climbing and relies on tension to complete.
What it is:
Stemming is using the opposite of forces on a corner to leverage the walls when there aren’t hand and footholds available.
When to do it:
You can use this technique any time you are in a corner where there is one wall perpendicular to the other wall.
How to do it:
Place one hand on each opposing wall and one foot on each opposing wall. Then if you want to move your right foot up, push against the wall with your left foot at the same time as pushing against the wall with the hand that your right foot is on.
Another common way to do this is by placing both hands on the same wall from the foot that you are trying to move while pushing with the opposite foot on the opposite wall.
13. Kneebar
A kneebar is most commonly done in sport climbing and bouldering.
What it is:
A kneebar is when you place your knee in between the edge of a hold and the wall so that you can leverage it to hold you in place. They are most commonly used to give climbers a rest for their hands.
When to do it:
With that being said, it is recommended to use a kneebar if the rock face gives enough space for it and you need a rest for your hands.
How to do it:
Place your knee between the wall and the hold. If needed, engage your hamstrings to increase the leverage you need to hold your body in place.
14. Dyno
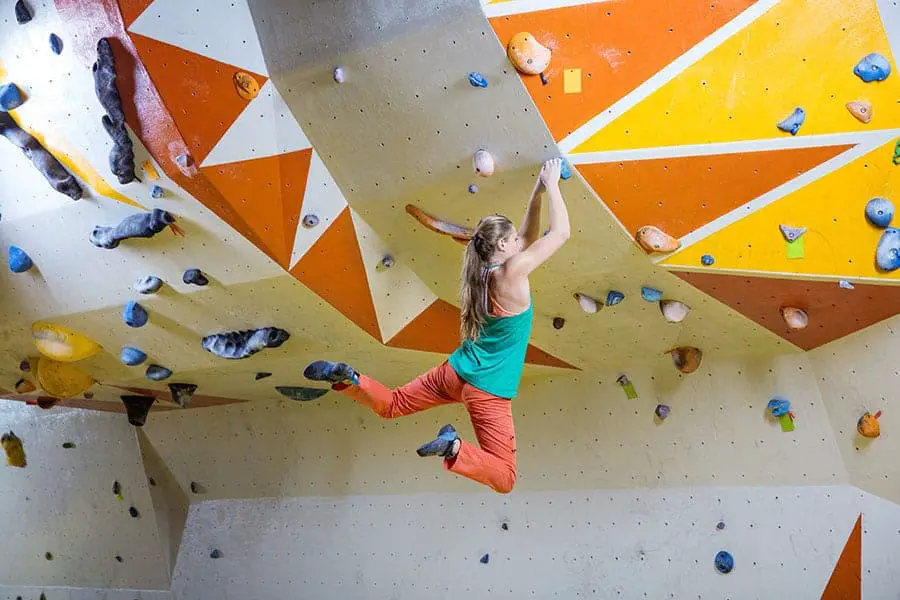
Dynos are one of the most popular movements in climbing and it is also one of the most difficult and risky techniques.
What it is:
Dynos is a dynamic climbing move that requires you to jump, while taking both hands of a climbing hold to reach the other holds.
When to do it:
Because dynos make you take both hands off the holds, it is difficult to control, and thus should only be done when you can’t reach a hold and need to jump to get it.
How to do it:
To dyno, you place your feet in a stable position, bend your knees and get low. At the same time as straightening your legs to jump, pull with your hands and jump toward the hold you are trying to reach.
For more information about Dynos and tips for how to accomplish them, check out this article: What Is A Dyno and How To Do It
15. Deadpoint
A deadpoint is often associated with a dyno because it is similar.
What it is:
A deadpoint is when you have to jump for a hold but one or both of your feet stay in contact with the foothold or wall.
When to do it:
You can do this movement whenever you need to reach a hold that is just out of reach from your current position but you think that you can reach it without taking your feet off the hold.
Deadpointing does take a lot of energy so it is recommended to only deadpoint if you need to.
How to do it:
Get in a low position similar to a dyno except instead of jumping off the footholds, just straighten your legs, get on your toes and reach for the hold.
16. Relaxed Grip
Over Gripping is a common mistake that beginner climbers make and a relaxed grip is the opposite of that mistake.
What it is:
A relaxed grip is when you are using the minimum amount of strength and energy to hold onto a hold. It is used to conserve energy throughout the climb and help with endurance.
When to do it:
It is ideal to use a relaxed grip during your entire climbing session. If you notice that you are over gripping or your hands are becoming extremely tired, it is likely that you would benefit from relaxing your grip.
How to do it:
The fastest and easiest way to use a relaxed grip is to loosen the muscles and tendons in your hands and fingers. It is often taught to move your palm slightly away from the handhold so that you can’t squeeze it unintentionally.
17. Rest
Rest is a technique used by sport climbers so that they have the strength and endurance to keep climbing.
What it is:
Rest is when you position yourself in a way that allows you to take a hand off the wall and rest your hand, then switch what hand you are resting. Oftentimes climbers will dangle their hand down toward the ground to help get fresh blood pumped into their hands and forearms.
When to do it:
When you are first climbing, finding resting positions and resting should be done 1-3 times per 30 feet. The stronger you get, the less you have to do it, but even then, 1 time per 30 feet is still a good idea.
How to do it:
Not every climb has a clear place for you to rest. In these cases, try to position your feet and legs in a way that takes most of your body weight (knee bars are also a good position to rest in) and take turns with both your hands to rest.
Many climbers often take their rest time to also add chalk to their hands. It isn’t a requirement, but it is a prime opportunity to do so.
18. Tripod Position
The tripod position, also known as a triangle, is the position for stability and balance in your body.
What it is:
The tripod position is when your legs are spread apart and your hands are close together, making a three point shape with your limbs. In addition, keeping your hands far apart and your feet closer together is also considered a tripod as you are still making a three point shape with your limbs.
When to do it:
Ideally, you should maintain the tripod/triangle shape and position throughout the entire route.
How to do it:
Whenever you move to a new position, attempt to replicate or maintain the tripod shape by moving your hand and/or feet. If you need to move your hand out wide while your feet are wide, consider flagging to maintain balance and the tripod position/shape.
19. Bicycle
The bicycle is a more advanced technique and is often seen in national bouldering championships.
What it is:
The bicycle is when you place one foot on the bottom side of a hold and the other foot on the top-side of the hold. This positioning provides stability and helps a climber maintain that position with their feet.
When to do it:
This move is most common on overhangs when you are trying to keep tension in your body and your feet against the wall while your hands reach out to the next hold, to prevent your feet from dangling.
How to do it:
Depending on the situation, you will usually place a toe-hook / place your foot below the foothold while you place your other foot on top of the hold.
Then press down with the foot on top of the hold and pull up with the toe on the bottom side of the hold.
To maintain this position, you will need to ensure that your core and glutes remain active throughout the move.
20. Figure 4
This is most common with shorter climbers on overhangs or right before a mantle.
What it is:
A figure 4 is when you place your leg through your arm while climbing.
When to do it:
There are two main reasons and instances to do this move. Either 1) you need to prevent your feet from dangling or 2) you don’t have a place to put your foot and need to get your center of gravity higher.
How to do it:
With your hand on a good grip, place your opposite leg through your arm (aka, with your left hand on a good grip, place your right leg through your arm).
21. Campus
This is an intentional move that climbers do while climbing and it is also a technique often used to train for hand and arm strength while climbing.
What it is:
Campusing is when your feet are dangling beneath you (intentionally) and you use your arm strength to move up to the next handhold.
When to do it:
This is a very exhausting movement so this technique should be avoided in most cases. However, when keeping your feet on the wall prevents you from moving up, then you can use this technique. Of course, you need to have the strength to pull your body weight up with one arm to successfully accomplish this technique/move.
How to do it:
With your feet dangling beneath you, engage your entire upper body and core to pull your body up and reach for the next hold. If possible, match your hands together to make this movement easier.
If you want a challenge, then only use one hand per move.
22. Bat hang
The bat hang is mostly used to show off but it also a great resting position, when needed.
What it is:
It is when both your feet are wedged into a hold and the rest of your body is dangling below/upside down.
When to do it:
If you are unable to leverage a hold for a knee bar because your knees are too big, you may be able to leverage the hold as a bat hang if your feet fit appropriately.
However, bat hangs use a lot of core muscles to get out of, so minimize how much you use this technique.
How to do it:
To do a bat hang, you will place your feet into the bottom side of the hold. Depending on the shape of the hold, you will most likely need to flex your feet so that your toes point in the same direction as your knees. Then let your body hang.
More About Training for Climbing:
- How To Climb More Often Without Getting Injured | Tried And Tested Methods For Recovery
- Lower Body Mobility And Flexibility Challenge
- Neglected Techniques Necessary For V4-V5 Progression
- 17 Footwork Drills For Climbing
- Mental Training For Climbing
- How Often And Hard Should You Climb To Get Gains?
- When Should You Start Hangboarding For Boulder’s
- Is Bouldering When Sore Bad?
- The Top 22 Climbing Techniques And Skills And How To Do Them
- 23 Tips For Climbing Slabs
- When To Flag In Climbing And How-To-Do It (With Videos)
- How To Learn Climbing Technique For Beginners
- What Should You Record In A Climbing Journal?
- Climbing Endurance: Muscle, Skin And Mental Training
- How To Deal With Fear Of Falling
- How Many Days Should You Climb Per Week?
- 5-10 Minute Warm-Up For Climbing
- What Is A Dyno And How To Do It
- What Is A Gaston In Climbing? Powerful Moves For Beginners
- Can Foam Rolling Improve Rock Climbing Performance?
- 7 Things Climbers Should Do On Rest Days For Better Performance
- When Do You Need A Rest Day?
- How To Climb Your Best – Pros And Cons Of Rest Days
- Static Vs Dynamic Climbing Movement: Pros And Cons
- 5 Habits For Healthy Climbing That You Haven’t Thought Of
- 5 Things To Improve Climbing Performance And Sustainability
- 10 Minute Workout Routines For Post Climbing Sessions
- How To Use Climbing Holds: Techniques For Improved Climbing
- A Guide For Climbers: Bouldering Drills 101
- 12 Easy Workouts To Increase Hand And Grip Strength For Climbers
- What Are Undercling Climbing Holds And Why Climbers Love/Hate Them
- What Is A Crimp In Rock Climbing And How To Train For Them
- 7 Common Mistakes in Rock Climbing For Beginners

