
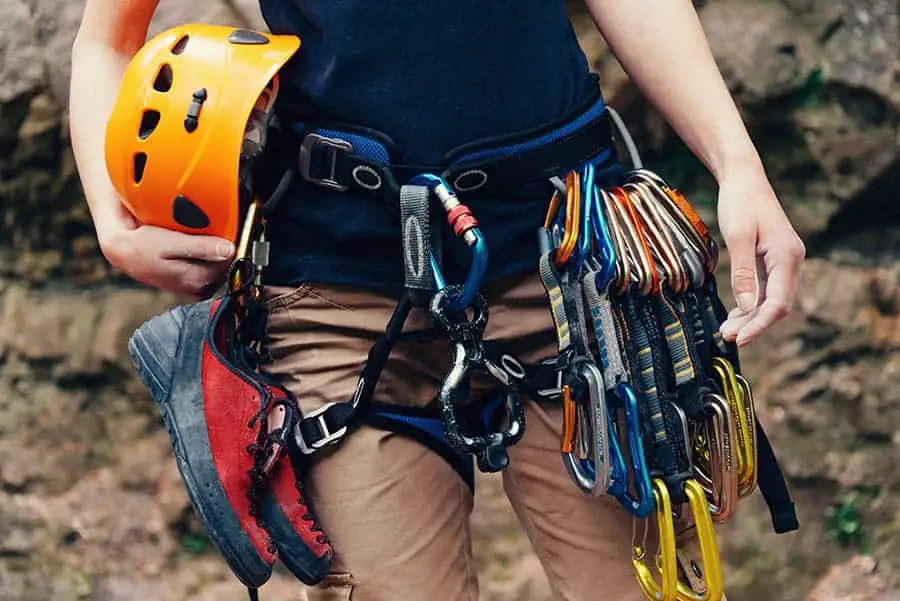
Learning how to clean and disinfect all of your climbing gear isn’t just about how it looks. Clean gear works better and lasts longer, and that’s reason enough to make it a habit.
Past the germs, getting dirt and grime off your gear is something you want to do at least once a year. Some pieces need it more often than that.
Take your rope. When it’s dirty or oily, it doesn’t run as smooth through your belay device or the anchors. Remember how your rope felt the first time you used it? It should feel like that every time, and that’s why we tell climbers to clean their gear every season, or at least once a year.
In this guide I’ll walk you through how to clean and disinfect all of your climbing gear, piece by piece, and how to do it based on what the manufacturers actually recommend so you don’t ruin anything along the way.
How to clean and disinfect all of your climbing gear
Every piece cleans up a little differently, so go slow and treat each one on its own. Here’s what needs attention and how to handle it.
What gear needs cleaning?
If you aren’t sure what to clean, just look inside your climbing bag. Everything in there needs to be cleaned and disinfected. Yes, that includes your brush and carabiners.
Each of these items needs its own approach, though, so clean every piece individually and carefully. That’s how you make sure it comes out clean and doesn’t get wrecked in the process.
Note: If you’re a smart climber, you probably also carry a first aid kit or something like it. That kit probably doesn’t need disinfecting (maybe a quick dusting), but take a few minutes to clear out any bandaid wrappers left over from last year and top up anything that needs replacing.
Climbing rope
Your climbing rope is a lot easier to clean than most climbers think. Because of that misconception, some climbers never clean their gear and don’t get the full life out of their rope. Keep your rope clean and you’ll stretch out its life and how well it handles. For the full rundown, we’ve got a whole climbing rope maintenance and care guide too.
What you need:
- Rope cleaner
- Warm water
- Bathtub or storage tub
- Optional: Rope brush
What to do:
- Add warm water to the bathtub or storage tub
- Add rope cleaner to the tub of warm water (check the bottle for measurements and any special instructions)
- Put the loose rope in unknotted and move it around so every part of it is covered in the water and cleaner
- If you have a rope brush, use it now to work out dirt and grime build-up. Heads up: some climbers have had a rope brush catch a snag and pull it out. Make sure there are no snags first, and use the brush at your own risk.
- Drain the water out of the tub
- Rinse the rope thoroughly until all the rope soap is out of it
- Let the rope dry (don’t dry it in the sun and don’t store it wet)
Note: Plenty of manufacturers, Petzl included, say you can wash your rope in a washing machine. Choose the 30 °C delicate synthetic setting, skip the spin cycle, and let it air dry.
Harness
Your harness is one of the most important pieces of gear keeping you safe, so keep it as clean as you can and it’ll last as long as possible. When it needs disinfecting or gets especially dirty, use the steps below.
What you need:
- A clean sink, storage tub, or bathtub
- Warm water
- Hand soap
- A soft brush
What to do:
- Work off any oily dirt or mud with the soft brush
- Fill the sink with enough warm water to cover the harness
- Mix in the hand soap
- Hand wash the harness in the soapy warm water
- Rinse the harness with clean water
- Dry it as much as you can with a towel
- Let it air dry on a clothesline (don’t dry it in the sun and don’t store it while it’s still wet)
Machine wash instructions
According to Petzl, you can wash your harness in a washing machine with these recommendations:
- Choose the 30 °C delicate synthetic setting, without a spin cycle.
- Wash the harness inside a thick cloth bag so the metal parts don’t damage the machine drum.
- Hang the clean harness on a line to dry (don’t dry it in the sun and don’t store it while it’s still wet)
- Don’t use laundry detergent.
Warning:
- Use only household face and body soap. Everything else, like solvents, stain removers, and degreasers, is too strong and isn’t compatible with nylon
- Don’t use a high-pressure water sprayer
Belay devices
Belay devices are a bit different from most gear because there are so many kinds. They come in different shapes with different mechanisms, and some are all metal while others have plastic built in. The good news is they can all be cleaned in a similar way.
For cleaning your grigri or other belay devices with moving parts, do NOT take the device apart. Clean it the same way you’d clean a single-piece belay device using the steps below. If you want the deep-clean version, here’s how to clean your grigri specifically.
Tip: If a belay device has developed a sharp edge on the body, it should be retired. In fact, Petzl, the popular maker of the Grigri, recommends “retiring any metal product that has wear greater than one millimeter deep on its body.”
What you need:
- A bowl
- Warm water
- Hand soap
- A soft brush
What to do:
- Work off any oily dirt or mud with the soft brush
- Fill the bowl with warm water
- Mix in the hand soap
- Wash the belay device in the bowl of water
- Rinse the device with clean water
- Dry the belay device as much as you can with a towel
- Let it air dry (don’t dry it in the sun and don’t store it while it’s still wet)
Warnings:
- Don’t use acid or harsh cleaners. Don’t use WD 40 type degreasers either, since they strip lubricants and their abrasive effect can speed up wear.
- Some belay devices have plastic parts. Only use household face and body soap. Everything else, like solvents, stain removers, and degreasers, is too strong and isn’t compatible with plastic.
- Don’t use a high-pressure water sprayer. It can strip lubricants and damage joints.
- If lubricating is necessary, use only fluid oils (machine oil) or graphite powder. After lubricating, wipe off any oil residue with a cloth so it doesn’t get on your slings or ropes.
Climbing shoes
When it comes to cleaning climbing shoes, the goal is usually about shoe stank, which matters, but the steps below are more about disinfecting. That just happens to come with the handy side effect of better smelling shoes. If odor is your main worry, here’s how to prevent climbing shoes from smelling in the first place.
Since some climbing shoes are mostly synthetic and others are leather, below are the most common cleaning recommendations for each. If your shoes are part leather and part synthetic, we’d follow the leather routine just to be safe.
Synthetic climbing shoes
Synthetic shoes can be machine washed on gentle with warm water.
What you need:
- Washing machine
What to do:
- Remove the laces and close all velcro straps
- Machine wash your shoes on gentle with warm water
- Stuff them with newspaper or paper towels beforehand so they don’t shrink
- Dry the shoes with a fan or another air-dry method (never put rock climbing shoes in a dryer, even on air dry)
- Treat the shoes with a Lysol or other antiseptic spray
Warning: With a lot of rock climbing shoes you’ll probably see the upper lighten a little, but the shoe itself won’t be affected.
Leather shoes
Leather shoes are more prone to shrinking and stretching, so it isn’t a good idea to machine wash them.
What you need:
- Warm water
- Hand soap
- Bowl or sink
- Cloth
What to do:
- Remove the laces and close all velcro straps
- Combine the warm water with hand soap in a bowl or sink
- Dip the cloth in the warm soapy water
- Wipe down the inside and outside of the shoes with the damp soapy cloth (don’t use too much water)
- Rinse the cloth until it’s clean
- Wipe the inside of the shoes again and remove any leftover soap
- Dry the shoes with a fan or another air-dry method (never put rock climbing shoes in a dryer, even on air dry)
- Treat the shoes with a Lysol or other antiseptic spray
Warning: Don’t use too much water, since that can break down the leather early.
Helmet
Most of the time helmets stay pretty clean compared to other gear, but with steady use (handling it with dirty hands) or if you drop it in a puddle of mud, it’s still worth cleaning.
What you need:
- A clean sink or bathtub
- Warm water
- Hand soap
- A soft brush (a clean chalk brush works)
What to do:
- Work off any visible oily dirt or mud with the soft brush
- Fill the sink with enough warm water to cover the helmet
- Mix in the hand soap
- Hand wash the helmet in the soapy warm water
- Rinse the helmet with clean water
- Dry it as much as you can with a towel
- Let it air dry (don’t dry it in the sun and don’t store it while it’s still wet)
- The shell of ABS helmets can be cleaned with a cloth lightly moistened with rubbing alcohol. Warning: do not dip the helmet directly in alcohol.
Warning:
- Use only household face and body soap. Everything else, like solvents, stain removers, and degreasers, isn’t compatible with polycarbonate, polystyrene, or nylon and can weaken the helmet
- Don’t use a high-pressure water sprayer
Carabiners
As you’d expect, your carabiners have to work right for a safe ascent and descent. That’s why it’s important to clear out any grime or oil that could be getting in the way of the gate working the way it should.
What you need:
- A bowl
- Warm water
- Hand or face soap
What to do:
- Use a soft brush to remove any excess oily mud
- Fill the bowl with warm water
- Mix in the hand soap
- Put the carabiner in the bowl of water
- Open and close the carabiner repeatedly until the soapy warm water gets into every part of it
- Rinse the carabiner
- Dry it as much as you can with a towel, then let it air dry (don’t dry it in the sun and don’t store it while it’s still wet)
Warning:
- Don’t use acid or harsh cleaners
- Don’t use WD 40 type degreasers, since they strip lubricants and their abrasive effect can speed up wear
- Everything else, like solvents, stain removers, and degreasers, is too strong and isn’t compatible with plastic
- Don’t use a high-pressure water sprayer. It can strip lubricants and damage joints
- If lubricating is necessary, use only fluid oils (machine oil) or graphite powder. After lubricating, wipe off any oil residue with a cloth so it doesn’t get on your slings or ropes
Quickdraws
Quickdraws are made of carabiners and a dog bone. To clean one, take the carabiners off the dog bone and clean them separately. For the carabiners, see the steps above. For the dog bone, see below.
What you need:
- A bowl
- Warm water
- Hand soap
- A soft brush
What to do:
- Fill the bowl with warm water
- Mix in the hand soap
- Put the dog bone in the bowl of water
- Using the soft brush, gently brush the dog bone while keeping it underwater
- Rinse the dog bone
- Dry it as much as you can with a towel
- Let it air dry (don’t dry it in the sun and don’t store it while it’s still wet)
Warning:
- Use only household face and body soap. Everything else, like solvents, stain removers, and degreasers, is too strong and isn’t compatible with nylon.
- Don’t use a high-pressure water sprayer
Sling
A sling is so versatile that it’s become an essential piece of gear for climbers all over the world. It’s also one of the cheapest, so a lot of times when they get dirty climbers just replace them. But if you’re like me and climb somewhere it rains every so often, a muddy sling is normal, and replacing it every time I climb after a little rain would get expensive.
What you need:
- A bowl, sink, storage tub, or bathtub (depending on the size of the sling)
- Warm water
- Hand soap
- A soft brush
What to do:
- Work off any oily dirt or mud with the soft brush
- Fill the bowl with warm water
- Mix in the hand soap
- Wash the sling in the bowl of water
- Rinse the sling with clean water
- Dry it as much as you can with a towel
- Let it air dry on a clothesline (don’t dry it in the sun and don’t store it while it’s still wet)
Warning:
- Use only household face and body soap. Everything else, like solvents, stain removers, and degreasers, is too strong and isn’t compatible with nylon.
- Don’t use a high-pressure water sprayer
Chalk bag
It isn’t hard to clean, but a lot of climbers don’t like taking the chalk out of their bag, so it doesn’t get cleaned as often as it should, if it ever gets cleaned at all.
Just like your chalk brush, you probably figured you could skip cleaning it. But like the brush, it’s an item you handle with your hands constantly, and you probably let other people handle it too, so it needs disinfecting.
What you need:
- Warm water
- Hand soap
- Sink or bathtub (depending on how big your sink and chalk bag are)
What to do:
- Take everything out of the chalk bag (chalk brush, tape, chalk, and so on)
- Fill the sink or tub with enough warm water to cover the chalk bag
- Mix in the hand soap
- Hand wash the chalk bag inside and out
- Dry it as much as you can with a towel
- Let it air dry (don’t dry it in the sun and don’t store it while it’s still wet)
Warning:
- Use only household face and body soap. Everything else, like solvents, stain removers, and degreasers, is too strong and isn’t compatible with nylon, which is a common chalk bag material
- Don’t use a high-pressure water sprayer
Chalk brush
Cleaning your chalk brush probably isn’t what you had in mind when you clicked on this article, but the truth is your chalk brush is one of the items you hold and touch the most, so disinfecting it helps you stay healthy.
Good news is cleaning your chalk brush is super easy and doesn’t take long.
What you need:
- Warm water
- Hand soap
What to do:
- Hand wash the chalk brush with warm water and hand soap
- Make sure you thoroughly disinfect the handle with the soap
- Dry it as much as you can with a towel
- Let it air dry (don’t dry it in the sun and don’t store it while it’s still wet)
Other and misc gear
Like I said at the start, everything in your gear bag should get cleaned. Some of it doesn’t need much instruction, though. Here are a few more items you still need to clean, they’re just easier than the rest.
Water bottle
Every gear bag has one, and you already know how to clean a water bottle. This is just a reminder that you should actually clean it, even if you only ever put water in it.
You can wash most water bottles on the top rack of a dishwasher. If the bottle isn’t dishwasher safe or you don’t have a dishwasher, use warm water and dish soap to hand wash it thoroughly, then dry it with a towel or let it air dry.
Grip trainer
I don’t see people cleaning these very often, but since it’s an item that’s constantly being gripped by your grimy hands or a sick friend’s, it’s worth cleaning more often than once a year.
Depending on the material, you can usually use warm water and hand soap. If the device has a lubricant, it may be better to use a damp cloth with hand soap on the areas your hand touches and avoid the lubricant.
Belay glasses
Belay glasses are one of those things you touch a lot or that pick up dust, so keeping them clean cuts your chances of getting sick and helps you see better too.
You can clean belay glasses the same way you’d clean normal glasses, with glasses cleaner. Clean the prisms and remove any extra cleaner so you don’t leave dry marks behind. You can also use the glasses cleaner on the piece that goes around your nose and ears.
Optometrists often recommend spray glasses cleaner with a micro-fiber cloth instead of the glass cleaner wipes. Those wipes have been known to scratch the prisms when dirt or dust gets dragged across them.
Cleaning day is a good reminder that clean gear is only half the game. If you want to actually climb better, our free newsletter sends you one short climbing drill a week, around 15 minutes each. Grab the free weekly drills here and put that fresh-feeling rope to good use.
More Buyer’s Guides:
- The Top 5 Crash Pads For Bouldering: How To Decide Which Is Best
- Diy Hangboard With Jugs And Edges For Less Than $15
- 6 Of The Best Belay Devices For Beginner Climbers
- The Best 11 Climbing Shoes Under $100
- Climbing Chalk: Chunky Vs. Fine
- The Best Chalk For Climbing And Bouldering
- Rock Climbing Starter Kits For Beginners Compared
- Liquid Chalk Vs. Dry Chalk For Bouldering (Hint: Dry Chalk Is Better)
- Top 5 Gear You Need In Your Climbing Pack For The Best Experience
- What To Wear While Bouldering
- Should You Upgrade To An Assisted-Braking Belay Device?
- Everything You Need To Know About Climbing Chalk
- 37 Things Serious Climbers Bring With Them To The Mountains
- Clothing For Climbing In The Gym: What Should You Wear?
- Can You Climb Without Chalk?
- How Tight Climbing Shoes Should Fit For The Best Performance
- Harnesses For Rappeling
- My Favorite Harness For Climbing
- What You Should Wear While Climbing
- What Affects How Climbing Shoes Fit?
- How To Clean Your Grigri
- How To Care For Your Climbing Rope

Frequently asked questions
How often should I clean my climbing gear?
At least once a year, so every season. Gear you handle or get dirty more often, like your rope, shoes, chalk bag, chalk brush, and grip trainer, should be cleaned more than that.
Can I put my climbing rope in the washing machine?
Yes. Petzl and plenty of other manufacturers say you can. Use the 30 °C delicate synthetic setting, skip the spin cycle, and let it air dry out of the sun. The same 30 °C delicate setting works for a harness, just put it in a thick cloth bag first and don’t use laundry detergent.
What soap is safe for cleaning climbing gear?
Household face and body soap only. Skip solvents, stain removers, degreasers, and WD 40 type products. They’re too strong for nylon, plastic, and helmet materials, and degreasers strip the lubricant out of moving metal parts and speed up wear.
How do I get the smell out of my climbing shoes?
Clean them based on the material. Synthetic shoes can go in the machine on gentle with warm water, and leather shoes get a damp soapy wipe instead. Air dry them with a fan, never a dryer, then hit them with a Lysol or antiseptic spray.
When should I retire gear instead of cleaning it?
If a metal piece like a belay device or carabiner has a sharp edge or wear more than one millimeter deep on its body, retire it. Petzl recommends the same. Cleaning won’t fix worn or damaged safety gear, so replace it.