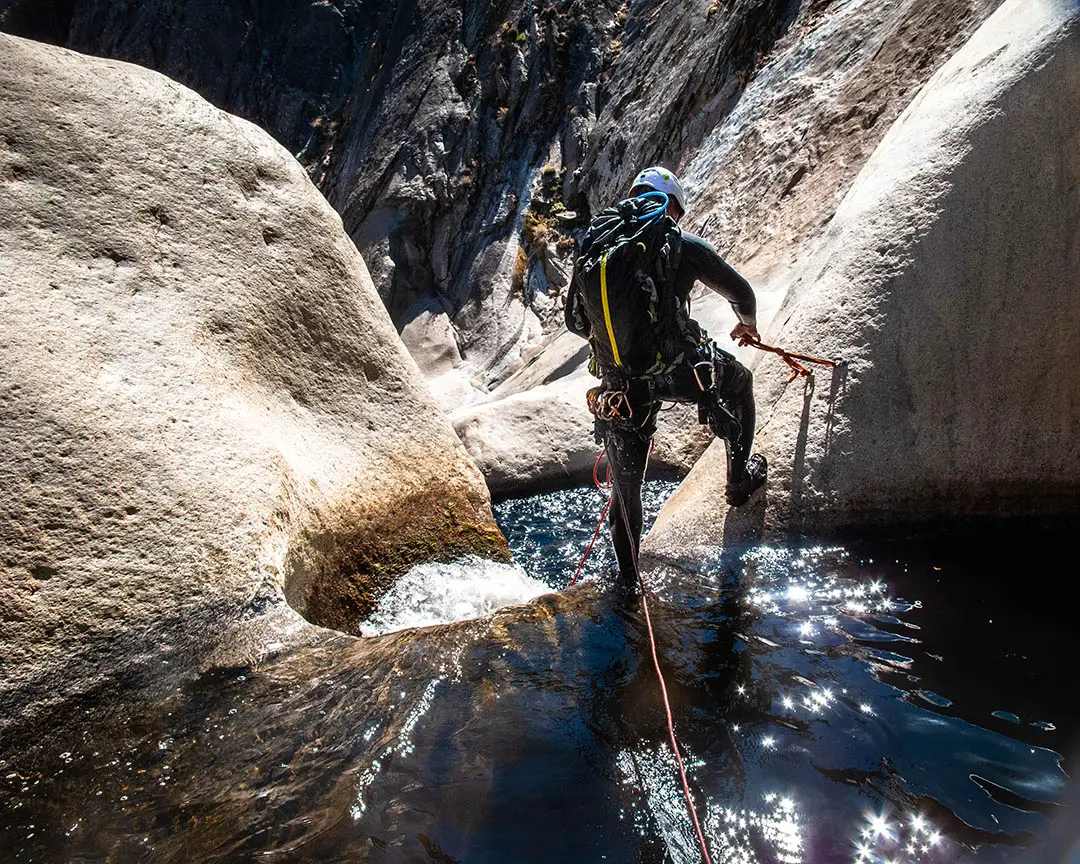
Rappelling is thrilling and many people find rappeling as a super fun activity. If you want to build your gear kit, then one of the first things you’ll be looking for is what rappelling device you should purchase. I have quite a few different devices so I’m sharing my experience here as well as what I found when I did some research.
The best rappelling device for canyoneering is easy to set up and use for any level of experience. In addition, it enables you to add or remove friction while lowering and can be used with almost any rope diameter. Ideally, your rappelling device has a backup system to prevent fetal user errors.
Unfortunately, I took part in a rappelling accident with my now-wife that could have been prevented if we used better gear and set up the anchors properly. Since that day, I decided that it was no longer enough to use gear that works, it needed to be gear that had extra safety features, just in case so that accident would never happen again.
Top Reccomendations: CRITR2
The CRITR2 provides you the ability to adjust friction while rappelling so if you feel like you’re lowering too fast, you can easily slow down your descent or speed it up as needed. Additionally, it’s super easy to set up and most people can successfully use the device with 5 minutes of instruction.
The CRITR2 is a second iteration of the CRITR and now has slightly larger arms so it is easier to use with multiple wrap-arounds or thicker rope. This is ideal when adjusting friction or when using the device with heavy or light-weight people.
The CRITR2 Is Easy To Rig and Use
One of the most important aspects of a rappeling device is the ease of use. If it’s difficult to use, it’s more likely to be misused and thus, dangerous. The CRITR2 has a similar set-up to the Figure 8 so it takes a second to set up and can easily be reviewed for proper rigging.
To rig the CRITR2, you will take a bite of the rope you are descending through the large hole in the device and then you will wrap the bite around the frame of the smaller hole of the CRITR2. Then you will connect the carabiner to the smaller hole.
The CRITR2 is Easy to Add or Remove Friction
To add friction, you’ll wrap the rope around the horns/arms of the device in a lateral or diagonal fashion until you have the tension and friction wanted. To decrease friction, you’ll decrease the number of wrapps around the device.
The great thing about this device, is that the horns/arms are big enough that you can do this easily while you are in the middle of a rappel. Of course, you should still stop your decent before doing this to be as safe as possible, but it only takes a moment and is easy to do so it doesn’t take away from your experience.
The CRITR2 is Versatile
Canyoneering includes a variety of scenarios such as dry rappelling, wet rappelling, long rappels and quick short rappels. The CRITR2 works for each of these scenarios with the same set-up for each type. It is also ideal for both right handed rappellers and left handed rappellers.
Compared to to many other rappelling device, it has a way of staying on the carabiner in case you are in water while unloading from the rope, which makes it that much more versatile.
The CRITR2 is Hard to Loose
The feature that separates this device from basic rappel devices is how it connects to the carabiner. The small loop with for around the carabiner preventing the device from dropping when unloading from the rope. The CRITR2 stays on the carabiner while removing the rope, which makes it difficult to loose the device by dropping it or loosing it in the water.
Some rappel devices like the Figure 8 has a large opening where the carabiner connects to the device. The problem with this is when you are unloading from the rope in scenarios where dropping the device would be detrimental. For example, if you are unloading from the rope while in water, if the device comes off your carabiner, it is likely to get lost. Additionally, you may be switching from one rappel to another on a cliff side, at which point, dropping your device could mean dropping it off the edge of the cliff – leaving you without a way to get down or forcing you to use a back-up device.
The CRITR2 Can Last Hundreds of Rappels
The device is semetrical, meaning that it can be flipped around for decreased wear and thus, last longer. This is particularly useful when you are rappelling in desert or sandy environments where sand is on the rope and rubs against device. With scenarios like this, you can flip the device back and forth every few rappells to make the wear more even.
What I Don’t Like About The CRITR2
I wish that the CRITR2 had an auto-locking mechanism that prevents rappellers from falling if they loose get knocked out or let go of the rope. Since I come from a rock climbing background, I’ve used rappeling devices as well as belaying devices to rappel. This background has provided me exposure to auto-locking devices that automatically locks the rope in place if a fall occurs while climbing, or in case of rappelling, if the rappelled lets go of the rope.
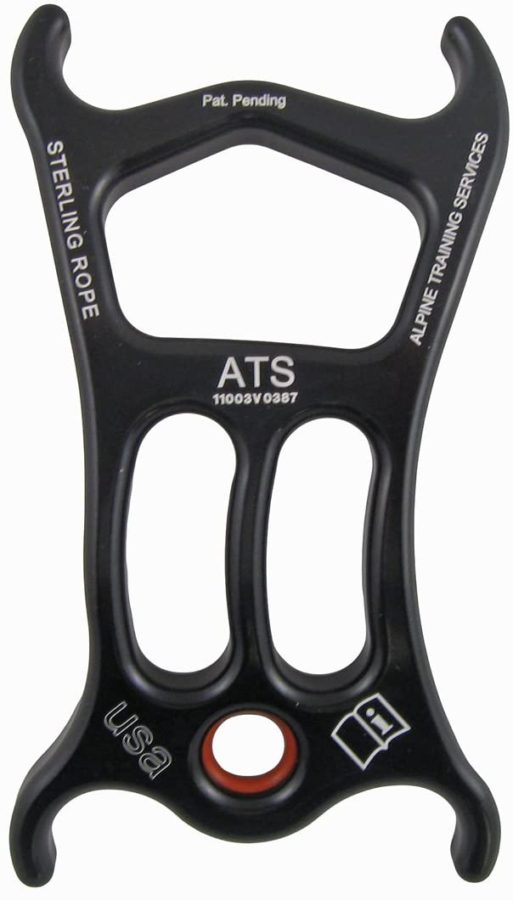
Top Alternative: ATS

When it comes to canyoneering, you need a versatile device that makes it easy to add or decrease friction while also minimizing the risk of losing your device when you’re unloading from one rope to another between routes as well as while treading water. The ATS device provides that for you.
The ATS is Easy to Add/Remove Friction
Similar to the CRITR2, the ATS has horns that allow you to quickly wrap or unwrap the rope for adjusting friction easily. In addition to having extra horns for adding or removing friction in the middle of the descent, the ATS also has a curved profile so you can add additional friction or decrease friction for easier speed control by flipping it around.
The ATS is Hard to Loose
Similar to the CRITR2, the ATS also has a piece where the carabiner connects that helps keep the device on the carabiner while you remove the rope. Even if water is rushing around you, it will stay on the carabiner.
What I Don’t Like About the ATS
The device will last tons of rappels, but not as many as the CRITR2 since it isn’t symetrical. The curved profile feature of the ATS that allows you additional friction control is fantastic, but it also makes it so you can’t easily flip it around to decrease wear.
What Rescue Professionals Use: CMI Rescue 8
The CMI Rescue 8 is one of the most popular descender devices on the market for rescue professionals. I’ve included it in this article because when I first started canyoneering, I thought “the pro rescuers use it, so I should too.”
Though this device functions really well and has mandy desirable attributes such as quick and easy rigging and additional horns for friction control, the reason rescuers typically use this instead of the CRITR2 or ATS is that the ropes they’re using are typically closer to the 11mm diameter or bigger, which requires much more space for wrapping the rope around.
11mm ropes will last a long time and they aren’t significantly more expensive than other diameter rope. However, they are very heavy and it isn’t ideal to carry around with you on a canyoneering trip.
Auto-Locking Rappel Device: Totem Descender
There are rappeling devices such as the Totem Descender that auto-locks if you let go of the device. However, this device is not easily rigged for beginners and there is a higher chance that rappellers make mistakes when rigging the device, which would be very dangerous. Additionally, it isn’t super easy to add friction to the device so you are more self-reliant on controlling how fast the rope runs through the device.
Auto-Locking Rappel Device: Grigri+
A belay device that I absolutely love for rappelling is the Grigri+. The Grigri+ allows you to control the speed of the rope running through the device by pulling on the handle. The further back you pull, the faster the rope goes through. And, in case you panic and pull it all the way back, it auto-locks again. This anti-panic feature makes it a fantastic device.
However, it is more than double the price of the CRITR2 and it’s pretty easy to rig incorrectly if you aren’t paying attention or if you are trying to be fast with it. This can increase chances of error and thus, isn’t my top recommendation for less experienced rappellers. In addition, to the rigging system, you also have to completely remove the device from the carabiner to unload the rope, which increases your chance of dropping it off the side of the cliff or to the bottom of a river if you’re rappelling into water.
More Like This:
- How To Retrieve Your Rope After Rappeling
- 5 Ways To Practice Rappelling
- Can You Rappel On A Dynamic Rope? Static Vs. Dynamic Rope For Rappelling
- The Best Rappelling Device For Canyoneering
- Comparing Different Types Of Rappeling
- The Best Rope For Rappelling
- Harnesses For Rappeling
- Beginners Guide To Rappeling
- How To Self Rappel With A Grigri
- What Is The Safest Way To Rappel?


