I made my Hangboard for less than $20 by borrowing tools and using recycled wood. The only thing that I paid for was sandpaper and screws. Plus, if you don’t want to make ½-inch holes in your wall like what most hangboards require, then you are going to love how we mounted this hangboard.
If you want to make a hangboard for cheap but also want different handhold angles, edge angles and jugs on top, then check out the DIY Instructions in this article.
Table of Contents:
- Material and Recommended Tools
- How To Get Tools For Free
- Prep the Wood
- Designing the Hangboard
- Creating the Handholds
- Creating Jugs and Edges
- Create the Mount
- Mount the Hangboard
Material Needed
- Wood board: 2”x8”x39”
- Wood board: 2”x3”x78” (cut in half to make two 39” boards)
- SandPaper 30 and 80-Grit (120 is optional but I recommend sticking with 80-Grit
- Dremel Sander bit 30 and 80-Grit
- Dremel Stone Sander bit
- Screws
- Wood Glue
Recommended Tools
- Electric Sander or a Sander Block
- Dremel
- Router
- Table Saw with Adjustable angles
- Hand Saw
- Wood Glue
- Countersink
- Paper, Tape and/or Spray Paint (optional)
- Leveler
- Stud Finder
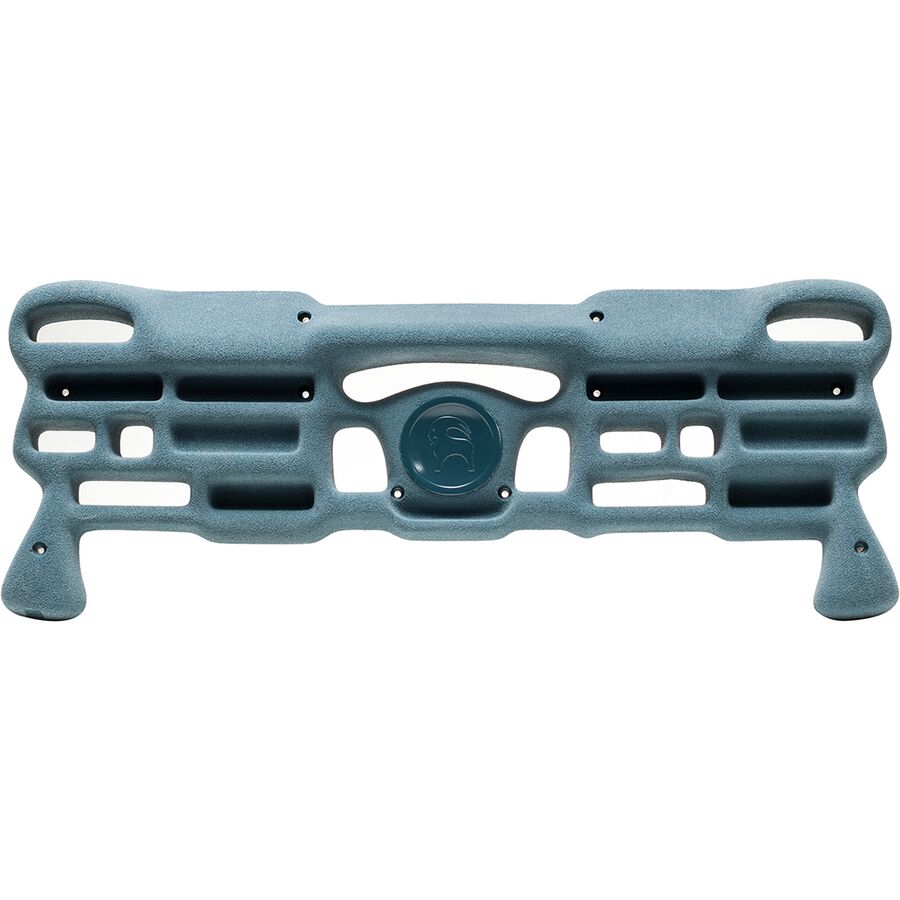
After using my DIY hangboard (from this post) for a couple of months, I realized that the depth of the finger holds aren’t consistent and a professionally-made board might be better for tracking progress… So I found this one that is relatively inexpensive and works really well. Check out the reviews and pricing from Backcountry here.
How To Get Tools For Free
You can borrow tools by asking a neighbor or by asking the family to ask their neighbors. You’d be surprised what your non-DIYer neighbors have in their garage. I borrowed most of the tools from my dad and the router that he bought 10+ years ago hasn’t ever used it before.
You can also rent tools at Lowes or Home Depot but this service is more expensive than the awkward conversation you might have with your neighbor if you just ask them.
If you break the tools however, you need to replace them, so consider that while you are using them. Luckily, most tools are built to handle roughness so it is unlikely that you break them by accident.
Preparing the Wood
What you need:
- Wood board: 2”x8”x39”
- Sander
- Sand Paper
Sanding off any finishes
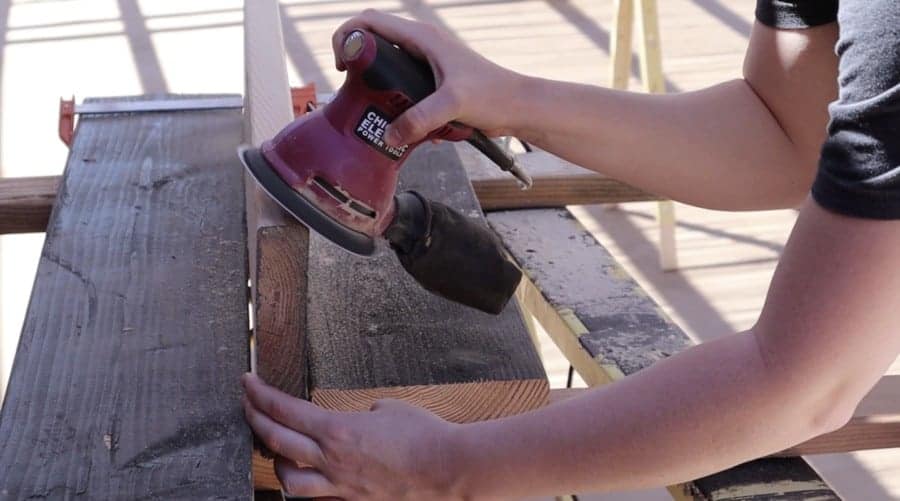
- The wood I borrowed had a few solid coats of stain so I used a band sander with 30-grit sandpaper to remove the finish. Any sander would have worked and I could have even done it with a 30-grit sander block but I don’t like sanding so I used the electric sander to get it done faster.
- After sanding off the finish with the 30-grit sandpaper, I went over it all again with an 80-grit sandpaper.
- You could go over it again with a 120-grit or something like that but I actually think 120-grit is too smooth and it would be easier to grip if you use an 80-grit. This left a smooth, one colored board that was ready for me to create the holds for the hangboard.
Designing Your Hangboard
What you need:
- Ink and/or Spray Paint
- Paper
Outlining the Edges
If you want a 45-degree angle and then a 20-degree angle and a 90-degree angle, then outline where you want those angles to be using a pencil or pen directly onto the wood.
Keep in mind what tools you are going to use to cut the edges.
Using a table saw, you are only able to cut 1 angle per pass on the saw. If you want all of the angles to be in the same direction, you can do as many angles as you like as long as you start with the deepest angles first and don’t mind if the deeper angles are near the center.
For my design, I wanted a 45-degree angle that made a jug as well as a 45-degree sloper, 30-degree and 90-degree edges.
Because of the jugs and the different angles/angle directions, I had to cut my board into thirds to get all of the edges I wanted.
With that in mind, I designed the hangboard edges knowing that I was going to cut my board into thirds.
Outlining the Handholds
Knowing that I had to cut my board into thirds, I designed handholds that allowed at least ½ inch on either side of where I planned to cut the board.
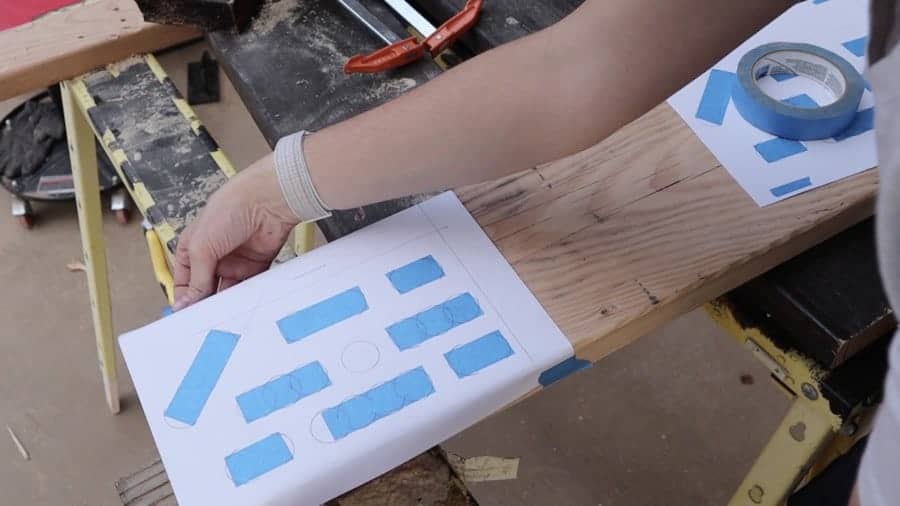
I tried creating a template with paper and tape but what I learned is that a marker or even pencil would be much better.
Ink/Spray Paint Template: If I were to do this project again, I would have created a guide for the router using ink or spray paint.
As for Ink, I would have drawn directly onto the board with a permanent marker and then used then wherever the ink was, I’d use the router in that area. For any mistakes that I make with the marker, I’d use sandpaper to remove it.
If you don’t like freehanding the design, try this
- Print out the template on a piece of paper
- Punch holes around the outline using a nail or something like that
- Tape the template onto the wood
- Spray paint over the paper template so the only paint that gets on the wood board would be through the holes that you made with the nail
- Remove the paper template so the only thing that remains is the wood with the spray-painted dots that outline where you want the handholds
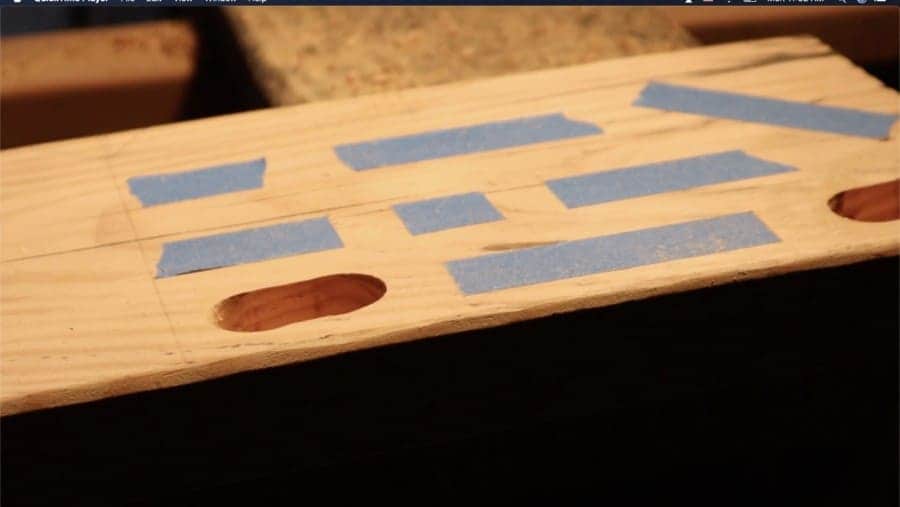
Tape Templates: This was the second template that I tried to use. I taped on exactly where I wanted the holds to be and then used the router to plunge through the tape. Though this option was better than the paper template, the tape still sometimes got caught on the router and would get pulled off the wood board before I was finished using it.
Paper Templates: This is the last option that I’d consider for outlining the handholds because it has some major drawbacks.
I tried this template Idea because I could create one half of the design and then copy/print the design again so that I had the same design on both sides of the board.
If you go this route, make sure that you either do a mirror setting on the printer so that it is the exact opposite, or make the ink dark enough that you can see the design from the opposite side of the paper.
Here is the major drawback and reason I wouldn’t do it again: paper templates get torn to shreds by the router while you are using it. Sometimes the router only tares where you are routing out the board but most of the time, the entire paper.
When you use paper, the router tares it apart and it becomes useless.
Creating Hand Holds
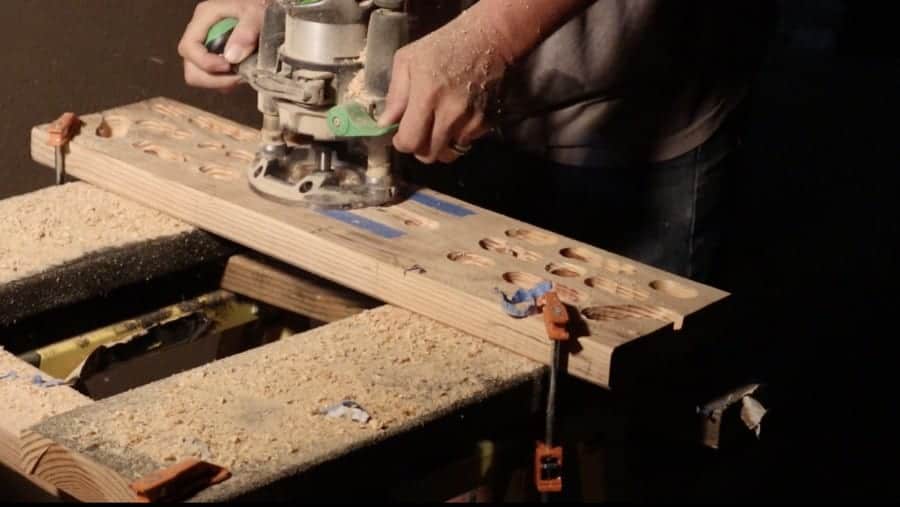
Now that you have the wood prepared and the outline of the holds are created, it is time to use the router to create the holds.
You can use a drill or even a Dremel for this part but routers are much easier to use and are built for this kind of project.
What You Need:
- Router
- Dremel (recommended)
- Sandpaper (block or bit for dremel)
Router Bit Choice
I wanted the same height and shape for all of my handholds so I used the same bit for the entire project.
Different bits make a different shape, some are rounded edges, some are straight edges and some have different curves in them. I used the drill bit that had a rounded tip (where the end of the hole would be in the board) and a straight edge (no extra curves where my fingers would be hanging from).
Adjust The Router Depth
Every brand router is somewhat different, but the basic idea for all of them is that there is a tool to dictate how deep you go into the board. If you want a 2-inch deep hole (the entire depth of the wood board), then you adjust the router to go that deep. If you want the hole to be ½-inch, then you adjust the router for that depth.
I read the user manual to learn how to change the depth allowance of the router and then I tested those depths on a separate piece of wood to make sure it was what I wanted.
Test Out The Router
I had never used a router before so I had to read the user manual and check out some YouTube videos before testing it on a different piece of wood.
If I were to do this project again, I would have attempted to make handholds and try different techniques on a different piece of wood so that by the time I was using the router on my hangboard, I would have had more practice. I did test depth control on a different piece of wood, but I didn’t test out my template or test doing the sideways motion with the router. That would have been really helpful to do before putting holes in my hangboard.
Route Out The Holds
Now that you have learned how to change the router depth and tested the router on a different board for your template and moving the router around while it is plunging into the test-wood, it is time to do it to the real thing.
Using the template (hopefully permanent marker or spray paint), plunge the router into where you want to make your first handhold.
If you want to do a long handhold, like a four finger hold, then only plunge the router in a couple of centimeters at a time and then drag it around the area you want cut out. This will help you maintain control and get a cleaner look at the end of your project (this was something I learned after already making a mess of my hangboard).
Sand The Holes/Holds
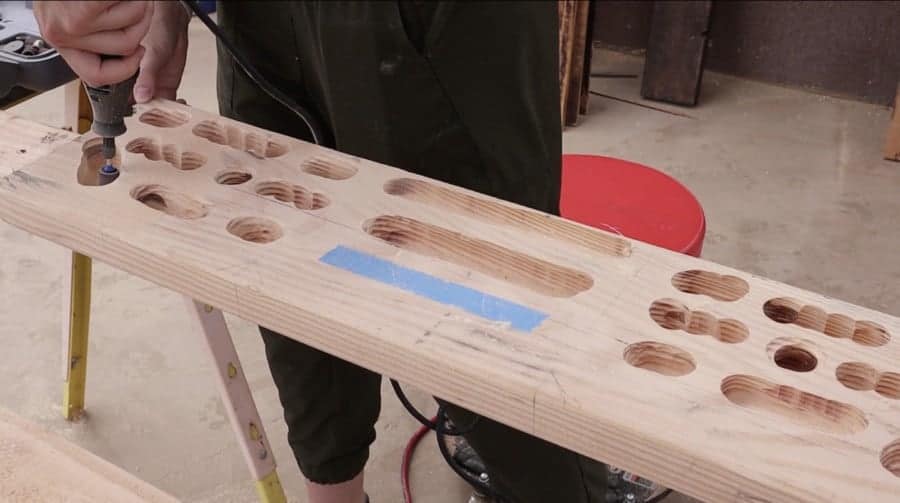
Routers are great at making holes, but they often have jagged edges (at least if you are new to using a router) that need to be smoothed and sanded out.
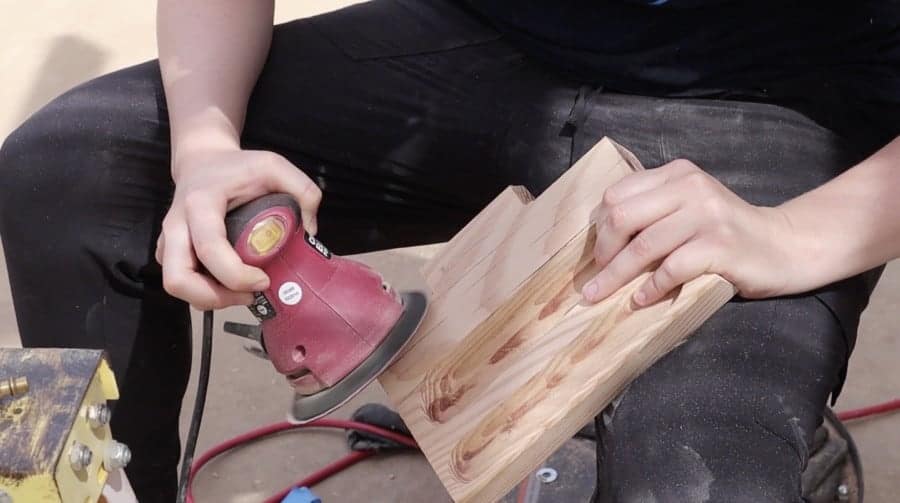
You can use a sanding block or sandpaper, but the Dremel is perfect for this job if you don’t like spending much time sanding like me.
For anywhere that had an edge that I didn’t want, I used the 30 grit sandpaper to get it down to where I wanted it and then I used the 80 grit to make it a little softer.
Sometimes I had to use the stone sander for a corner that I couldn’t reach with the basic sander bit.
Creating Jugs and Edges
This was probably the hardest part of building the hangboard, which is probably why most DIY boards just leave the board at a 90 degree angle.
If you want the board to be easy, just move onto creating the mounting section. If you want jugs and/or different edge angles, continue with this section.
I recommend watching the video for this section as it may be difficult to understand unless you are watching it.
What You Need:
- Table Saw
- Hand Saw
- Dremel
- Wood Glue
- Paper Towel or Wash Cloth/Rag
- Clamps
I researched for an easier way to do this and besides a CNC machine (which makes DIY instructions pointless). However, I did see some people creating strange rigs using an angled piece of wood and a table router online… If you have access to a table router, it may be worth checking out.
- Cut the board into thirds, as outlined in the design part of this project with a table saw (a chop saw that reaches 8” will work as well).
- Adjust the table saw angle to the angle you wish the edge to be at. For me, I wanted a 45-degree jug on the outer edges of the hangboard so I adjusted the table saw to be 45-degrees.
- Mark on the table saw where the end of the blade goes so that you don’t over cut the board
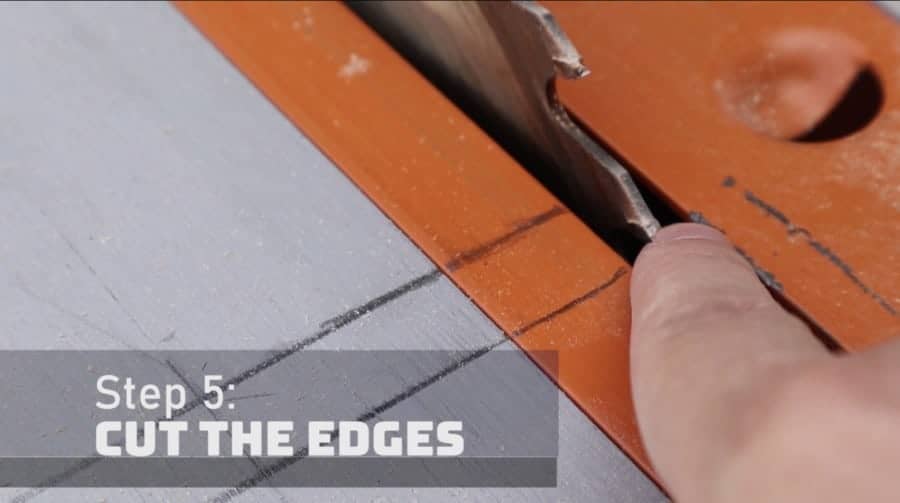
Table saws are rounded blades so the blade doesn’t cut all the way through at the edge of the blade but it will score your board (meaning it cuts the board but not all the way through).
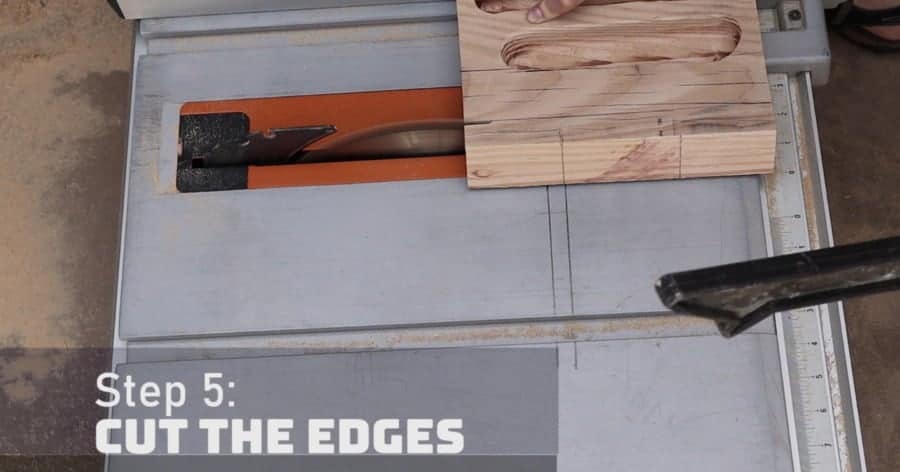
- Using the table saw, run the board through the saw until the mark on your board and the mark on the table saw line up
- Adjust the table saw to the angle you want the other part of the board at
- Run the board through the table saw until the mark on your board and the mark on the saw table line up
- Adjust the table saw to a 90-degree angle
- Cut the board where the two angles meet
- Using a hand saw, complete the cuts where the table saw didn’t go all the way through.
- Using a dremel, smooth out the corners or any pieces that may have broken off in the process.
- Repeat for each edge/angle/piece of the hangboard.
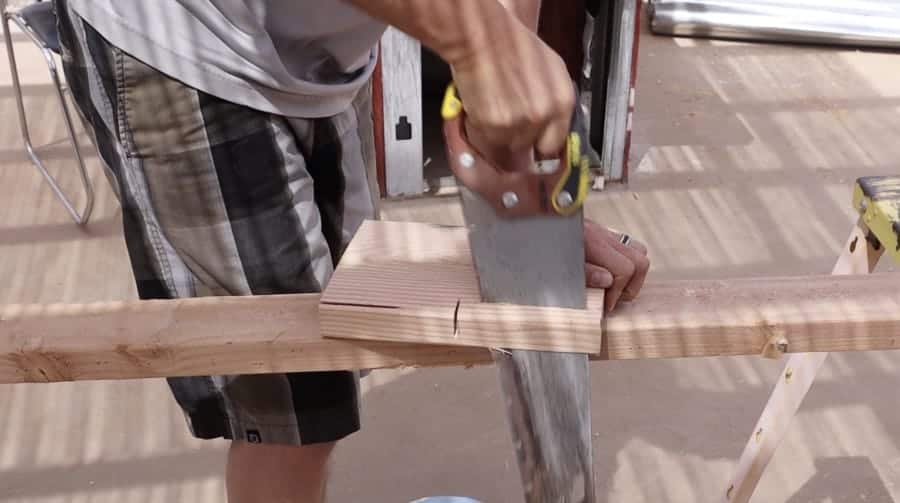
I made the mistake of not mirroring one side of the board to the other, so instead of it being two jugs on the outside, I have one jug on the outside of the far-left piece (the outside of the board) of hangboard and one jug on inside of the far-right piece.
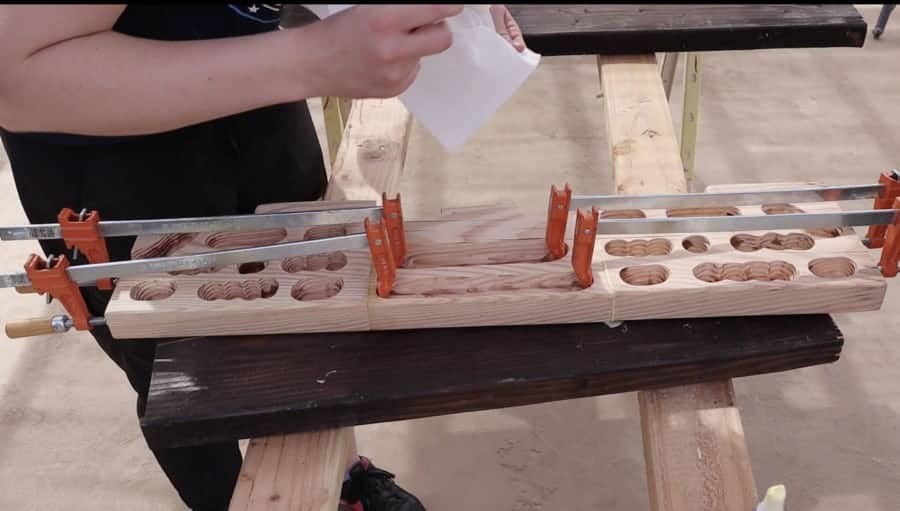
Putting the Hangboard Pieces Back Together
If you followed the same process and edges for this project, then your hangboard is in three pieces right now and there is no way of mounting it to the wall. To fix this, we have to put everything back together.
This process is just to put the wood back together and it has little to do with holding your weight (that will be next).
- Put glue on the edges that need to be put together, spread the glue around with your finger and then place the edges together.
- Clamp the pieces together.
- Using a rag or paper towel, remove any excess glue.
- Let sit for 1 hour.
Tip: Enlist someone’s help so that you can get the alignment of the wood is flesh together.
Building The Mounting System
When you get a hangboard pre-built it usually comes with a few giant bolts that leave holes your fingers can fit through.
I rent an apartment and half-inch holes will ruin my deposit so I needed a different way to mount them.
I found a mounting system that only uses three screws (normal size screws) and it holds over 400lbs (more than enough if I had another full-grown human on my back while using it).
For this hangboard DIY, we are using the same mounting system that carpenters use to mount cupboards so it is meant to hold A LOT of weight. For example, each screw is built to hold 100lbs, plus the wood is able to hold over a hundred pounds so it can hold well over 400 pounds.
What You Need:
- Wood board: 2”x3”x78” (cut in half to make two 39” boards)
- Wood Glue
- Clamps
- Counter Sink
- 2” Screws
- Table Saw
- Stud Finder
- Leveler
- Drill (optional)
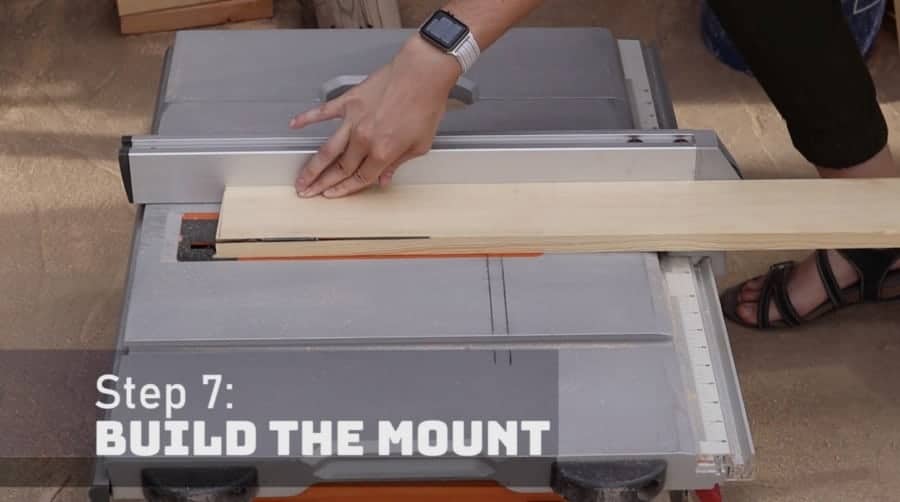
Create the Mounting Board
Now that the wood glue has been sitting for an hour, it is still pliable but it shouldn’t be dripping, and it’s ready to add the mounting bracket on the back of the hangboard.
To make the mounting board, you will need two 1”x3”x39” boards and a Table Saw.
- Using the table saw, cut one edge of each board at a 45-degree angle.
Add the Mounting Board to the Hangboard
With the two mounting boards, one will be on the hangboard and one will be on the wall.
The orientation of the board on the hangboard needs to be with the longest side of the wood (pointy side) going against the wall (it won’t hang otherwise) so consider the orientation with the next step.
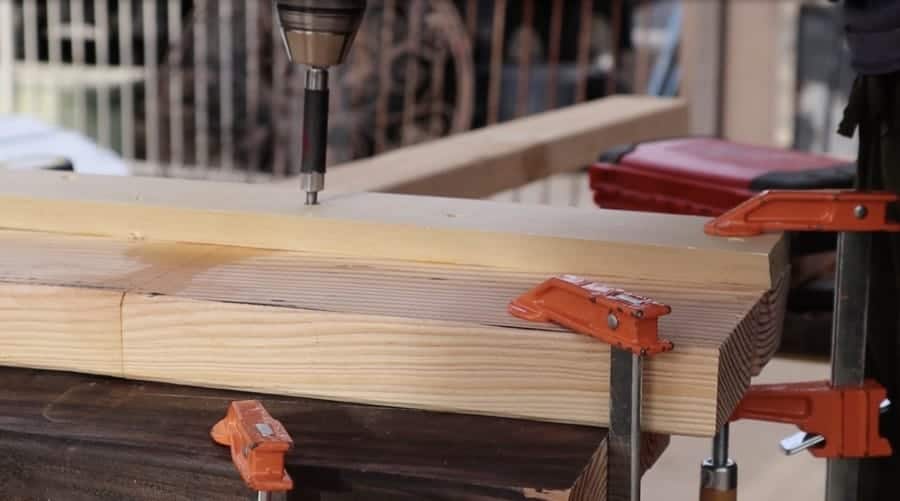
- You don’t want any screws sticking out from the board (because the screws would scratch the wall and prevent the rest of the board from being flush to the wall) so before screwing one mounting board into the hangboard, use the Countersink drill bit to create a lip that the screw can nestle into.
- Place glue on the back end of the mount board and glue it to the board (this will help further keep the three pieces in place while using it but it isn’t necessary)
- Using multiple screws per piece of hangboard, screw the mounting board into the hangboard. Remember the orientation of the mounting board on the hangboard so that it will mount correctly.
- Let the board sit for 24 hours or until the glue is completely hardened and dry (see glue bottle for instructions)
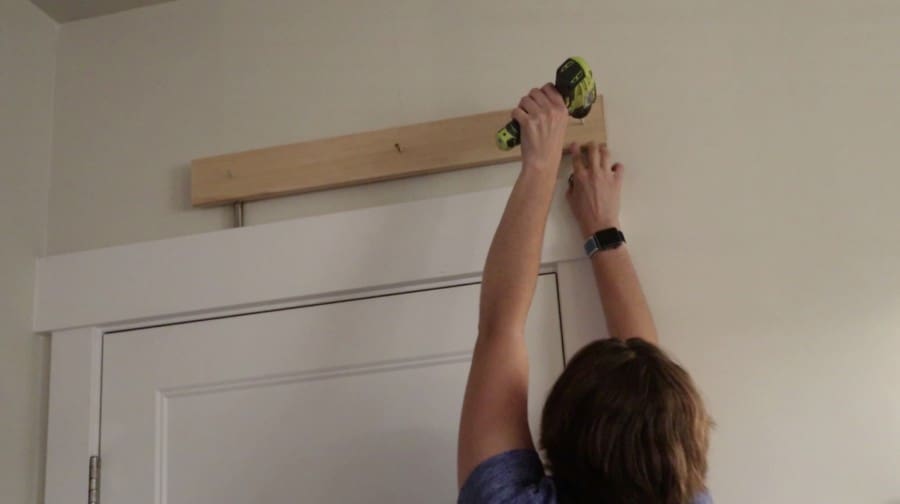
Mounting The Hangboard
Now for the fun part (and easiest part), mounting the hangboard so you can actually use it.
- Identify where you want the hangboard to be mounted. Most climbers add it above a door frame so their legs can move freely beneath them and so their face isn’t pushing against the wall while hanging.
- Use the stud finder and mark where each stud is in the area with a pencil
- Use a leveler and the mount that is going against the wall
- Mark on the wall and mounting board where the three screws holes should be drilled
- Pre-drill the holes in the board and wall with a bit that is slightly smaller than the screw width and depth.
I tried only drilling holes in the board and not the wall (because I was being lazy) but ended up unscrewing everything and drilling the hole because it was too difficult to screw the mounting board in all the way without stripping the screws.
- Use a countersink to create a lip on the mounting board so that the screws can be flush with the wood.
- Screw in the mounting board to the wall.
- Slide in the hangboard so that the mounting board on the wall and on the hangboard are aligned.
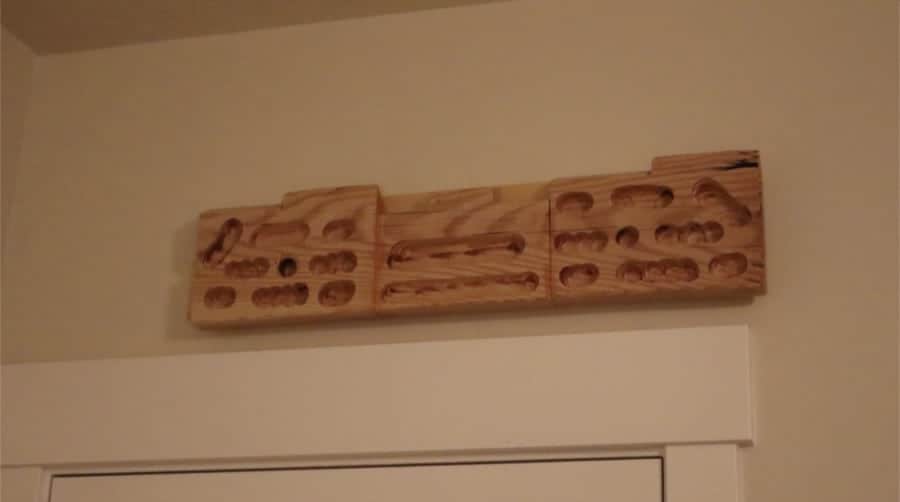
Start Your Hangboard Training Regimen
Don’t be like those other climbers that have a hangboard but never use it… You spent so much time and effort to create the hangboard and it is time to actually use it.
Enjoy.
More Buyer’s Guides:
- The Top 5 Crash Pads For Bouldering: How To Decide Which Is Best
- Diy Hangboard With Jugs And Edges For Less Than $15
- 6 Of The Best Belay Devices For Beginner Climbers
- The Best 11 Climbing Shoes Under $100
- Climbing Chalk: Chunky Vs. Fine
- The Best Chalk For Climbing And Bouldering
- Rock Climbing Starter Kits For Beginners Compared
- Liquid Chalk Vs. Dry Chalk For Bouldering (Hint: Dry Chalk Is Better)
- Top 5 Gear You Need In Your Climbing Pack For The Best Experience
- What To Wear While Bouldering
- Should You Upgrade To An Assisted-Braking Belay Device?
- Everything You Need To Know About Climbing Chalk
- 37 Things Serious Climbers Bring With Them To The Mountains
- Clothing For Climbing In The Gym – What Should You Wear?
- Can You Climb Without Chalk?
- How Tight Climbing Shoes Should Fit For The Best Performance
- Harnesses For Rappeling
- My Favorite Harness For Climbing
- What You Should Wear While Climbing
- What Affects How Climbing Shoes Fit?
- How To Clean Your Grigri
- How To Care For Your Climbing Rope

