
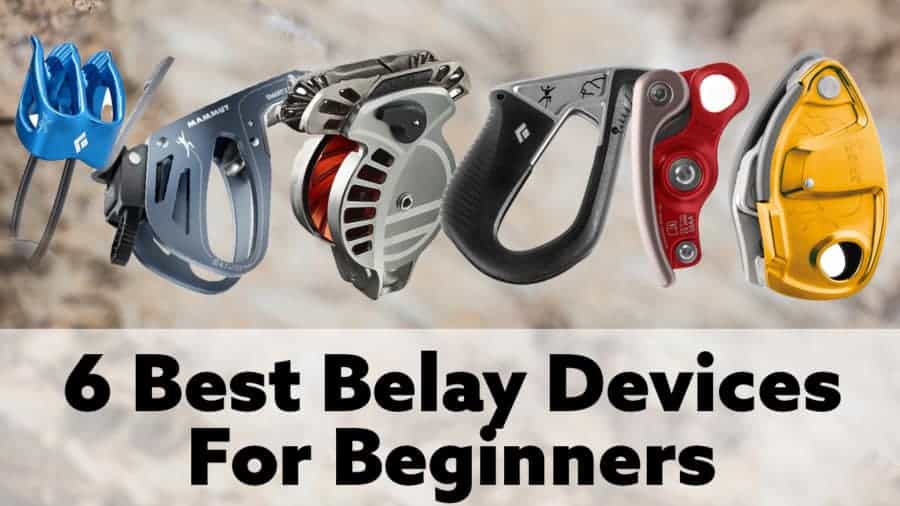
I own nine belay devices right now (tubular, semi-assisted, and auto-locking), and I still have a couple sitting on my wish list. So when it comes to climbing gear, you can bet belay devices are my favorite thing to nerd out about. This is my honest rundown of the best belay devices for beginners, built around the ones I actually climb with week to week.
When I first started climbing, I bought the cheapest gear on the market and it worked fine for me. As long as you are belaying properly, any brand new belay device should work for you too.
That said, if you already know how to belay and you are ready to buy your own first device, or your second one, you might be after the extra peace of mind that comes from a device with added safety features. A belay device is only one piece of the kit, so it is worth pairing it with a harness you trust too.
Honestly, it wasn’t until I made the jump to an auto-locking belay device that I really felt comfortable climbing and belaying. Since then, I only recommend semi-assisted and auto-locking belay devices to my friends and family.
Why Some Climbers Don’t Recommend Assisted-Braking Devices For Beginners
Before we get into the list, this needs to be addressed. There is a difference between first-time belayers and beginners. First-time belayers are people who have never belayed before. In most cases, they borrow a belay device or rent one while they are learning. If that is you, it is a good idea to get proper training with an ATC first, just in case you ever need to use one.
Plenty of climbers (usually the more experienced crowd) say you should stick with a tubular ATC for a while before moving to an assisted-braking device, because they feel it is harder to learn to belay properly once the device is doing some of the work for you.
Here is my take though: you can learn to belay properly on any device. If you only ever use a Grigri, why would you need to know the ins and outs of a basic tubular ATC? (Answer: just in case.) If you are still weighing this up, I wrote a whole piece on whether you should upgrade to an assisted-braking belay device.
I have included one ATC in this article for anyone who wants to spend as little as possible on a belay device. But for most beginner climbers, I recommend a device with semi-assisted or auto-locking features.
With an assisted-locking device, you can climb without spending the whole time worrying about the belayer dropping you, or you dropping them.
Note: As a beginner, worrying about whether your belayer is going to catch you will undoubtedly hold you back from pushing to your full potential, and it will slow your progress.
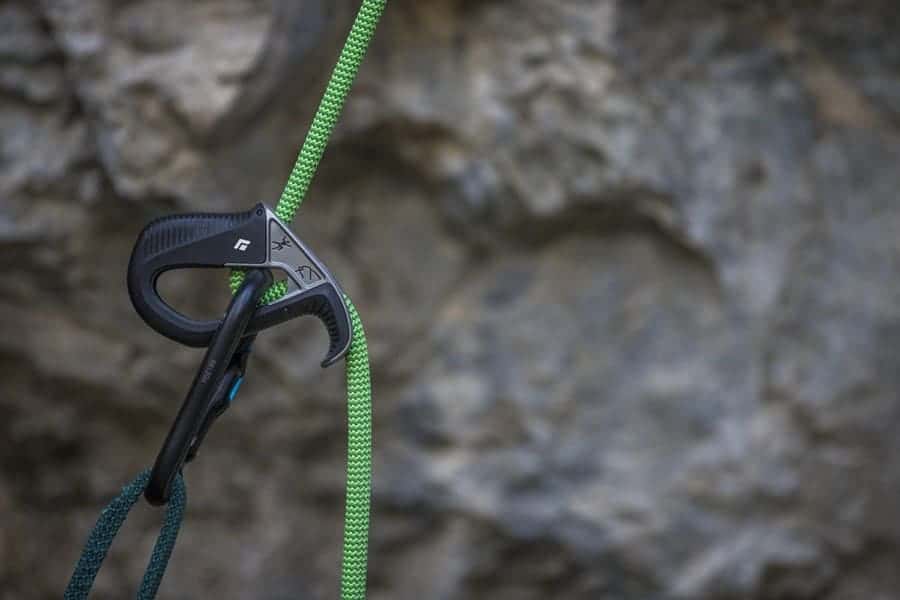
Black Diamond Pilot
- See the price from Backcountry here.
- See the price from Black Diamond here.
- See the price from REI here.
Type: Semi-Assisted Braking
Overview: This is my newest belay device, and I picked it up specifically to try a semi-assisted braking device and compare it to my auto-locking ones. It works a lot like a tubular ATC, but with the added braking assistance if a climber falls.
One thing I really like is that feeding rope through it feels almost identical to a basic ATC, so there is a minimal learning curve for beginners.
To lower a climber, instead of nervously moving the rope up toward the belay device (a common habit with basic ATCs), you tilt the device like a lever to control how fast the rope runs through it.
One thing climbers bring up in reviews is that the part you hold has a plastic coating on it. For some people that sounds like a cheap material, which can feel concerning. But honestly, a full metal-frame device like this would get too hot to hold in summer, and holding it is exactly what you need to do to lower a climber.
How It Works: The Black Diamond Pilot has a tubular shape (similar to an ATC) with a lip where the rope feeds through. In the neutral position, with the device facing up, the rope runs through easily. When the rope tightens between the device and the carabiner (which is what happens when a climber falls), the device tips forward, pinching the rope between itself and the carabiner and stopping it from moving.
To get the rope moving again, you reposition the belay device, either by turning it up or by using the lip to push it back up.
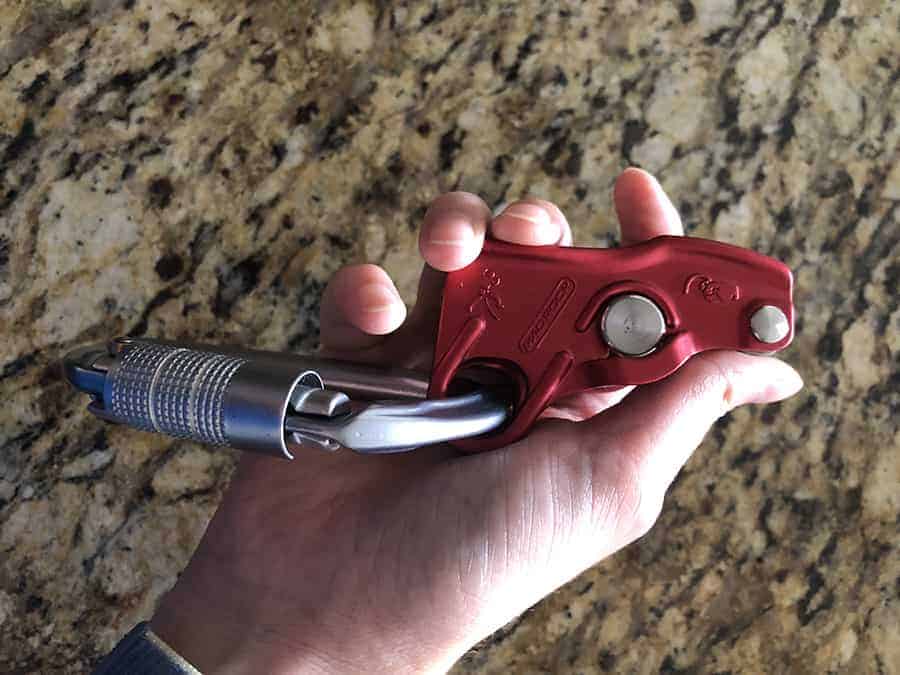
Mad Rock Lifeguard
See the price from Backcountry here.
Type: Auto-Locking
Overview: This one and the Black Diamond Pilot are my favorite belay devices for beginners and advanced climbers alike. It works a lot like a Grigri, but it takes up less space, it’s lighter, and feeding rope and lowering climbers is a little easier.
How It Works: The Lifeguard has a cam mechanism inside. While you are feeding rope through it or pulling in slack, the device stays in a neutral position and the rope moves freely.
When a climber falls, the cam pinches the rope and stops it from moving through the device, auto-locking it and keeping the climber off the ground.
That is great if something happens to the belayer, say they get knocked unconscious or they are not paying full attention, because you have the peace of mind that no matter what, you will be caught.
Compared to the Grigri, there is less friction while the device sits in the neutral position, so it is easier to feed rope and take in slack.
For example: I mostly climb with people around my own weight, but lowering kids on top-rope with a Grigri is tricky because they are so light that you basically have to feed rope into the device while holding the brake release. With the Lifeguard, the smaller profile means less friction, so you don’t have to feed rope while holding the brake release lever. It is easier, and it feels safer.
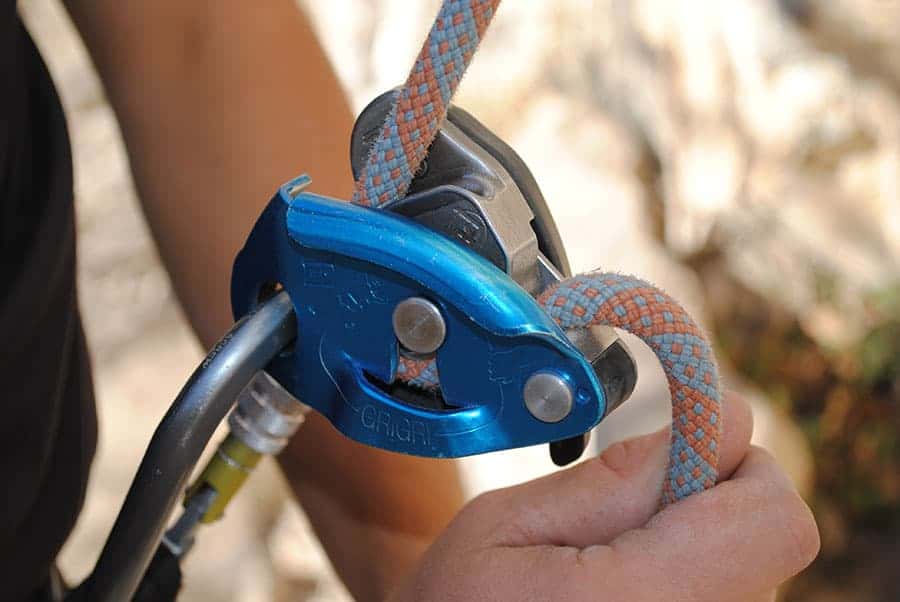
Petzl Grigri+
See the price from REI here.
Type: Auto-Locking
Overview: A few years back, when I asked climbers what they thought about belay devices, the Grigri and Grigri+ were what everyone recommended. I knew I loved climbing and wanted to do it more often, so I figured I needed one. A staff member at my local gym told me to get the Grigri over the Grigri+ because it was simpler to use and, in their words, better for a beginner.
Now that I am more familiar with Grigri devices, I actually wish I had gotten the Grigri+ as a beginner.
The Grigri (Link to product) is a great device, but there is one important safety feature on the Grigri+ that solves my biggest concern with the standard Grigri. It has a feature that stops you from holding the brake release open when you panic. If I had understood that better at the time, I would have ignored the advice from climbers who probably never used the Grigri+ and bought it instead.
How It Works: The braking uses a cam, just like the Lifeguard does.
When the device is in the neutral position, the rope feeds through easily. When the climber falls, the cam pinches the rope and stops it running through the device.
On top of that, you can switch between top-rope mode and lead mode, which basically changes how quickly the device brakes. When you are lead climbing, a little slack can make a fall safer. On top-rope you don’t need that extra slack, and quicker braking is what you want.
To switch modes, you turn the knob on the device and then press the locking button so it can’t change while you are climbing. It really is that easy. And once you have been using it a while, it pays to keep your Grigri clean so the cam keeps working smoothly.
Additional Notes: If you are planning to get the standard Grigri ($110) instead of the Grigri+ to save money, just get the Mad Rock Lifeguard. It has the same features, but it is easier to feed and take in rope, and it is even cheaper.
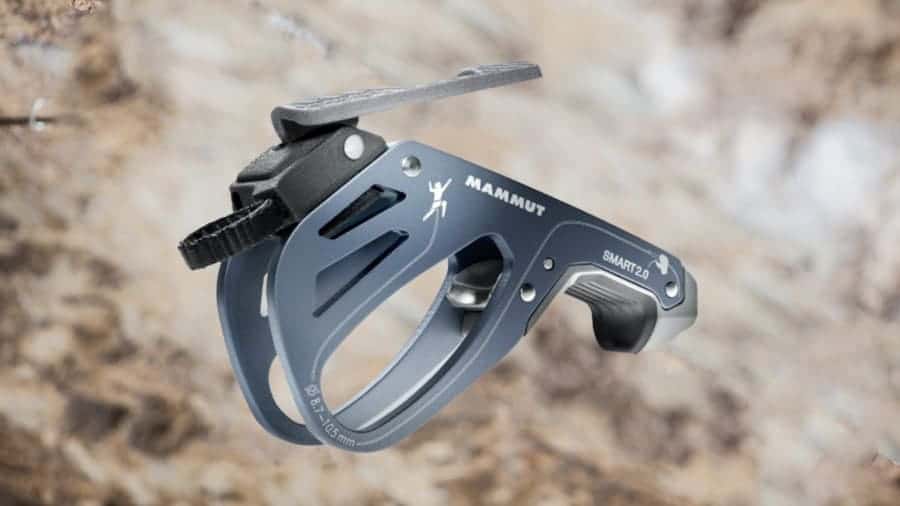
Mammut Smart 2.0 + Smarter Add-On
See the price from REI here.
See the price from Backcountry here.
Type: Semi-Assisted Braking
Overview: The Mammut Smart 2.0 is very similar to the Black Diamond Pilot in how it works, just with a slightly different design. The add-on, called the “Smarter” (See the price from Backcountry here), is the reason I put it on this list. It stops beginner belayers from holding the rope in the wrong position while belaying, which makes it really beginner friendly.
So if you are happy to spend an extra $20 for a semi-assisted belay device, this is a great option.
How It Works: The Smart 2.0 works almost exactly like the Black Diamond Pilot. When you are feeding rope through and there is slack, the device stays in a neutral, upright position.
If the rope tightens, the device snaps against the carabiner in a forward position, pinching the rope and stopping it from moving. To get it moving again, use the thumb that is holding the brake rope to push the lip of the device back into an upright position.
For lowering, you control the speed by pushing up for a faster descent and letting the device settle into a sideways, locked position for a slower one.
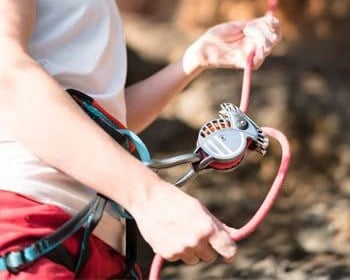
Wild Country Revo
See the price from Backcountry here.
Type: Auto-Locking
Overview: The Revo doesn’t ask you to change your standard belaying technique at all. It has the feel of a tube-style belay device, but with an emergency locking feature backing you up.
I haven’t actually used the Revo yet (it is at the top of my belay device wish list), but I have watched so many videos that I can’t wait to get my hands on one. Basically, it feels like you are just moving rope through a pulley device, and the mechanics inside auto-lock when they detect a fall from fast-moving rope.
When these first came out, I could have sworn they were almost $300, but I must have imagined that, because Backcountry has it for $145. This thing is incredible.
You take in slack like you would with any other belay device, but lowering feels more like an ATC than an auto-locking device, so it is simple to use.
Most climbers absolutely love it and feel like it is revolutionizing the auto-locking belay device world.
The biggest gripe some climbers have is that when you are projecting a route and falling a lot, clicking the device back out of the locked position takes a bit more effort than just moving your hand would with an ATC.
For beginners this isn’t a big deal, because you are unlikely to be falling on every move of every climb. But if you do a lot of projecting (and I’d recommend getting solid on basic technique before you start projecting), you will notice the extra effort is minimal, and the peace of mind is still worth it compared to a basic ATC.
How It Works: The device uses a spinning cam inside, and when that cam spins too quickly (a climber falls), it pinches the rope in place. To cut down on accidents caused by incorrectly loaded belay devices, Wild Country made the Revo bi-directional, so it works loaded either way. That also makes it easy for a left-handed climber to use without changing their technique. On top of that, the emergency locking function is panic-proof and can’t be overridden by incorrect handling.
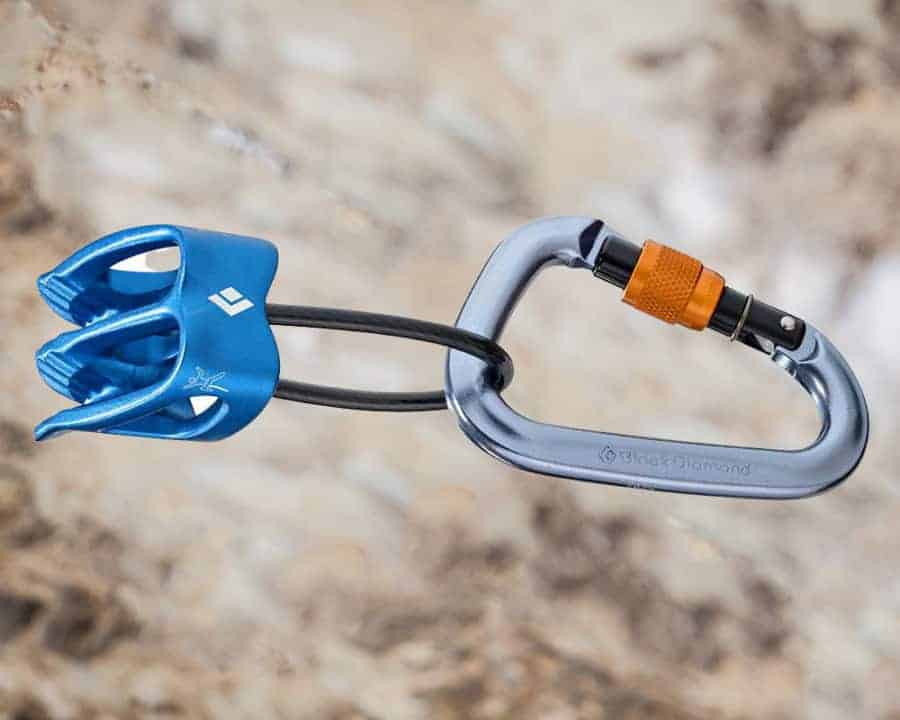
Black Diamond ATC-XP Belay Device
- See the pricing from Black Diamond here.
- See the price from REI here.
- See the price from Backcountry here.
Type: Tubular ATC
Overview: I get that some beginner climbers don’t want to sink much money into gear yet. If that is you, I’d still nudge you to spend an extra $15 to $20 on a semi-assisted braking device like the Black Diamond Pilot (see above).
But if you truly don’t want to spend a penny more than you have to, this is a great ATC to use.
It has teeth for extra grip when you are braking, and it is built with windows on the sides so it doesn’t weigh as much as a solid ATC (though weight matters less for beginners).
It is the top-rated belay device on Backcountry and plenty of people have reviewed it as perfect for any climber.
Climbers who have used it say it is very durable and can handle just about anything, including rappelling. It switches from stop to go quickly and with easy control.
One nice thing about how cheap this ATC is: when the teeth wear down after a lot of use, you can just replace it. If you are still pricing out the rest of your kit, here is what a beginner climbing setup costs.
Additional Notes: I don’t climb with basic ATCs anymore unless I’m with a group and we don’t have enough auto-locking and semi-assisted devices to go around. Some experienced climbers think it is really important to learn to belay on a tubular device first, so the risk to the climber forces you to belay properly. For most climbers though, that is only really necessary if you plan on using an ATC.
How To Pick The Best Belay Devices For Beginners
If you are choosing between the best belay devices for beginners, my short version is this: go with an auto-locking or semi-assisted braking device if you can. The Mad Rock Lifeguard and Black Diamond Pilot are the two I reach for most, the Grigri+ is worth the upgrade over the standard Grigri, and the Revo is a fun option if you like the feel of a tube-style device. The ATC-XP is there if budget is the only thing that matters. Whatever you pick, the device is only as safe as your belay habits, so keep practicing and always double-check your partner before anyone leaves the ground.
Want to get better at the moves too, not just the gear? I send out one short climbing drill every week that takes about 15 minutes, and it is free. You can grab the weekly drills here and level up between sessions.
Frequently asked questions
Do beginners really need an assisted-braking belay device?
No, you can learn to belay properly on any device, including a basic tubular ATC. But for most beginners I recommend a semi-assisted or auto-locking device because it gives you extra peace of mind: if you lose focus for a second, the device helps stop the rope so the climber isn’t dropped.
What is the difference between semi-assisted and auto-locking belay devices?
A semi-assisted braking device like the Black Diamond Pilot or Mammut Smart 2.0 feeds rope much like an ATC and tips forward to pinch the rope when a climber falls. An auto-locking device like the Mad Rock Lifeguard or Petzl Grigri+ uses a cam inside that pinches the rope automatically when it detects a fall, so it locks even if the belayer isn’t paying full attention.
Which belay device is best for a beginner on a budget?
If you want the cheapest safe option, the Mad Rock Lifeguard gives you auto-locking features for less than a Grigri. If you truly want to spend as little as possible, the Black Diamond ATC-XP is a solid basic tubular ATC, though I’d suggest spending the extra $15 to $20 on a semi-assisted device if you can.
Is a basic ATC still worth buying?
Yes, especially as a backup or for group days when there aren’t enough assisted devices to go around. A basic ATC like the ATC-XP is durable, cheap, and can handle rappelling. Just know that it does none of the braking for you, so your technique has to be dialed.