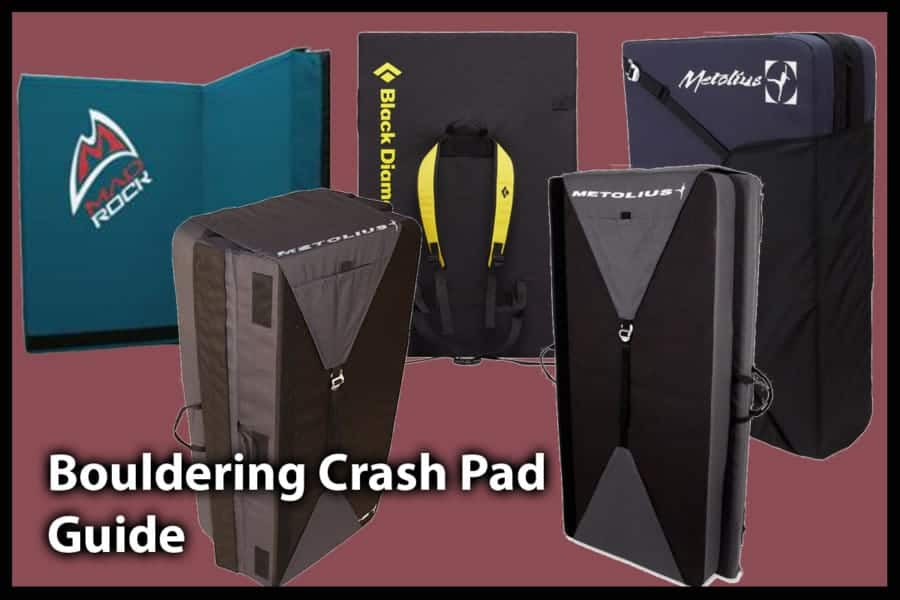
Not every climber has the same needs when it comes to bouldering crash pads. For example, some climbers need more cushion for higher routes and some climbers need something light they can take with them after work to the crag. Which bouldering crash pad is best for you?
The Mad Rock Mad Pad Crash Pad is, overall, the best crash pad for most climbers. Considerations such as how often you boulder and how high you climb should also be considered and thus may change what pad you should get.
What makes the Mad Rock Mad Crash Pad so amazing? Today we go through that as well as the top 5 Crash pad alternatives based on the needs and responses to questions that climbers should keeping in mind while deciding. I’ve also included questions and features that you should keep in mind to help you figure out which one you should get.
Table of Contents
- The Mad Rock Mad Pad
-
Top 5 Bouldering Pad Alternatives
- For the gym climber that sometimes boulders outdoors
- For the Beginner Boulderer
- For the Solo Boulderer
- For the Avid Boulderer Who Climbs With Friends
- For the Every-Day Boulderer
- Questions To Ask Before Purchasing Your First Bouldering Crash Pad
- Bouldering Pad Thickness
- Pad Materials
- Pad Size
- Pad Portability
- Pad Weight
- Pad Price
- Pockets and Extras
- Patches and Repairs
My Top Recommendation: Mad Rock Mad Pad Crash Pad
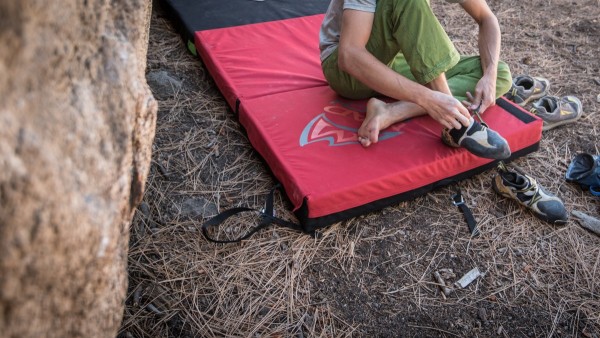
If you want a bouldering pad that will work for anyone and has a decent price tag (See current pricing from Outdoor Gear Exchange here) then this is the crash pad for you.
I actually purchased the Mad Rock Triple Mad Pad (see details on Backcountry here) which is essentially the same pad but longer. It’s a great pad, but it is super big folded up and therefore is hard to store and hard to transport.
The Mad Rock Mad Pad Crash Pad is 48 x 36in so it is big enough to cover your entire fall zone. You will need a friend to move the pad if that fall-zone moves while you boulder (aka a bouldering problem that goes sideways a lot) but it is 5 inches thick so you will feel comfortable making big moves knowing that 5 inches of foam is ready to catch you in case you fall, no matter how high you are.
Many climbers report that the pad’s strap system is awesome for hiking with the pad to the boulder problem and even making the pad into a seat that you can use for a snack break or just to hang out.
My Top 5 Picks
For the top 5 bouldering crash pads, I divided them into categories based on who will benefit from them the most. Depending on the type of boulderer you are, a different bouldering pad is going to be best for you.
- For the gym climber that sometimes boulders outdoors, the Black Diamond Circuit Crash Pad (check the price from Backcountry here) is perfect – it’s lightweight and firm so it’ll last a long time.
- For the Beginner Boulderer, the Metolius Session II Crash Pad (check the price from REI here) is inexpensive and has enough support that you can fall on it comfortably.
- For the Solo Boulderer, the Metolius Magnum Crash Pad (check the price from REI here) is big enough that you won’t need someone to move the pad, which makes it easier for solo bouldering.
- For the Avid Boulderer Who Climbs With Friends, the Mad Rock Mad Pad Crash Pad (check the price from Outdoor Gear Exchange here) is thick and makes falling down more comfortable. Most pads this thick are well over $200 and this one comes in well under that so it’s a great choice.
- For the Every-Day Boulderer, the Metolius Recon Crash Pad (check out the price from REI here) has the thickness, size and weight that makes it easy to love.
For the gym climber that sometimes climbs outdoors:
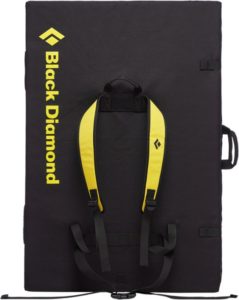
Black Diamond Circuit Crash Pad
Price: See the current price from BackCountry here.
Dimensions: 35 x 47.2in
Thickness: 3in
Weight: 8lb 5oz
It is perfect for the climber that doesn’t boulder outdoors very often and when they do, want to have the most portable pad on the market.
Pros:
- It’s one of the most inexpensive crash pads on the market (for the size and thickness)
- It has a firm foam so it gives you the most support you are going to get with only 3 inches
- It’s super light and easy to hike with
- It stores really small and fits in most car trunks
- It comes in two colors – pink or yellow and both look cute
Cons:
- It’s only 3 inches thick so high falls will hurt
- It doesn’t cover a lot of space so you will need someone to move it as you are bouldering
For the Beginner Boulderer
Metolius Session II Crash Pad
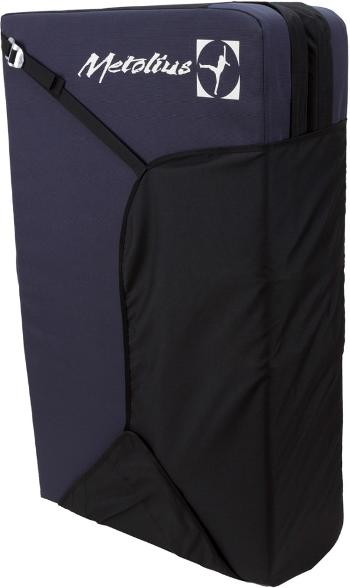
It’s perfect for the beginner climber that doesn’t want to invest a lot of money but wants to feel comfortable falling while bouldering outdoors.
Pros:
- You’re unlikely to find a better price for the size and thickness
- It’s relatively light and easy to carry
- You can fall from most bouldering distances and feel comfortable when you hit it
- The flap closure system makes the pad easier to load into your trunk and it reverses to cover up the shoulder straps while you’re bouldering
Cons:
- You will likely need more than one while you are bouldering or have someone who can move it for you while you are bouldering
For the Solo Boulderer
Metolius Magnum Crash Pad
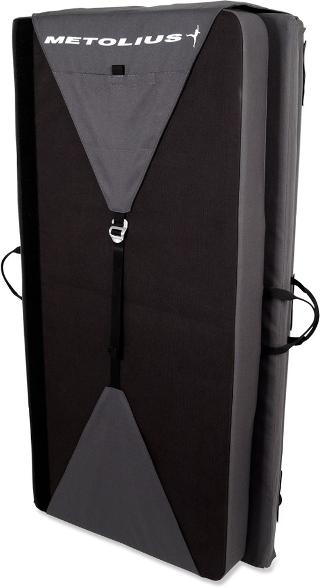
The Metolius Magnum Crash Pad is perfect for the climber that likes to boulder by themselves and doesn’t always have someone to move the pad for them.
Pros:
- It is giant so you don’t have to move it on many routes (you will still need to move it on some routes)
- It is thick enough that most falls feel comfortable
- It folds into thirds so it still fits in most car trunks
- It has stash pocket and a large interior pocket hold shoes, chalk bags and other essentials while you are hiking to the boulder problem
Cons:
- It is heavy. At 19 lbs any hike will feel like a long hike
- It’s expensive and you can get two of the Metolius Session II Crash Pads (see above) that add up to 72 x 96in and 18 lbs for cheaper price (but it’ll be harder to carry two pads than it is to carry one pad unless you strap them together)
For the Avid Boulderer Who Climbs With Friends (Top Pick)
Mad Rock Mad Pad Crash Pad
Price: See the current price from Outdoor Gear Exchange here.
Dimensions: 48 x 36in
Thickness: 5in
Weight: 14lbs
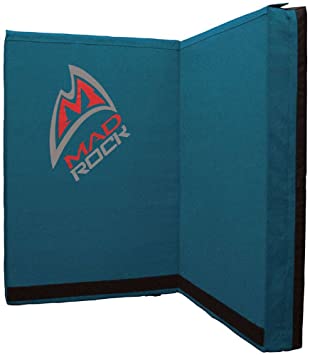
This is the perfect mat for a climber that boulders frequently and has a few friends who can move the mat throughout the route.
Pros:
- It is 5 inches thick so it will be one of the most comfortable pads to fall on that is available on the market under $200
- It fits in most car trunks and is easy to store
- It is has a waste and chest strap to make it easy to hike with
- It has straps that makes it into a decent chair while you’re taking a break
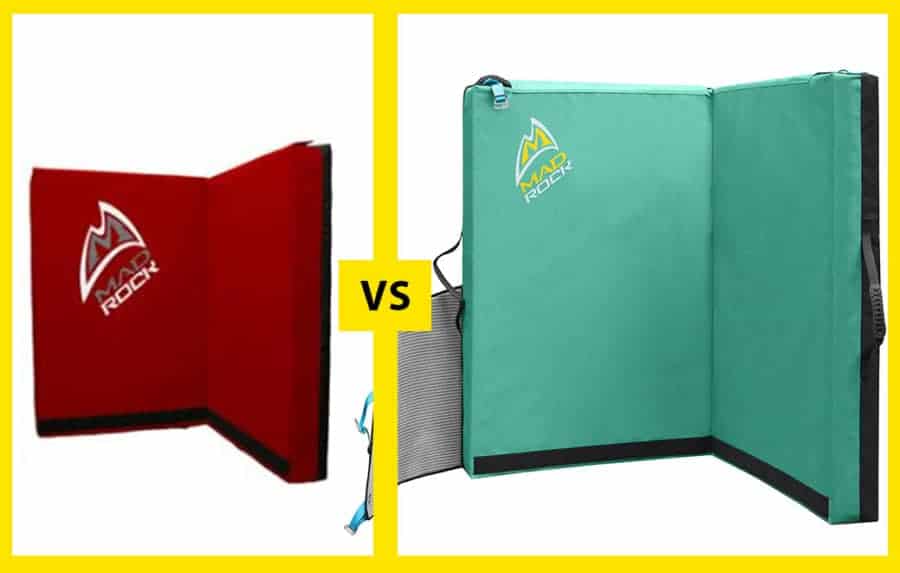
- It comes in multiple colors (including red, green and blue)
- They come with velcro so they can be put together with multiple pads for added protection
Cons:
- You will need someone to either move the mat or get multiple pads to cover the area of most bouldering routes
- It is heavy
- The backpack straps aren’t removable so they will get dirty while bouldering
For the Every-Day Boulderer
Metolius Recon Crash Pad
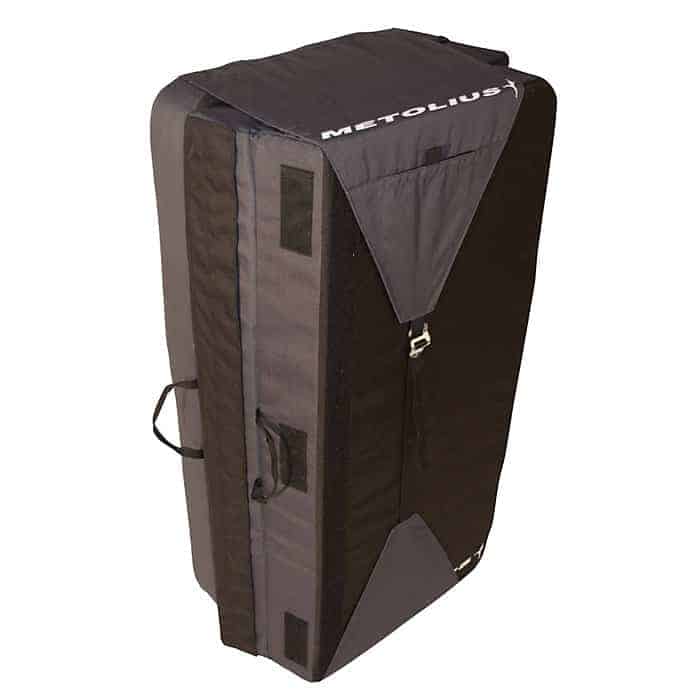
Price: See the current price from REI here.
Dimensions: 60 x 42in
Thickness: 4in
Weight: 14lbs. 5.1 oz
This is the perfect bouldering crash pad for most climbers as it has all of the features you need in a bouldering pad for the price.
Pros:
- Folds into thirds so it fits in most car trunks and stores easily
- The center layer of foam is soft so falling into it feels comfortable
- It has a small exterior stash pocket to keep your keys and phone in while hiking
- It also has a large interior pocket hold shoes, chalk bags and other essentials (which can be used for hiking your gear in, but it is also great for storing your gear when you aren’t climbing
- The closure flap also covers the shoulder straps to protect them from ware while you are bouldering
- It’s big enough that you don’t have to move it very often while bouldering
Cons:
- It has exposed velcro on the outside so dirt gets caught in it easily
- It is heavy so it takes a bit more work to hike to the crag with for some people
Questions To Ask Before Purchasing Your First Bouldering Crash Pad
Before you click add to cart or actually add it to your cart at REI or BackCountry, there are a few questions that will help you clarify if it is the right crash pad to get.
How Often Do You Boulder?
The first question you should be asking is how often are you going to boulder outdoors. If you only plan on bouldering a couple times per year, then you don’t need a pad that is extra thick and will last a hundred falls. Insead, you may be good with a thinner and/or cheaper pad.
On the other had, if you intend to boulder every day, then it is a good idea to invest in something that will last a couple of seasons.
Do You Have To Hike With The Pad?
If you are hiking to your bouldering location, you are going to need to carry the bouldering pad with you. Crash pads come in different sizes and weights so some are more difficult to to hike with.
In addition, different bouldering pads have different carrying systems. For example, a taco folding bouldering pad carrying system slings over one shoulder, which is harder to hike long distances with compared to a backpack carrying system common with hinge folding bouldering pads.
Not to mention that if the boulder you are climbing requires more square footage covered, you may need to carry multiple pads with you. If that is the case, you’ll want to find a bouldering pad that makes it easier to carry multiple pads at a time.
How High Is The Climb?
The higher you climb, the more padding and more solid foam you will need to maintain your safety while climbing.
If most of your bouldering problems are shallow or if you plan on landing on your feet the most, then you may not need as thick of a pad. This is convenient because the thinner the pad, generally the cheaper it is.
If you sometimes boulder long overhang routes or if you boulder high routes then you will want a pad that can support you in case a fall occurs.
Thickness Guidelines:
- For sitting starts and fall zones that are less than 3 feet tall, you can usually get away with 2-3 inches.
- For fall zones 3 feet and higher, you usually need to use a pad that is at least 4 inches thick.
- For fall zones over 6 feet, it is ideal to use a pad that is at least 5 inches thick.
Foam Stiffness Guidelines:
- 2-3 inch bouldering pads should be more stiff. Since there isn’t much padding, you want to ensure that the foam is stiff enough to prevent you from hitting the ground.
- 4-5 inch bouldering pads can be a little softer but the base should still be solid enough that even with a high fall, you won’t hit the ground
Where Will You Store The Pad?
So often I get caught up in the climbing aspect of gear but I sometimes fail where I’m going to store the gear.
For example, I live in an apartment that has little storage availability. We do have a 1-car garage so any climbing gear that can be outdoors (shoes need to be stored indoors) is stored in the garage. I currently store our bouldering pad on the side of the car and there is space for a slightly bigger one but it would need to be able to stand on it’s side. So for me, I have to consider that space before purchasing a new bouldering pad.
How Big Is Your Fall Zone?
Some routes have a small fall zone and 1 mat that is 3×4 can work. However, most routes have larger fall zones or even a swing out area that you need a ton of coverage. For those bigger routes, you may benefit from getting a bigger mat or a couple of smaller mats. Especially if you boulder by yourself and there isn’t anyone with you that can move the pad as needed.
Bouldering Pad Thickness
When it comes to your safety, the bouldering pad thickness makes a big difference. Most pads are around 4 inches thick and any pad over 4 inches thick are probably safe for use.
The Mad Rock Mad Pad, my top recommendation, is 5 inches thick.
Pad Thickness Overview
Most pads are between 3” and 4” thick and this thickness is usually adequate. However, many boulderers prefer pads to be at least 4” thick.
The main reason for this is likely because the 1” of extra padding makes a fall much more comfortable. Which, if you are more comfortable falling, you will also be more likely to push yourself and make big moves compared to if you weren’t as comfortable when you fall.
Thin Crash Pads
Thin crash pads are between 1-2” thick and they aren’t safe as your only crash pad for bouldering.
They aren’t really meant to cover your fall zone but they are good to sit on when you are doing a sit start or for covering pointy rocks on the edges of the fall zone, just in case.
Fat/Thick Crash Pads
Fat pads, also known as thick pads are usually 5” or thicker. They usually feel softer to fall into and they support higher falls. However, they are usually significantly more expensive and heavier so they aren’t the most common in the bouldering community.
Pros of Bouldering Pads Under 4 Inches
If you want to save some money, you may be wondering what the pros and cons of using different thicknesses are.
- They are usually cheaper, which is probably the biggest pro of a thinner mat
- They usually are built more firm to make up for the thickness so you can still fall a decent height with the needed support from the pad
- They are lighter (like way lighter) so hiking with them is easier
- They store much smaller so you don’t need as much storage space
Cons of Bouldering Pads Under 4 Inches
- They are thinner so they don’t “pad” you as well if you fall on them
Pros of Bouldering Pads Over 4 Inches
- They support bigger falls
- They are usually softer so they feel more comfortable to fall on
- You can often sleep on them comfortably (not sure why you’d need this though, I know my crash pad is dusty and chalky and I really don’t want to sleep on it…)
Cons of Bouldering Pads Over 4 Inches
- They are usually more expensive
- They are usually heavier and more difficult to carry to the boulder problem
- They usually take up more space and are hard to store
Materials
Most bouldering pads are made with similar material, however when you look a bit closer and try out different pads, you’ll likely find that they feel different and the small differences make a big difference for how long you can use it.
The Mad Rock Mad Pad, my top recommendation is made with a 1” layer of hard foam on top, 3” layer of soft foam and then 1” layer of hard foam so that it is comfortable to fall on, no matter how high you fall.
Foam Type
- Hard/Closed: This foam type is less comfortable to fall on but because they are more firm, you are less likely to hit anything underneath it. For example, if you have a soft foam that is only 2 inches thick, you will likely feel the rocks under the pad. If you have a hard foam that is only 2 inches thick, you will likely not feel the rocks under the pad.
- Soft/Open: Soft foam is usually only used as a top layer or middle and thus it is usually only on thicker pads. The soft foam is usually really comfortable to fall into and boulderers sometimes even use them to sleep on when they do an overnight bouldering trip. However, the soft foam doesn’t last as long and will break down faster than the hard foam.
- Recycled: This foam type is more for environmentally concerned boulderers (which covers a vast amount of the bouldering community). It may sound like something that should be cheaper but in most cases, the creation is more difficult and people are more likely to pay extra for an environmentally aware product so they are priced to accommodate that.
Cover Material
The cover material is the biggest defence against weather and damage. Meaning that the cover material is super important.
A lot of bouldering pad advertisements tout how they have scratch resistant and water resistant cover material. The fact is that most name brand bouldering pads are made with scratch and water resistant cover materials.
With that in mind, if you’re nervous about the material taring on a rock or something like that, consider getting a $5 tarp that you can put under the pad while you are climbing.
Bouldering Pad Size
The pad size is how much coverage the pad gives in the fall zone. Ideally, you can cover the entire fall zone with one pad. However, for most people, falling may include swinging out or uncontrolled falls and thus one pad won’t be enough.
The Mad Rock Mad Pad, my top recommendation, is 48 x 36in (4’x3’).
3’x4’ Bouldering Pads
The most common bouldering pad size is 3×4 feet. It works great for people that are climbing with a friend who can move the pad while they climb. In addition, they are usually cheaper and lighter so they are common for beginner climbers or gym climbers that are moving to outdoor bouldering.
4’x5’ Bouldering Pads
Because this is a full foot bigger than the average boulder pad size (avg size is 3×4’), it is common for avid outdoor boulderers and climbers who frequently boulder by themselves.
The additional coverage makes it so that you don’t have to move the pad as much and even if you swing out when falling, you are more likely to land on it.
They are usually significantly more expensive and they weigh more so if you plan on hiking with it, keep that in mind.
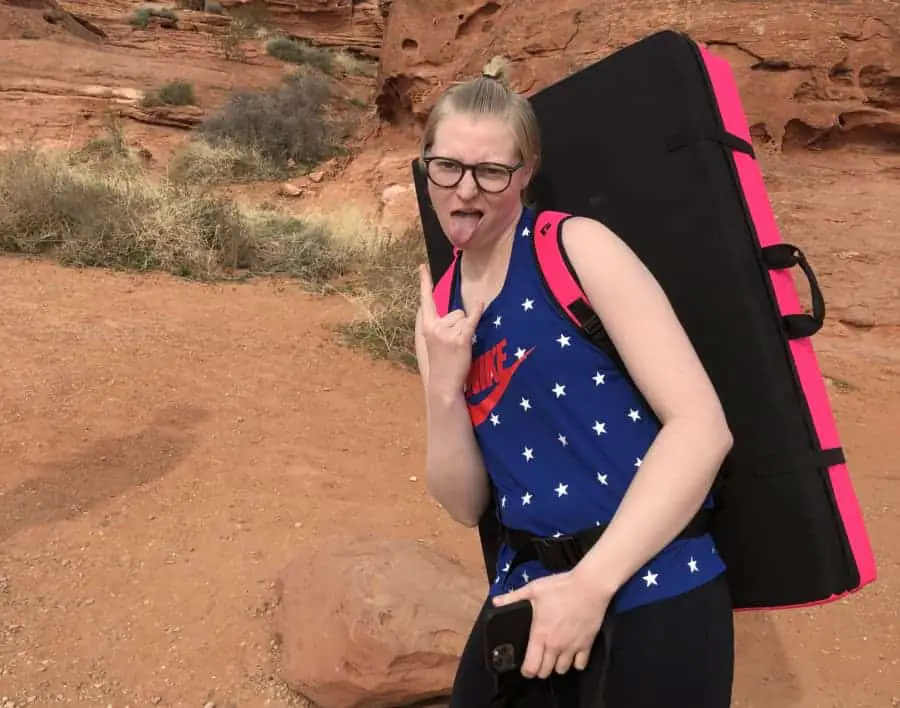
Bouldering Pad Portability
One of the most common decision makers for bouldering pads is the portability of the pad since it is common for people to need to pack it in their trunk and then hike it to the crag.
When it comes to storing it in your trunk and hiking it to the crag, the way it folds makes a huge difference.
The two most common folding types are the hinge and taco folding. The Hinge is when the pad folds in half seamlessly and stores flat. The Taco is when you fold the pad in the middle but there isn’t a seam and it makes a taco shape.
The Mad Rock Mad Pad, my top recommendation, uses a Hinge folding system and can fit in most car trunks.
Hinge Pros
- They store flat which makes them easy to store
- They usually have backpack shoulder straps so they are easy to hike with
Hinge Cons
- The hinge requires a gap in the pad which is a weak spot that rocks can stab you through
Taco Pros
- There aren’t any weak spots or seams
- They are usually softer (this can be a con too, depending on how far you are falling from)
Taco Cons
- They don’t lay flat so storing them can be a pain
- They don’t usually have a backpack strap system and usually has a one-shoulder strap so they aren’t ideal for hiking.
Bouldering Pad Weight
The bouldering pad weight is often used as a reason whether or not you should get a bouldering pad, however, it would be more accurate to use it as proof of how much support you would get when you fall on it.
With that being said however, different foam weight density differently so it isn’t always completely clear how much support you’d get.
For example, the Black Diamond Circuit is lightweight compared to most bouldering pads but the support you get for 3 inches is incredible. So the next thing you have to look at is how thick the pad is and how wide the pad is.
On the other hand, you can get Evolv Iceman Crash Pad that is 5 oz lighter and 2” bigger, however, it is also 3” x 5.2” smaller
The Mad Rock Mad Pad, my top recommendation, is 14lbs, which is on the higher end of the spectrum but it also has a 5” thickness and is 48” x 36” and is still easily hiked to the crag.
Popular Crash Pads By Weight
| Evolv Iceman Crash Pad | 32 x 42in | 5in | 8lbs |
| Black Diamond Circuit Crash Pad | 35 x 47.2in | 3in | 8lb 5oz |
| Metolius Session II Crash Pad | 36 x 48in | 4in | 9lbs |
| Black Diamond Drop Zone Crash Pad | 41 x 48in | 3.5in | 9lb 8oz |
| Mad Rock Mad Pad Crash Pad | 48 x 36in | 5in | 14lbs |
| Metolius Recon Crash Pad | 60 x 42in | 4in | 14lbs. 5.1 oz |
| Metolius Magnum Crash Pad | 48 x 72in | 4in | 19 lbs |
Bouldering Pad Price
One of the biggest things I look at before purchasing any climbing gear is the price. Like many climbers, climbing is my hobby so spending my rent money on a bouldering pad isn’t realistic.
With that being said, when it comes to crash pads, you get what you pay for.
In many products, even in the climbing industry, you commonly pay for the brand that is stitched into it.
However, when I reviewed the price of the bouldering pads and the size and thickness, it seemed pretty even across the board.
The Mad Rock Mad Pad, my top recommendation, is $179, which is a great price (like amazing) for the size and thickness.
Bouldering Pad by Size and Price
| Evolv Iceman Crash Pad | 32 x 42in | 5in | 8lbs | $150 |
| Black Diamond Circuit Crash Pad | 35 x 47.2in | 3in | 8lb 5oz | $150 |
| Metolius Session II Crash Pad | 36 x 48in | 4in | 9lbs | $159 |
| Mad Rock Mad Pad Crash Pad | 48 x 36in | 5in | 14lbs | $179 |
| Black Diamond Drop Zone Crash Pad | 41 x 48in | 3.5in | 9lb 8oz | $250 |
| Metolius Recon Crash Pad | 60 x 42in | 4in | 14lbs. 5.1 oz | $280 |
| Metolius Magnum Crash Pad | 48 x 72in | 4in | 19 lbs | $340 |
Pockets and Extras
Some bouldering pads have pockets that you can slip towels or mats into and some have straps or loops for gear. You pay more for the extras but some are nice for when you have to hike a ways before getting to your bouldering spot.
The Mad Rock Mad Pad, my top recommendation, has a cool feature that helps you turn the pad into a comfortable seat (perfect for snack breaks), it also has velcro strips for easily attaching multiple pads together, padded straps with a waist and chest strap to easily and comfortably hike to the boulder with, and it has a cool velcro strap system that helps you carry multiple crash pads at a time.
Common Extras:
- Gear loops – use a carabiner to attach your shoes to your bouldering pad so you don’t have to carry them separate from your pad while hiking.
- Pockets – Keep small things like your keys and phone safe while you are hiking (though you should probably remove that stuff before use. Landing on keys wouldn’t feel good at all).
- Welcome mats – it’s ideal to clean your shoes off on the mat, not your pad. A welcome mat is a mat that comes with some crash pads (often sold separate).
- Velcro strips – these are often used as closure systems but oftentimes bouldering pads will have velcro strips to help hold multiple pads together so you don’t have to worry about gaps between the pads.
- Multi-pad straps – some bouldering pads are made with straps that allow you to easily attach and carry multiple bouldering pads at a time, this can be incredibly useful if you are bouldering by yourself and don’t have anyone to carry the second pad.
Patches and Repairs
It’s inevitable that your bouldering pad is going to get a tare or hole in it after a few seasons. You could replace the bouldering mat or you could just patch it up.
Most nylon is repairable with a gear patch similar to the ones you can use on tents and sleeping pads. However, some bouldering pads are easier to repair than others, depdending on where the tare is and how big it is.
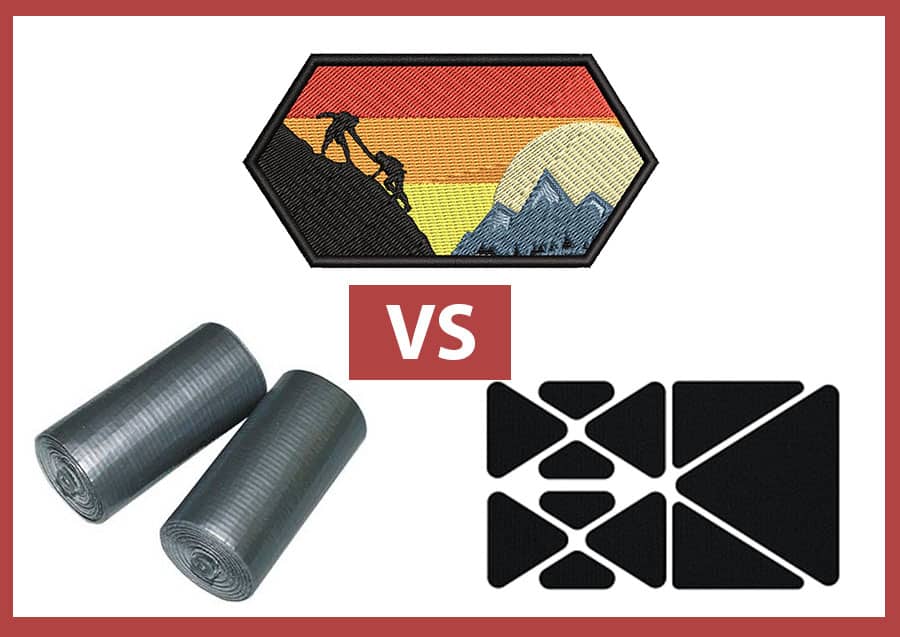
Common Repair Material
- Duct tape – it is probably the cheapest and easiest to use. Some climbers think it looks really cool and a sign of crazy use and sends. Others, however, prefer something a little nicer. (Here is a portable roll of duct tape from REI that fits perfectly in your gear bag and can be with you wherever and whenever).
- Gear Repair Patches -You can get basic repair patches that are made in circle or square forms like these ones from Patagonia or these ones from REI.
- Classic Patches – If you know how to sew, then a classic patch is a super custom and fun way to repair the holes or tares (assuming you can find a patch big enough for it.
More About Bouldering:
- What Is The Minimal Gear Needed For Bouldering?
- Can You Boulder Alone? The 8 Benefits Of Climbing Alone
- The Complete Guide For Bouldering Grades – What You Should Know
- Should You Wear A Helmet For Bouldering?
- Can You Boulder In The Rain Or When The Rock Is Wet?
- First Time At The Bouldering Gym – What You Should Know
- Pros And Cons Of Indoor Bouldering
- Indoor Bouldering: Do’s And Don’ts For Beginners
- Bouldering For Beginners: What You Need To Know
- A Guide For Climbers: Bouldering Drills 101
- Is Climbing and Bouldering Good For Cardio?
More Buyer’s Guides:
- The Top 5 Crash Pads For Bouldering: How To Decide Which Is Best
- Diy Hangboard With Jugs And Edges For Less Than $15
- 6 Of The Best Belay Devices For Beginner Climbers
- The Best 11 Climbing Shoes Under $100
- Climbing Chalk: Chunky Vs. Fine
- The Best Chalk For Climbing And Bouldering
- Rock Climbing Starter Kits For Beginners Compared
- Liquid Chalk Vs. Dry Chalk For Bouldering (Hint: Dry Chalk Is Better)
- Top 5 Gear You Need In Your Climbing Pack For The Best Experience
- What To Wear While Bouldering
- Should You Upgrade To An Assisted-Braking Belay Device?
- Everything You Need To Know About Climbing Chalk
- 37 Things Serious Climbers Bring With Them To The Mountains
- Clothing For Climbing In The Gym – What Should You Wear?
- Can You Climb Without Chalk?
- How Tight Climbing Shoes Should Fit For The Best Performance
- Harnesses For Rappeling
- My Favorite Harness For Climbing
- What You Should Wear While Climbing
- What Affects How Climbing Shoes Fit?
- How To Clean Your Grigri
- How To Care For Your Climbing Rope

