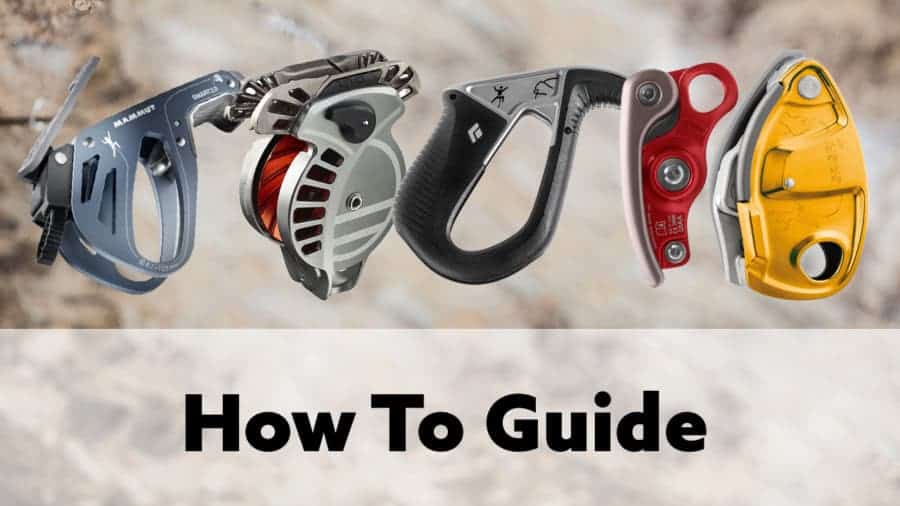
How you use the assisted-locking device depends on what kind of assisted-locking device it is.
In this article, we will demonstrate how you can identify the type of belay device it is and how to use it.
What Is an Assisted Locking Belay Device
An assisted locking belay device is a tool that climbers use to keep climbers safe and control the speed of the rope going through the device. Compared to an ATC, assisted locking belay devices also prevent accidental falls if the belayer isn’t paying attention when a climber falls by locking the rope into place and preventing it from moving through the device until the belayer intentionally lowers the climber.
When it comes to assisted-locking belay devices there are two types, semi-assisted and auto-locking belay devices. Of semi-assisted belay devices, the functionality of the devices across different brands is the same.
Of auto-locking devices, there are two main types with different functionalities for how they work. The most common one is called a one-direction camming auto-locking device and the second is called a bi-directional camming auto-locking device.
3 Types of Assisted Locking Belay Devices
There are three main types of assisted locking belay devices on the market today. The one-direction camming auto-locking belay device (the oldest of the locking devices), the semi-assisted locking devices and the more recent to the market, bi-directional camming auto-locking belay device.
One-Direction Cam Auto-Locking Belay Device
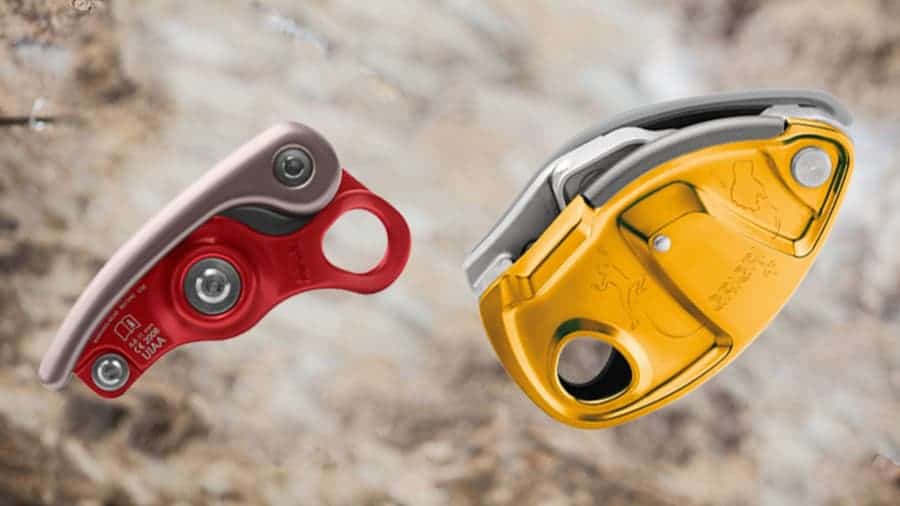
The difference between the auto-locking and semi-assisted belay devices is that the auto-locking device pinches the rope with a caming mechanism within the device and works independently from the carabiner.
There are two types of auto-locking belay devices. The one-direction cam is the oldest locking belay device mechanism brought to market. It was introduced with the first Grigri in 1991 and has since then been used by many brands.
Popular one-direction cam auto-locking devices:
- Petzl Grigri
- Birdie
- Tango Vergo
- Camp Matik
- Madrock Lifeguard
They are called the one-direction cam because there is one cam in the device (a metal knob) that moves in one direction to lock the rope in place.
The one-direction cam auto-locking belay devices use the weight of the rope attached to the climber to control the orientation of the cam. When the climber falls, the rope jars the caming device forward, which pinches the rope and prevents the rope from moving through the device.
Bi-Direction Cam Auto Locking Belay Devices
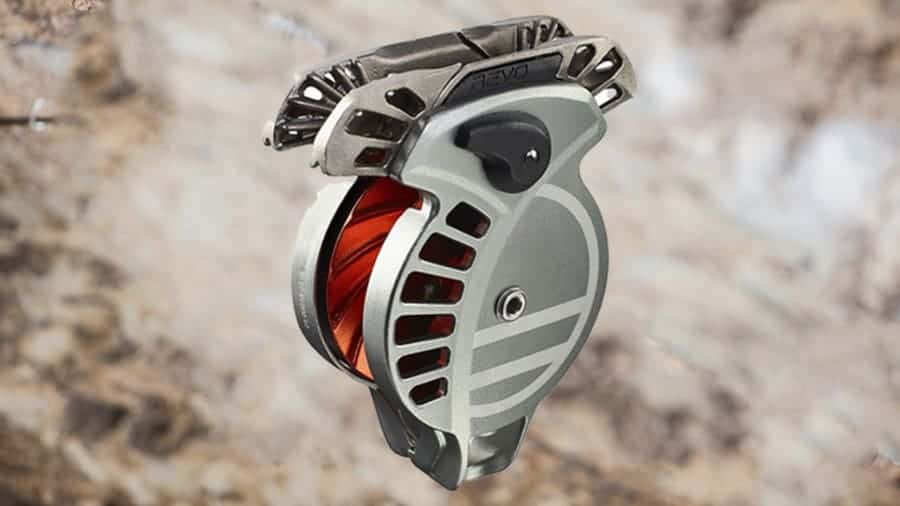
There is only one bi-direction cam auto-locking belay device on the market right now and it is the Wild Country Revo.
What sets the Revo apart from the one-direction cam auto-locking device is that the camming mechanism works in two directions. This allows the belayer to load the rope into the belay device in either direction as well as belay left or right-handed.
For the Revo, specifically, the belay devices central caming mechanism is only able to spin up to 4 meters per second. When the mechanism exceeds that (like when a climber falls), the device will engage the camming mechanism and prevent the rope from moving through the device, thus locking the rope in place.
The rope can move once the device is reengaged by the belayer and the belayer can control the climbers decent.
Semi-Assisted Locking Belay Devices
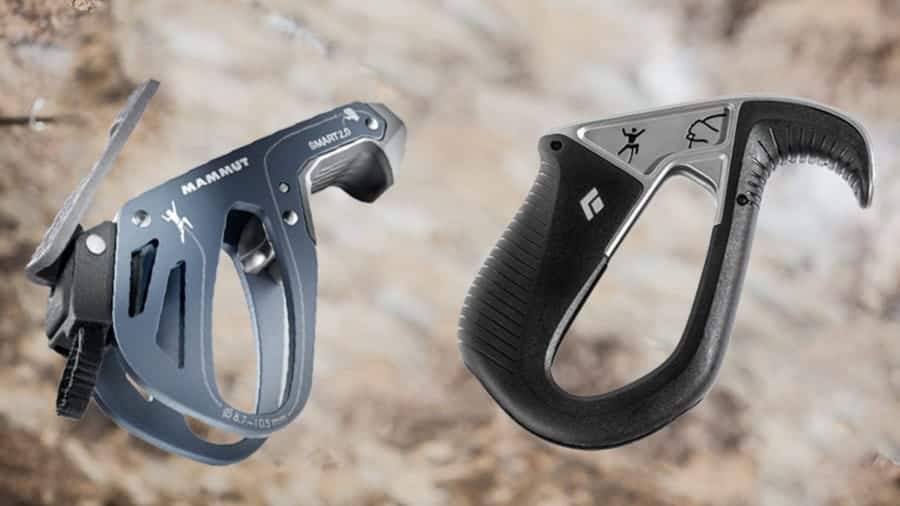
These belay devices will lock the rope if the climber falls so that the rope doesn’t go through the device and thus prevents a ground fall. On the market today, there are three popular devices that are considered a semi-assisted locking belay devices.
Other popular semi-assisted ;locking devices:
- Mammut Smart and Smart 2.0
- Eldrid Jul and Jul 2
- Black Diamond Pilot
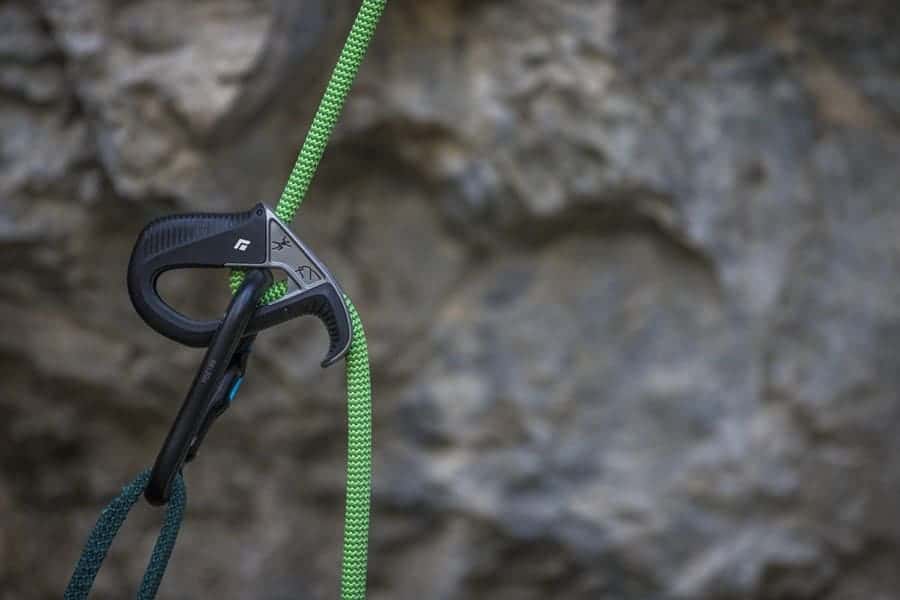
All of these devices work the same way. The shape of the belay device has an extra lip or extrusion that, depending on the direction of the belay device, can block the rope from going through the device.
If the belay device is in an upward/neutral position, then the rope can run through the device thoroughly.
If the belay device position moves to a forward position where the top of the device is facing forward (caused by the climber falling and thus forcing the device forward) then the rope gets locked between the carabiner and the belay device.
How To Use One-Direction Cam Auto-Locking Belay Device
The general use of a one-direction cam auto-locking device is the same across all brands, however, it is always a good idea to read the device manual to ensure safety.
How to load rope into the device
- Slide open the device
- Place the rope around the cam mechanism with the side of the rope attached to the climber closest to the carabiner loop and the feeding/break hand away from the carabiner loop. All of the main-stream brands have images that provide additional direction. For example, the devices usually have a climber icon, which indicates that the 7side of the rope should be the part of the rope attached to the climber and an icon of a hand with rope in it, indicating what side the break hand/rope should be coming from.
- Slide the device close
- Attach the device using a carabiner through the carabiner loop on the belay device to the belay loop on your harness.
Failure to load the rope correctly will make the belay device not functional and thus not safe
How to feed out rope through the device
For feeding rope through the device, there are two main ways to do it.
The first way is proficeint while the climber is making their way up the wall and to do that, you just pull the rope up with your left hand while your right hand brings the rope closer to the device (just like an ATC). However, some auto-locking belay devices such as the Grigri has been known to lock up while giving out slack quickly.
If you need to quickly give out slack and the device is locking up, use the second way.
Remember: Keep a hand on the brake rope at all times!
- While keeping your right-hand pinky, ring finger and middle finger on the brake rope, hold the device up with your pointer finger on the lip of the device.
- Place your right-hand thumb on the backside of the lever and press down.
- While your thumb is pressing down, quickly pull the rope through the device with your left hand until you have the needed amount.
- Do NOT take your hand off of the brake rope!
How to take in the rope through the device
This is a relatively simple process and very similar to the ATC.
- With your left hand, pull the rope down and toward the device
- Pull the rope through the device with your right hand
- Place your left hand on the outside of your right hand onto the rope
- Slide your right hand up toward the belay device
- Repeat steps 1-4 as needed.
How to lower a climber
All of the models for the one-direction cam auto-locking belay device has a similar build for lowering climbers.
- Do not remove your hand from the brake rope
- Pull back the lever on the side of the belay device until the rope starts sliding through the device.
- To speed up rope moving through the device, move the lever back slightly more
- To slow down the rope moving through the device, move the lever slightly forward
- Adjust to wanted speed
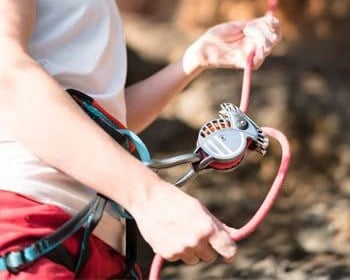
How To Use a Bi-Direction Auto-Locking Belay Device
Since there is only one bi-direction auto-locking belay device on the market today, this will be specific directions for using the Wild Country Revo belay device.
How to load rope into the Revo
- Open the Revo using the black locking lever on the side plate
- Feed/wrap the rope around the orange wheel (in any direction, clockwise or counterclockwise) until both ends of the rope come out the top of the device
- Close the Revo and listen for an audible click to ensure it is securely closed.
- Orient the device so the brake side of the rope is away from the belayer
- Attach a locking carabiner through the bottom of the Revo and through the belay loop on your harness
How to feed out rope through the device
The process of feeding out rope using this device is the same as with an ATC.
- Remember: Keep your brake hand on the brake side of the rope
- Using the top hand (not your brake hand) pull rope through the device up and away from you.
How to take in rope/slack through the device
This process is the same as how you would use an ATC
- With your left hand, pull the rope down and toward the device
- Pull the rope through the device with your right hand
- Place your left hand on the outside of your right hand onto the rope
- Slide your right hand up toward the belay device
- Repeat steps 1-4 as needed.
How to catch a falling climber
Though the Revo will catch a climber if the belayer is negligent, unlike the one-direction cam auto-locking belay device, the functionality of catching a climber is within the control of the belayer.
The Revo is meant to allow the belayer to still treat the device like an ATC so this is the same functionality of an ATC.
- Pull the brake side of the rope down and across your body/against the Revo
- The fall will be caught just like an ATC
How to lower a climber
Lowering a climber with the Revo is significantly different compared to the one-direction cam auto-locking belay devices. There are two scenarios that affect how you lower the climber:
Unlocking Tuber Up:
- Hold the brake side of the rope with both hands
- Pull the rope down directly against the tuber, which will unlock the rope
- Slowly let the rope in your brake hands slide slowly through the device
Unlocking Tuber Down:
- Hold the brake side of the rope with one hand and the climber side of the rope with the other hand
- Pull the brak side of the rope away from your body and through the Revo until the rope unlocks.
- Slowly let rope in your brake hand slide through the device
How To Use a Semi-Assisted Locking Belay Device
Semi-Assisted locking belay devices have the same functionality but the Eldrid Jul and Jul 2 have a different way of unlocking the device so these directions will reflect that.
How to load rope into the device
Loading rope into a semi-assisted locking belay device is the same as an ATC.
- Take a bite of the rope (a folded piece of the rope)
- Orient the rope so that the brake side of the rope is pointing away from the belayer and the climber side of the rope is closest to the belayer
- Orient the belay device so the side of the device that has a lip or protrusion is pointing away from the belayer
- Push the folded end of the rope into the device from the top
- Lock your carabiner around the device, the rope and the belay loop on your harness
How to feed out rope through the device
This process is the same for all of the devices on the market and is also the same as an ATC.
- Remember: Keep your brake hand on the brake side of the rope
- With your top hand, pull the rope through the device while the brake hand pushes rope toward the belay device from the brake side of the rope
How to take in rope/slack through the device
This process is the same for all devices on the market and is also the same as an ATC.
- Remember: Keep your brake hand on the brake side of the rope
- With your top-hand, pull the rope down and toward the device
- Pull the rope through the device with your brake hand
- Place your top-hand on the outside of your right hand onto the brake side of the rope
- Slide your brake hand up toward the belay device
- Repeat steps 1-5 as needed.
How to lower a climber
This is the part of the process that the Eldrid Jul and Jul 2 differ from the other popular semi-assisted braking devices.
For the Eldrid devices, you will attach a carabiner to the back of the belay device and use the carabiner as a handle. For the Mammut and Black Diamond devices, you will use the device itself as a handle.
- Tilt the belay device backwards to change the orientation of the belay device to be more upright
- If needed, also raise the belay device up and away from the carabiner
- To increase the speed of the rope running through the device, raise the belay device higher and more upright
- To decrease the speed of the rope, move the device lower/toward the carabiner
► Belaying 101: You Shouldn’t Climb Without Reading This
More Buyer’s Guides:
- The Top 5 Crash Pads For Bouldering: How To Decide Which Is Best
- Diy Hangboard With Jugs And Edges For Less Than $15
- 6 Of The Best Belay Devices For Beginner Climbers
- The Best 11 Climbing Shoes Under $100
- Climbing Chalk: Chunky Vs. Fine
- The Best Chalk For Climbing And Bouldering
- Rock Climbing Starter Kits For Beginners Compared
- Liquid Chalk Vs. Dry Chalk For Bouldering (Hint: Dry Chalk Is Better)
- Top 5 Gear You Need In Your Climbing Pack For The Best Experience
- What To Wear While Bouldering
- Should You Upgrade To An Assisted-Braking Belay Device?
- Everything You Need To Know About Climbing Chalk
- 37 Things Serious Climbers Bring With Them To The Mountains
- Clothing For Climbing In The Gym – What Should You Wear?
- Can You Climb Without Chalk?
- How Tight Climbing Shoes Should Fit For The Best Performance
- Harnesses For Rappeling
- My Favorite Harness For Climbing
- What You Should Wear While Climbing
- What Affects How Climbing Shoes Fit?
- How To Clean Your Grigri
- How To Care For Your Climbing Rope
More About Climbing:
- My Favorite Harness For Climbing
- Belaying 101: You Shouldn’t Climb Without Reading This
- How To Belay With A Grigi For Top Rope Climbing | With Photos And Video
- How Climbing Routes Are Set: Interview With Team Usa Chief Route Setter Mike Bockino
- How To Put On A Harness
- What You Need To Know Before Starting Indoor Rock Climbing
- How To Belay: Using Assisted Locking Belay Devices
- How Should Your Climbing Harness Fit?
- How Are Climbing Routes Graded?
- What You Should Wear While Climbing
- What Affects How Climbing Shoes Fit?
- 7 Common Mistakes In Rock Climbing For Beginners
- Why Is Climbing Such A Mental Sport?

